Getting Started
Note:
Safety goggles must be worn at all times when
handling this gun.
1) Tank Installation
First make sure that the gun is on SAFE mode. Next you
need to cock the gun by sliding the bolt handle all the way
back until it locks into place.
To install the tank, insert the tank valve end into the tank
adapter at the back end of the pistol grip. Twist the tank
clockwise into the gun, until it stops. Adjust the butt plate
if necessary. Your gun is ready to fire once you switch to
firing mode from safe mode.
If the tank is full and you do not hear the CO2 engage, the
pin valve could be too short or the pin valve seal is
damaged.
2) Ammo Box
Make sure that the neck is clean and to keep the paintballs
from breaking and to feed the gun smoothly. You do not
want any sharp edges or debris in your hopper.
Install the neck into the feed elbow of your gun and tighten
the hopper down with the large allen wrench. Now you
are ready to load your hopper with paintballs.
Note:
Do not overtighten or the elbow will break.
8
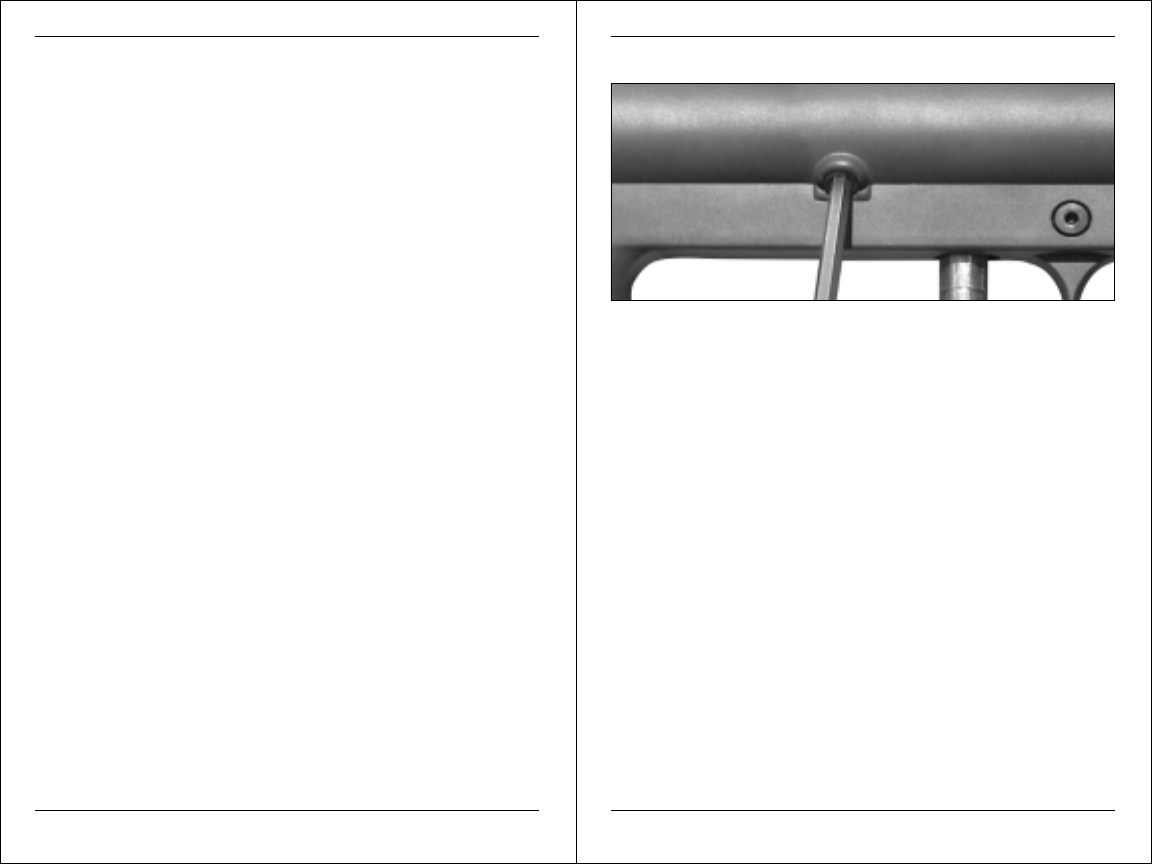
3) Velocity Adjustment
To adjust the velocity use the 5/32” allen wrench included
with your gun. The velocity adjustment screw is located
on left side receiver at a 45° angle. To adjust the velocity
down, turn the screw inward or clockwise. To turn the
velocity up, turn the screw out or counterclockwise (
Do
not remove velocity screw
).
Note: You must turn the velocity screw all the way in
before doing any disassembly.
4) Rear Sight Adjustment
If your paintball is hitting low, slide the rear sight back
towards rear of gun. Do the opposite if paintball is hitting
high.
9


