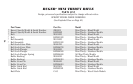
Figure 9
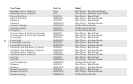
Figure 10
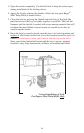
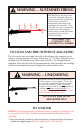
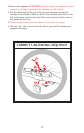
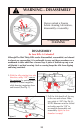
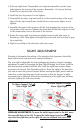
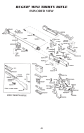
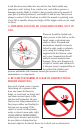
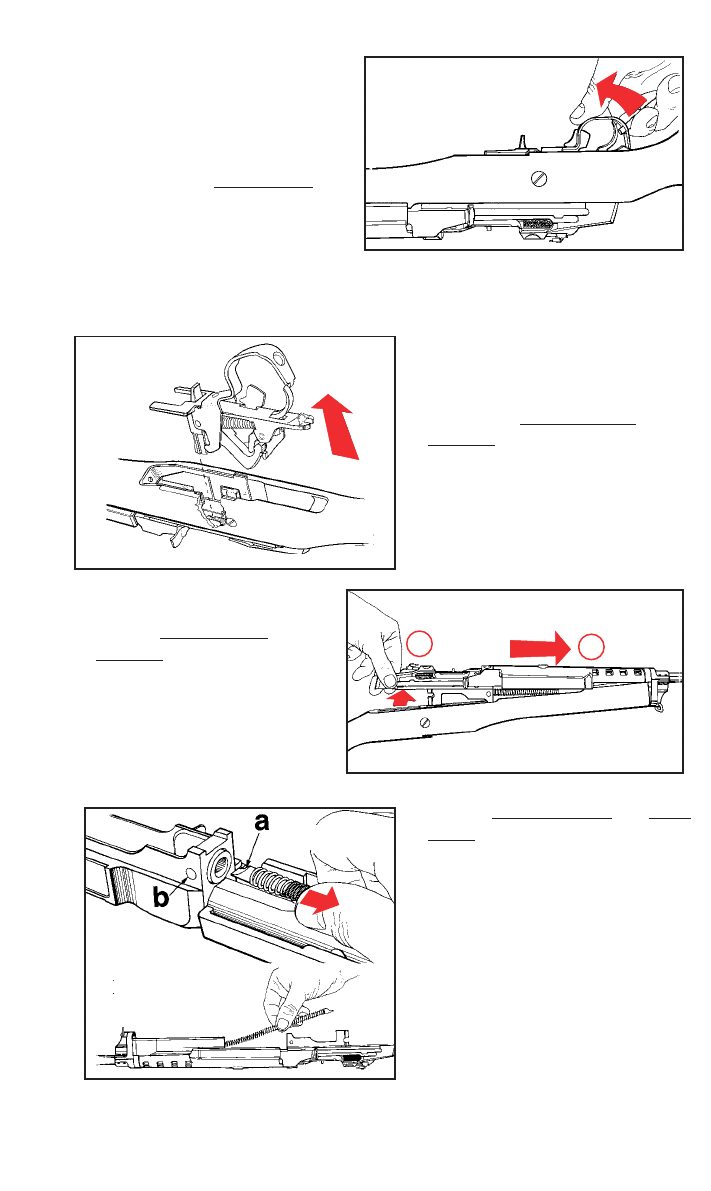
3. Use a 1/4” diameter steel rod,
punch, screwdriver shank, or
other suitable instrument
inserted into the hole in the rear
of the trigger guard as a lever to
spring open the trigger guar
d
from its latched position
(See Fig. 9).
WARNING: Do not use a cartridge to unlatch the trigger guard because of the
danger of loosening the bullet in the cartridge case (See Warnings in “Ammunition”
section, p. 11).
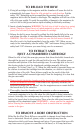
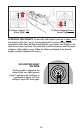
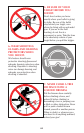
4. Fold rear sight down. Invert rifle
and remove trigger housing
assembly by carefully pulling it
upward (See Fig. 10). Be careful
not to damage stock when
removing or replacing the trigger
housing assembly.
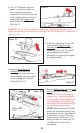
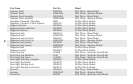
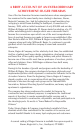
Figure 12a
Figure 12b
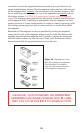
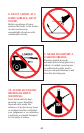
5. Remove barrel/receiver
assembly from stock by
swinging rear end away from
action slightly, then pull stock
out of engagement with gas
block (See Fig. 11).
6. Remove buffer guide rod and recoil
spring (See Figs. 12a and 12b).
CAUTION: The spring is heavily
compressed -– use eye protection
and care when disassembling and
reassembling to prevent the rod
and spring from escaping forcibly
and possibly causing injury.
NOTE: When removing the buffer
guide rod, note positioning of the
projection on its end with relation
to the buffer cross pin. The long
tongue portion of the rod (“a”)
must go under the cross pin (“b”)
in Figure 12a, at the time of
reassembly.
24