46
Network Scanner
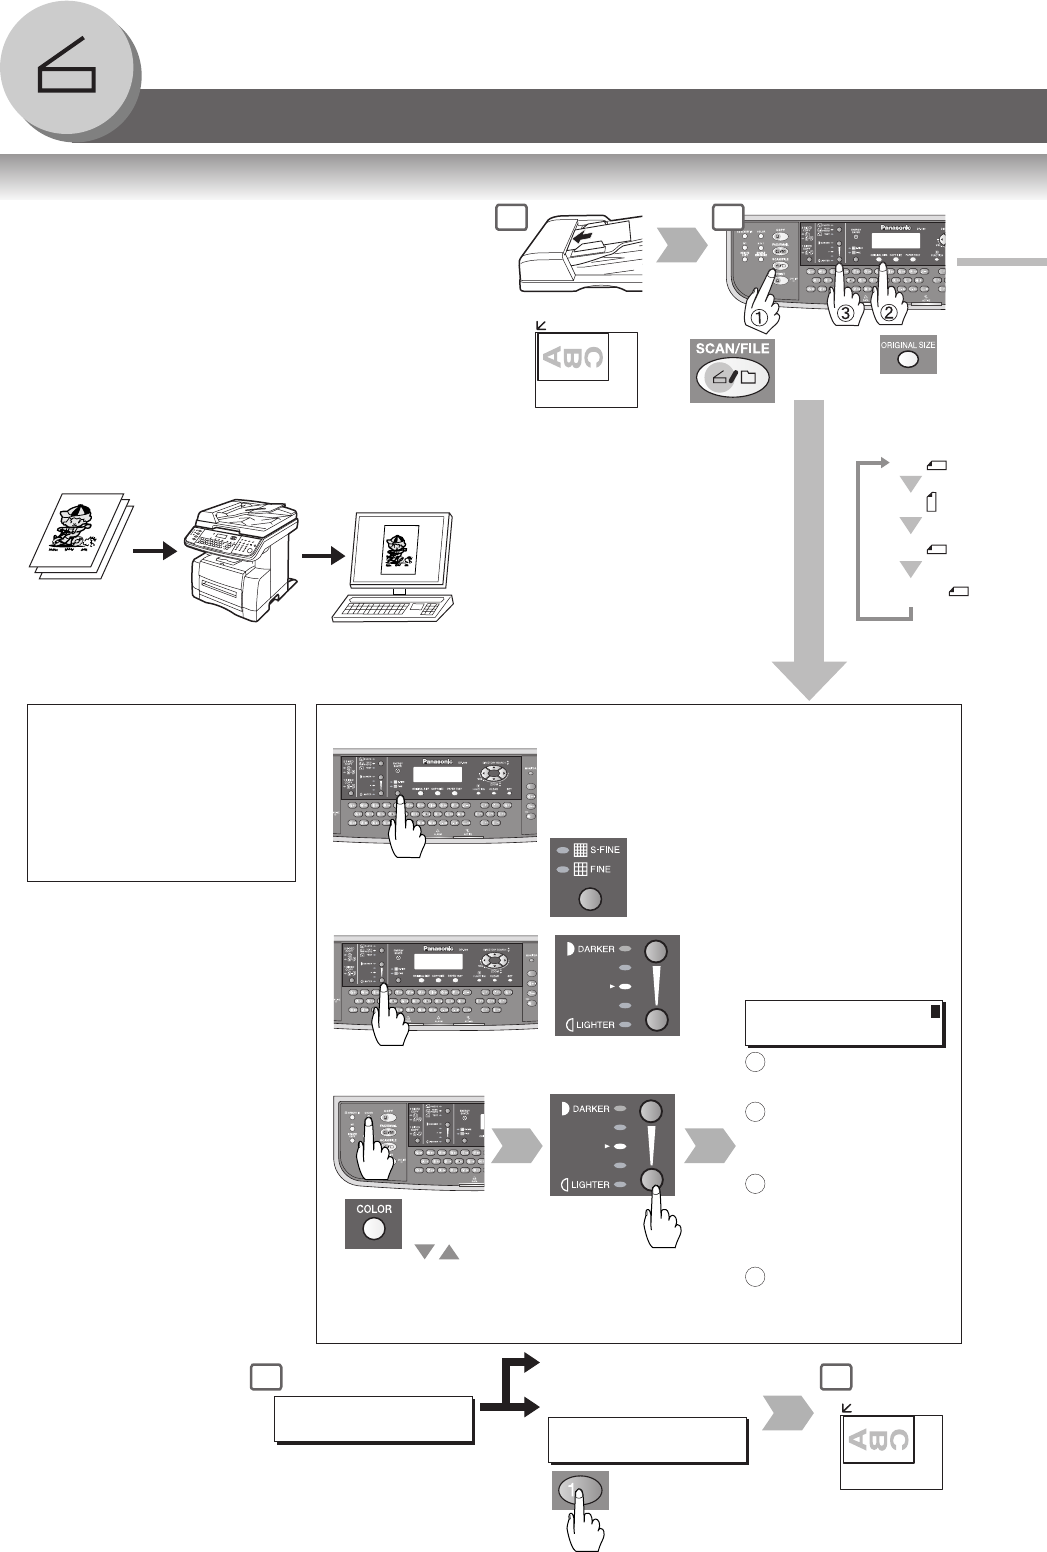
■ Document Scanning
When the Panasonic Document Management System
(Panasonic-DMS) is installed and configured on your
PC, document(s) can be scanned from the machine to
the PC.
Direct Connection
(with Crossover Cable, see page 54)
● Document Scanning directly from the machine to
your PC using Windows “My Network Places” or
“Network Neighborhood”.
NOTE:
USB Port is used for printing only, and is not
available for local scanning.
A
B
C
or
Document Scanning
NOTE
If the PC's IP address is not
shown on the LCD of the
machine, register the PC's IP
address using the machine's
Control Panel. (See page 48)
● ONE-TOUCH or ABBR No.
Original Size
(FLS: with
ADF only)
Next Original
With the ADF (Skip to step 8)
A4
A5
A5
FLS1
SCANNING DOCUMENT
PAGES=001 00%
For Colour Scanning
Monochrome/Colour
STANDARD: 150 x 150 dpi*/75 x 75 dpi
* Only available when Original setting at TEXT
mode. (See page 25)
FINE : 300 x 300 dpi/150 x 150 dpi
S-FINE : 600 x 600 dpi/300 x 300 dpi
(STANDARD : When the FINE/S-FINE
indicator is not lit.)
Colour
(illuminates)
Monochrome
1: YES
or
2: No (Skip to step 8)
ANOTHER ORIGINAL?
1:YES 2:NO
Selecting the Scanning Resolution
CONTRAST NO.=
1:CONTRAST 2:DENSITY
On the Platen
Select
scanning
mode
For Monochrome
Scanning
Press DARKER/
LIGHTER Keys.
Select "1" for
Contrast or "2" for
Density.
Adjust Contrast or
Density with
DARKER/LIGHTER
Keys.
Press SET Key.
2
1
3
1
2
4
5
When adding a file name, selecting a compression format or gray scale
mode. (See page 50)
4


