29
Remote connection by VNC viewer
The VNC viewer is a compact application that runs on your remote system and
allows you to view and use the LINDY KVM IP and its host computer(s). VNC
viewer is readily available from a number of different sources:
• from t
he LINDY KVM IP installation CD
• from the LINDY KVM IP itself
• from the RealVNC website
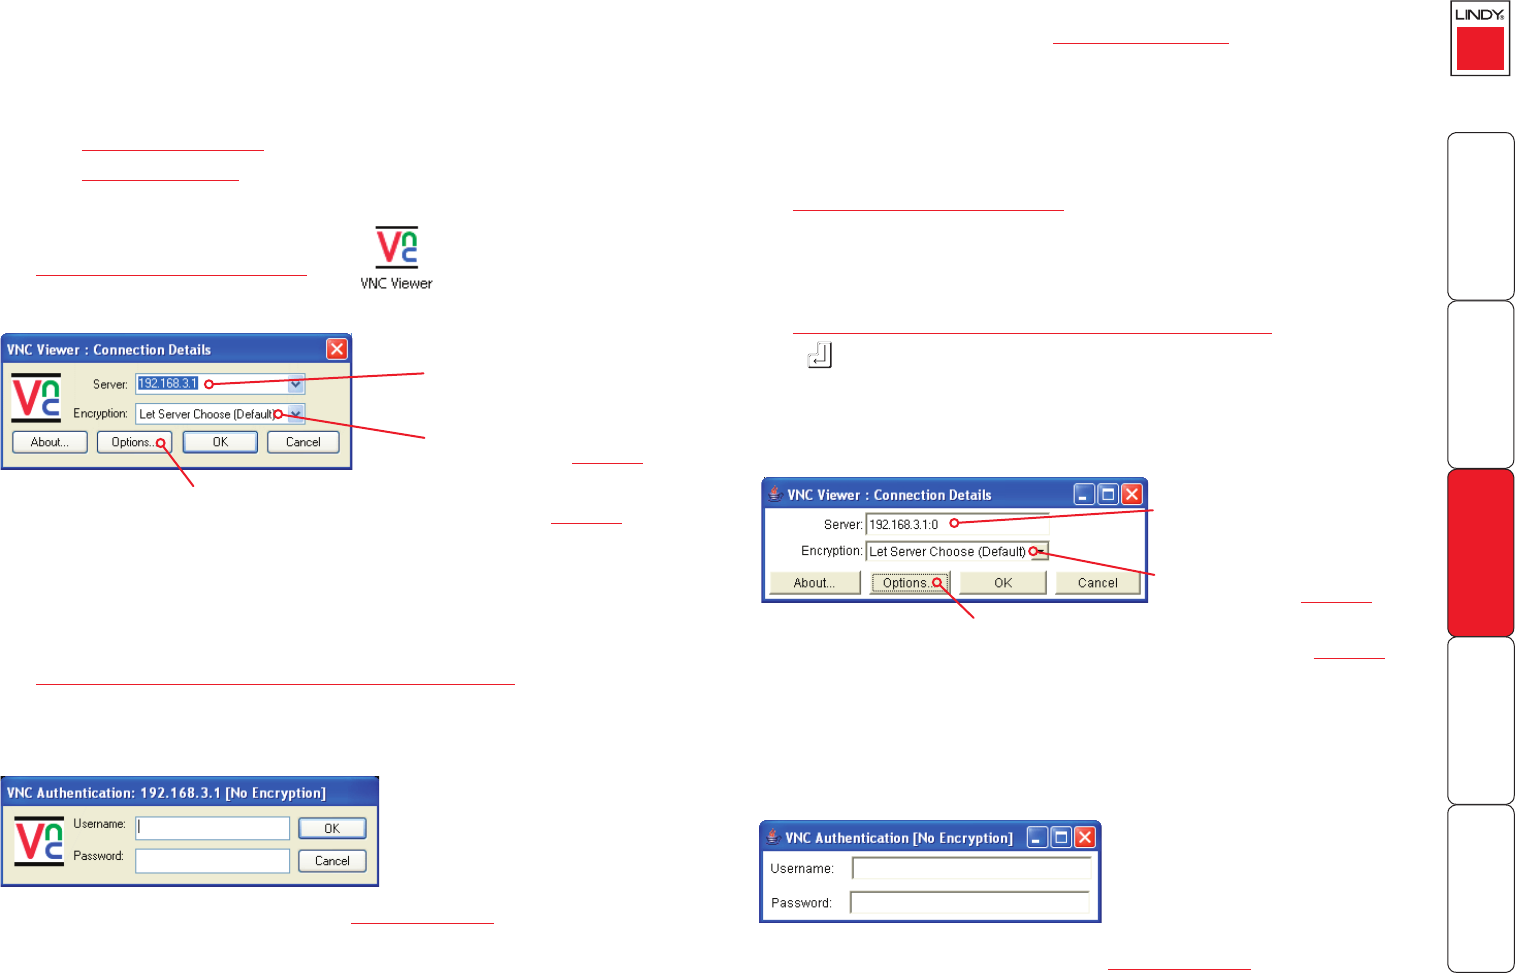
To connect using the VNC viewer
1 Locate and select the VNC viewer icon
•
If you are using a dial up link.
A connection details
dialog will be displayed:
Remote connection by Web browser
You can use a standard Web browser (supported versions) to gain access to
the LINDY KVM IP and its host computer(s). As soon as you make contact with
the LINDY KVM IP it will begin downloading a small Java application to your
browser, which will be used only for the duration of your connection.
To connect using your Web browser
1 Launch your standard Web browser as usual.
• If you are using a dial up link.
2 In the Address section, type the address of the LINDY KVM IP as follows:
http://v.w.x.y
where v.w.x.y is the IP network address, for example 192.168.0.3
•
If you have been asked to also enter a port number.
3 Press
. A connection attempt will be made. In the browser window,
select the ‘Connect using built-in Java VNC viewer’ option to download
a small application that will temporarily empower your browser (on slow
connections the application download can take several tens of seconds to
complete). Once complete, a connection details dialog will be displayed:
2 In the ‘Server:’ entry, type the address of the LINDY KVM IP as follows:
v.w.x.y
where v.w.x.y is the IP network address, for example 192.168.0.3
• If you have been asked to also enter a port number.
3 Click the OK button. Depending on the options selected, you may need to
confirm certain items. A connection attempt will be made and if successful,
an authentication dialog should be displayed:
4 Enter your username and password. The viewer window should now open
and show the current host computer. Note: If the Username entry is blanked
out then only admin user account is currently defined and only a password is
required.
Options button
Provides a range of viewer and connection settings - MORE [+]
Enter the LINDY KVM IP
address here and click OK
The previously entered LINDY
KVM IP address will be shown
here
Options button
Provides a range of viewer and connection settings - MORE [+]
4 Make any necessary option/encryption changes and click the OK button
to proceed. Depending on the options selected, you may need to confirm
certain items.
5 A second connection attempt will be made and if successful, an
authentication dialog will be displayed:
6 Enter your username and password. The viewer window should now open
and show the current host computer. Note: If the Username entry is blanked
out then only admin user account is currently defined and only a password is
required.
If required, select the
encryption mode - MORE [+]
If required, select the
encryption mode - MORE [+]


