DELAYED RECORDING STEPS
38
DELAYED RECORDING STEPS
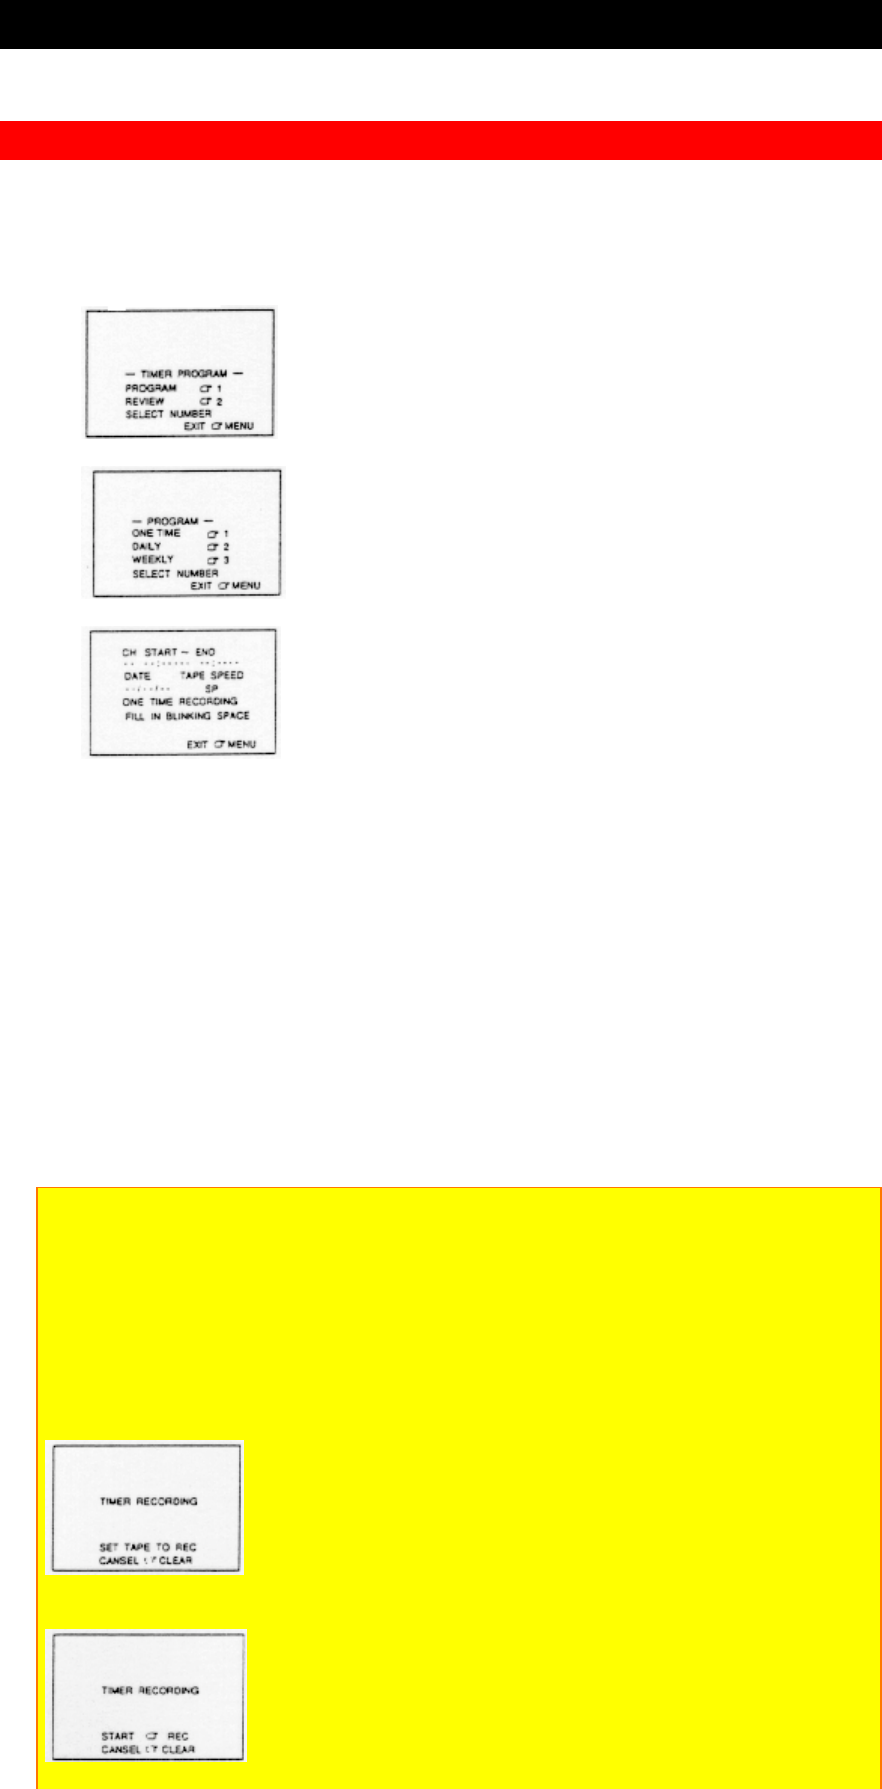
You can set up the delayed recording using the on-screen System.
1. Press "Program" button.
2. Press "1" Key to get program screen.
3. Select One Time, Daily, or Weekly by press "1", "2", or "3".
4. When the cursor is flashing enter the following.
• Select channel by numeric key (2 or 3 or them) (For external Video input, press
"AVX" button.)
• Input start and end times by the order of Hours Minutes AM/PM.
• Select the tape speed by TAPE SPEED Button in REMOTE Control.
• Input date by the order of Month Date. Year will be indicated automatically.
You may select the date to a year ahead.
* When you have a wrong setting, press the CLEAR button and correct it.
• Press MENU button.
• Load the videotape for recording.
• Turn off power.
Turn off the power at least one minute before the recording start time.
• In order to stop the recording in progress which is programmed, press
STOP/EJECT Button more than 3 seconds.
CAUTION:
(1) If the power isn't off more than one minute before the delayed recording start
time, the delayed recording doesn't start automatically.
(2) If delayed recording is set and the power is still on within one minute before the
delayed recording start time, guide messages appear on the screen. Then, make
operation following the messages as shown below.
If VCR isn't in stop mode or no tape is inserted, following message appears one
minute before the delayed recording start time.
If a tape is inserted and VCR is in stop mode, following message appears 5
seconds before the delayed recording start time.
If the power turns off after the message
or
appears, delayed recording doesn't
