12
Installation
36" Stainless Steel Refrigerators, Freezers
Step 8
Check Power
Step 9
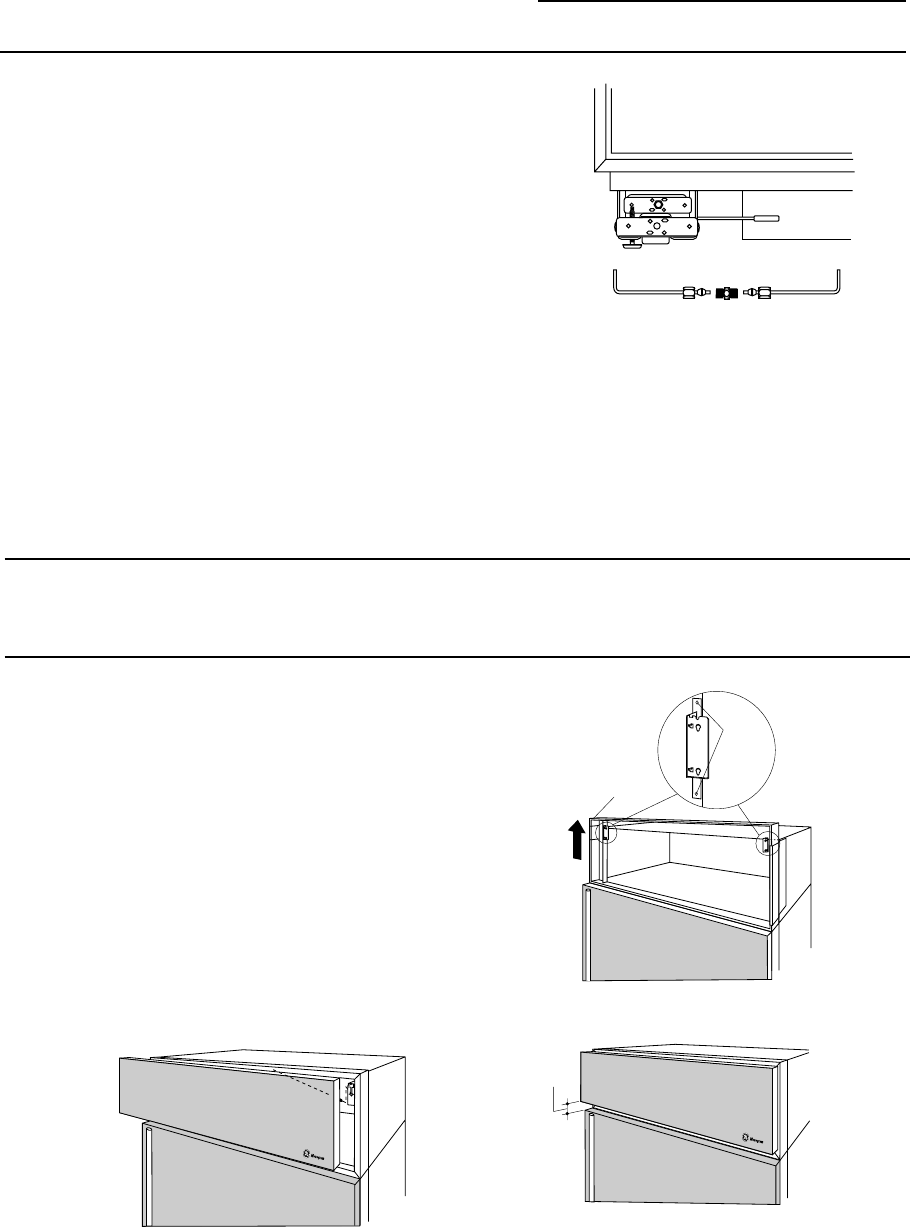
Mount Top
Grille Panel
For shipping purposes, the top case trim is secured at
84" installation height.
To raise case trim to 84-1/2" installation height or to
lower case trim to 83-1/2":
• Loosen 2 screws on both sides and raise or lower the
top case trim to meet soffit height or to the top of
adjacent cabinets.
• Tighten all 4 screws.
• Mount the grille panel by dropping into slots on the
case trim.
The grille panel assembly is factory set for an 84"
installation height. If installation height is 83-1/2" or
84-1/2", order ZGCSS36RH (right hand) or ZGCSS36LH
(left hand) grille panel kit.
IMPORTANT: Maintain 1-1/2" min. gap between top of doors and
bottom of grille panel.
1-1/2"
min.
gap
Screws
Top Case Trim
Raise To
Installation
Height
Step 7
Connect
Freezer
Water Supply
• Locate and bring tubing to the front of the cabinet.
• Turn the water on to flush debris from the line. Run
about a quart of water through the tubing into a
bucket, then shut off water.
Copper Tubing:
• Slip a 1/4" nut and ferrule (provided) over both ends
of the copper tubing. Insert tube into the union fitting
on the unit and tighten nut to union.
• Turn on the water to check for leaks.
GE SmartConnect
™
Tubing:
• Insert the molded end of the tubing into the
refrigerator connection. Tighten the compression
nut until it is just hand tight.
• Tighten one additional turn with a wrench.
Overtightening can cause leaks!
• Turn on the water to check for leaks.
NOTE: Make sure excess tubing length does not
interfere with toekick installation.
• Check to make sure power is on by opening the door
to see if interior lights are on.


