Installation Instructions
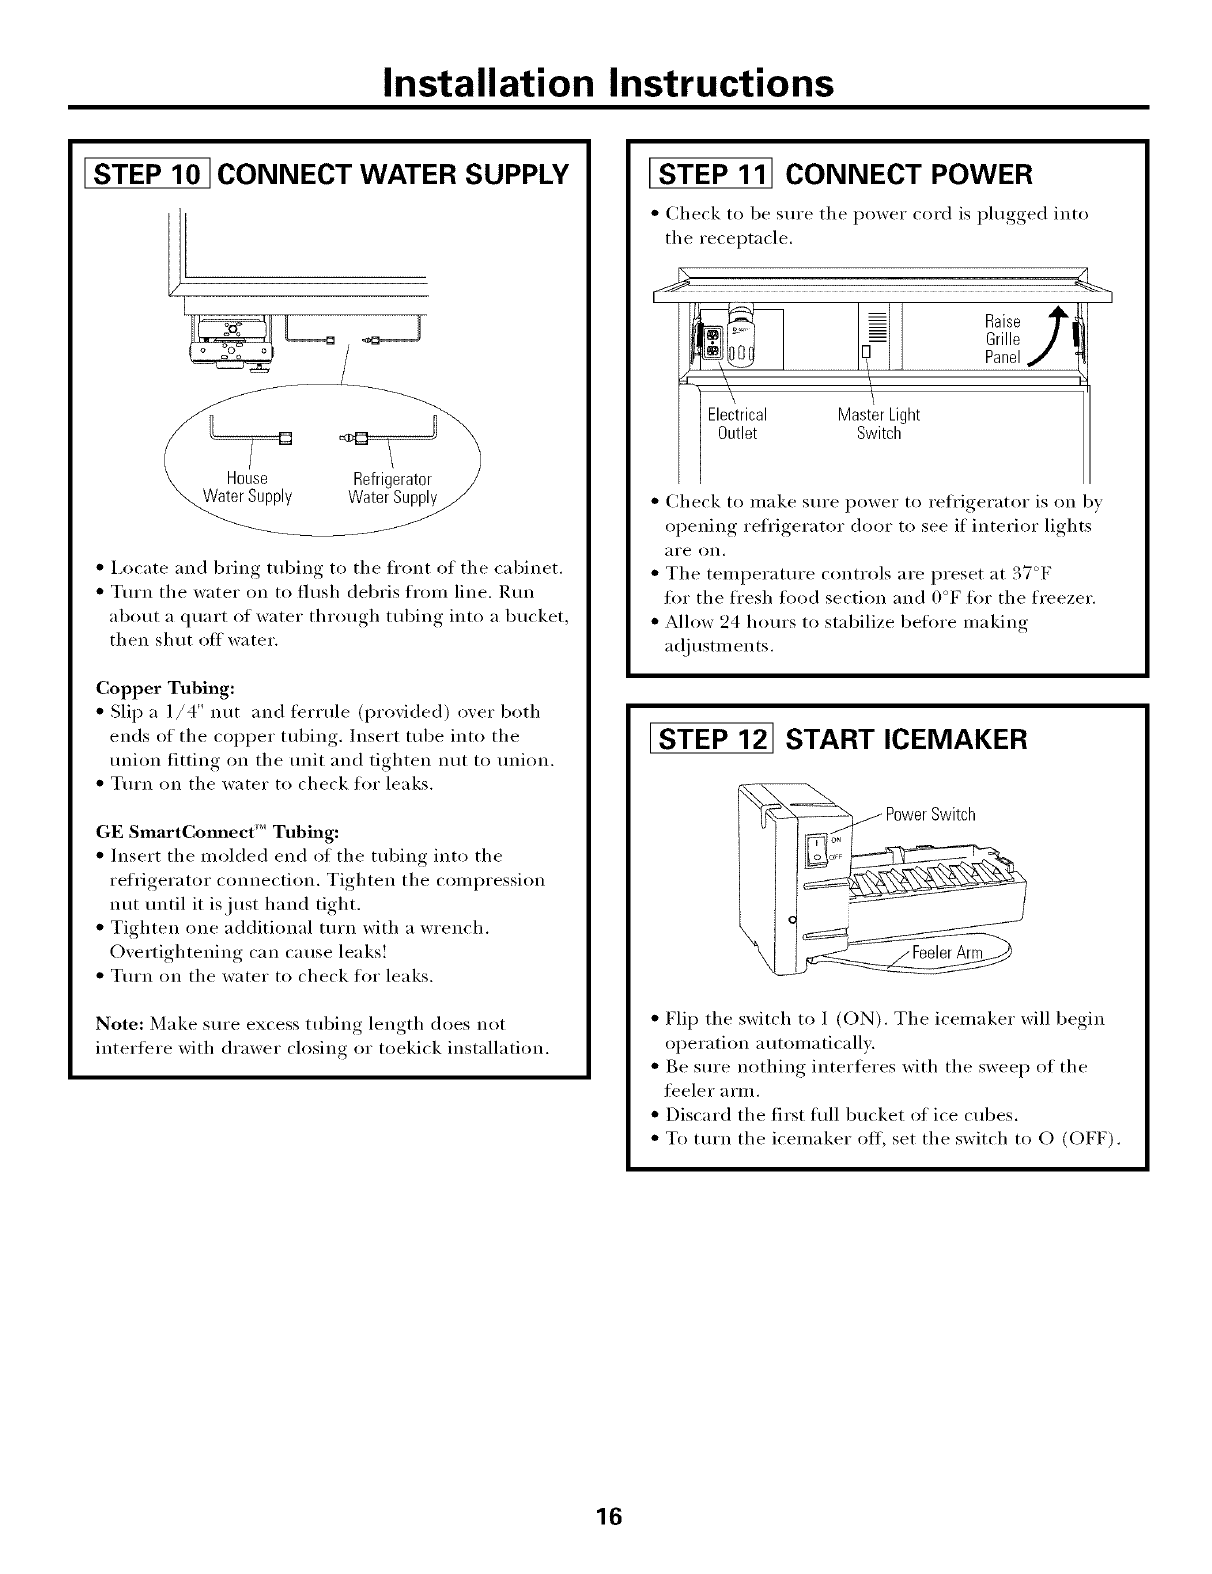
[STEP 10]CONNECT WATER SUPPLY
L[
• i,ocate and bring tubing to the fl'ont of the cabinet.
• Turn the water oil to flush debris frmn line. Run
about a quart of water through tubing into a bucket,
then shut off wa te r.
Copper Tubing:
• Slip a 1/4" nut and tbHule (provided) over both
ends of the COl)per tubing. Insert tube into the
tmion fitting on the trait and tighten nut to union.
• Tm'n on the water to check fin" leaks.
GE SmartCommct'" Tubing:
• Insert the molded end of the tubing into the
refrigerator connection. Tighten the compression
nut until it is just hand tight.
• Tighten one additional turn with a wrench.
Overtightening can cause leaks!
• Tm'n on the water to check for leaks.
Note: Make sure excess tubim*_ length does not
interfere with drawer closim* or toekick installation.
I STEP 11] CONNECT POWER
• Check to be sm'e tile power cord is phlgged into
the receptacle.
:L.
Raise"N
Grille]1!
Panel_]
4
Electrical MasterLight
Outlet Switch
• Check to make sm'e power to refl'igerator is on by
opening refl'igerator door to see if interior lights
are Oil.
• The temperature controls are preset at 37°F
fin" the fl'esh food section and 0°F fin" the freezer.
• Allow 24 horn's to stabilize before making
a({j ustm ents.
lSTEP 121START ICEMAKER
i
PowerSwitch
o
• Flip the switch to I (ON). The icemaker will begin
operation automatically.
• Be sm'e nothing interteres with the sweep of the
feeler arm.
• Discard the first fidl bucket of ice cubes.
• To tm'n the icemaker off, set the switch to O (OFF).
16


