6
D-108 Quick Operation Guide
Connecting cables
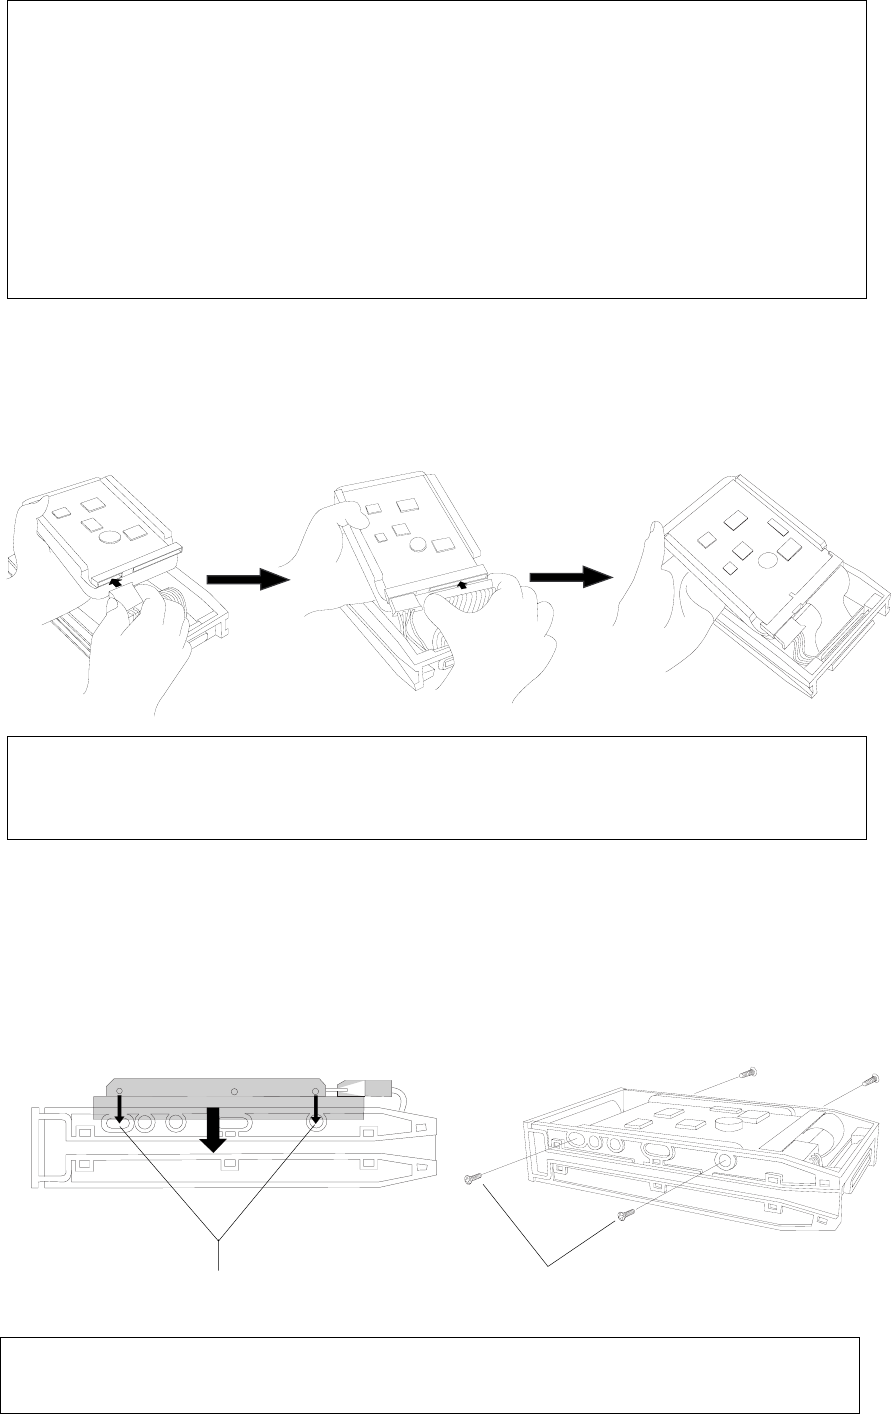
1.Connect the cables in the removable case to the connectors on the rear of the hard disk.
As shown in the figure, first connect the power supply cable. Make sure that you connect the cables
securely in the correct direction.
<Notes on handling a hard disk>
• A hard disk is a high-precision device. Do not apply any impact to the disk when and after
you install it in the case. Do not leave the disk near a device that generates a strong magnetic
field. Choose a level and stable surface for installation. Be careful not to injure yourself.
Fostex is not liable for any malfunction or damage to the hard disk caused by mishandling.
• You need to set the DIP (Jumper) switch on the hard disk to “MASTER” before you install it
into the removable case. If the switch is set to “SLAVE,” the hard disk will not function
correctly.
Refer to the instruction manual that came with your hard disk for more information on the
DIP (Jumper) switch setting.
Fixing the hard disk to the case
1.Align the screw holes.
As shown in the figure, align the screw holes on the side of the disk with the holes on the case.
2.Insert four included fixing screws (two screws on each side) and tighten them.
<Note on the connectors>
Some connectors on the hard disks may be too tight to connect cables easily. Do not apply
excessive force to such connectors to avoid injury or damage to the hard disk.
Align the screw holes on the other side of the
hard disk with the holes on the case.
Tighten four screws (two on each side).
<Note on tightening the screws>
Do not tighten the screws too much. Otherwise, you may damage the case.
