28
Cleaning
Important!
Please keep these guidelines in mind when you are cleaning your built-in oven. Please read
the cleaning instructions on this page and the Safety & warnings before you start. Ensure the
appliance is switched off at the wall and cool to touch before cleaning. Be careful of sharp
edges.
Important!
Do not use abrasive cleaners on the outside surfaces of the oven. Do not use a steam cleaner
to clean any surface of the oven.
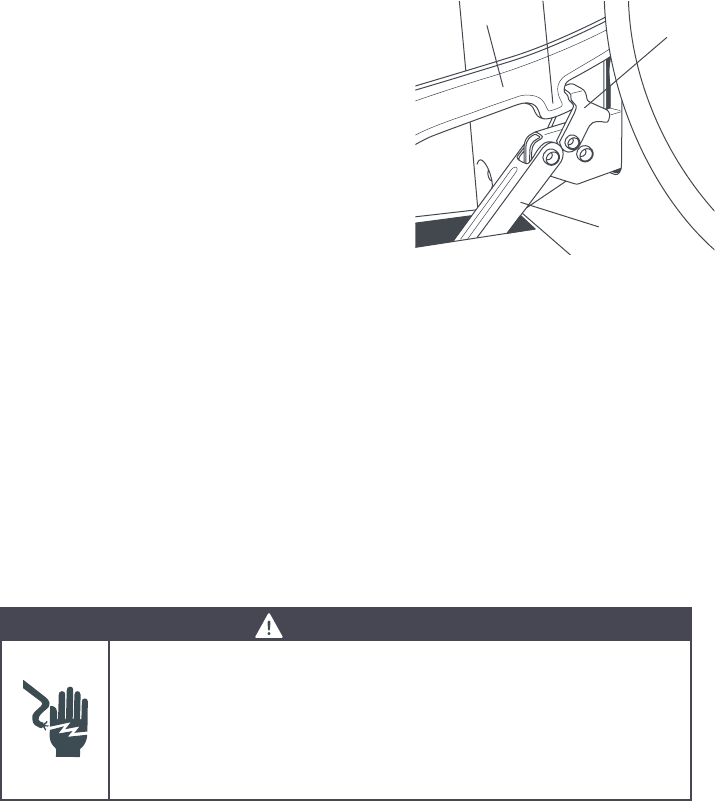
Removing and replacing the oven door
1
To remove the oven door for easier cleaning, open
the door fully, lift the clips (C) back towards you
onto the hooks.
2
Raise the door slightly, holding on either side near
the handle, making sure that the clips stay on the
hooks (A). Lift the door out.
3
To put the door back on, place upper hinge arm
(B) in the upper slot and lower hinge arm (D) in the
lower slot. Push the hinge arms in as far as they
will go until the slot in the lower arm locates in the
hinge support.
4
Lower the door gently. The clips will be released
from the hooks.
5
Raise the door slightly and ensure the clips are
released from the hooks. Close the door.
Removing and replacing the fan cover
1
To remove the fan cover, remove the screw at the top, supporting the cover as it drops forward.
Lift the cover out of the slots at the rear of the oven.
2
To replace, fit in the reverse order.
Removing and replacing the oven lamp
Always turn the oven off at the wall before touching an oven lamp. To clean the oven more
easily, pull off the glass cover. If you need to replace the light, simply unscrew it.
WARNING!
Electrical Shock Hazard
Ensure the appliance is switched off at the wall before replacing the
oven lamp.
Failure to follow these instructions could result in electrical shock.
B
A. HOOK
B. UPPER HINGE ARM
C. CLIP
D. LOWER HINGE ARM
A
C
D


