EPSON PowerLite 5300/7200/7300 Projector
4 -
EPSON
PowerLite 5300/7200/7300 Projector
1/99
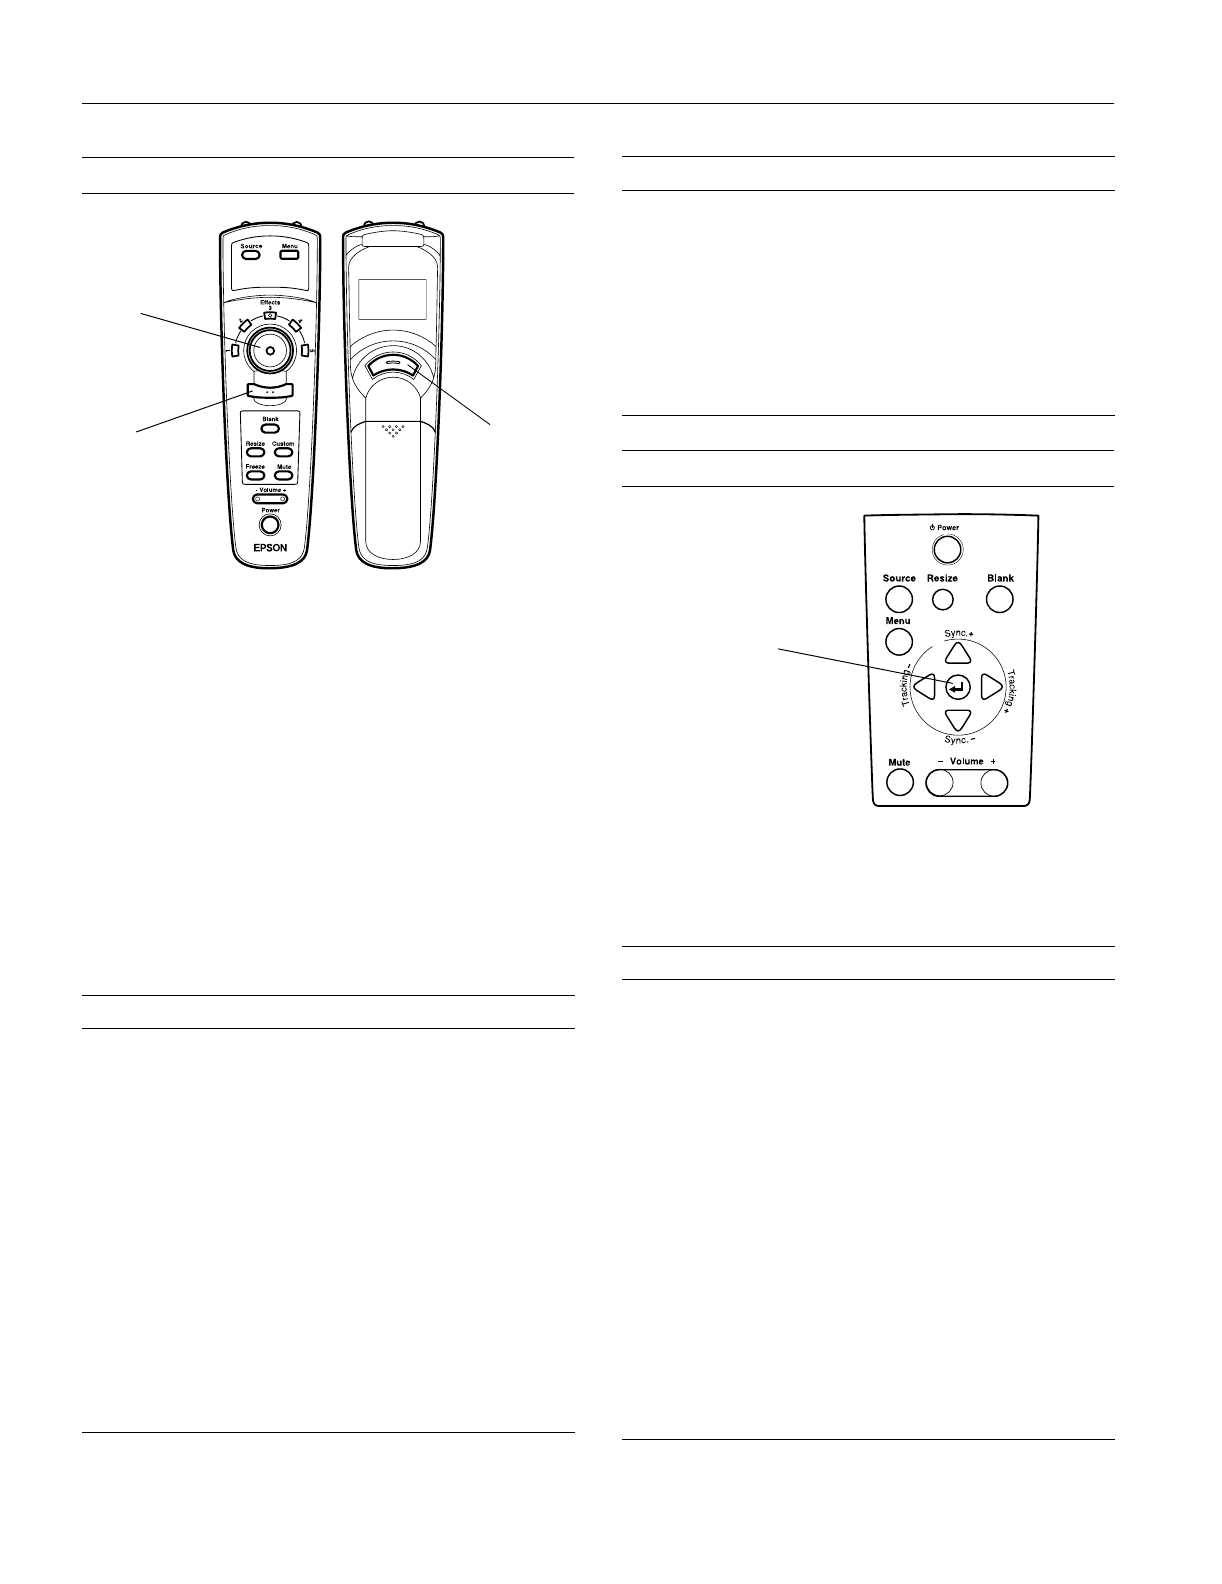
Using the Remote Control
The remote control uses a line-of-sight infrared signal. To use
the remote control, point it towards one of the infrared
receivers located at the front and back of the projector. You
can use the remote control up to about 32 feet (10 meters)
from the projector. (This distance may be shorter if the remote
control batteries are low.) You must also be within a
± 30°
angle from the front or rear receiver.
Note: The projector may not respond to remote control commands
in these conditions: ambient light is too bright; a certain type of
fluorescent light is present; a strong light source (such as direct
sunlight) shines into the infrared receiver; or other equipment
emitting infrared energy is present (such as a radiant room
heater). Correct these conditions to use the remote control or
control the projector from a computer.
This table summarizes the functions on the remote control.
Using the Control Panel
You can use the control panel to control the projector instead
of the remote control. However, you can program and access
the custom features only with the remote control. The
following table summarizes the functions on the control panel.
Button Function
Menu Displays or hides the menu.
Source Switches between Computer 1 and Computer 2, and
from video to computer. (When the Computer 2 BNC
switch on the back of the projector is set to BNC, the
source is switched to 5BNC.)
Pointer button Use the pointer button to navigate the menus or use the
remote as a mouse pointer when the projector is
connected to the computer with the main cable and the
mouse cable.
Effects buttons Use to display special effects assigned using the ELP
Link III software.
Top
multi-purpose
button
Acts as a right mouse click, registers a menu selection,
and selects other custom functions.
Bottom
multi-purpose
button
Acts as a left mouse click, registers a menu selection,
and selects other custom functions.
Blank Clears the screen and switches to a blue or black
display, or a user logo.
bottom
multi-purpose
button
top
multi-purpose
button
pointer
button
Resize Switches the display dot mode and resize mode for VGA,
SVGA, XGA, and SXGA input (for resolutions that do not
match the projector’s output).
Custom Accesses Custom menu functions (Zoom, Preview, and
Strobe).
Freeze Keeps the current computer or video image on the
screen.
Mute Turns off audio.
– Volume +
Adjusts the volume.
Power Starts or stops the projector.
Button Function
Power Starts or stops projection.
Source Switches between Computer 1 and Computer 2, and
from video to computer. (When the Computer 2 BNC
switch on the back of the projector is set to BNC, the
source is switched to 5BNC.)
Menu Displays or hides the menu.
Up, down arrows
(Sync+/Sync
−
)
Synchronizes the computer’s graphic signal.
Use these buttons to adjust an image that is fuzzy or
streaked, or to select menu items.
Left, right arrows
(Tracking
−
/
Tracking+)
Matches the projector’s internal clock to various
computer graphic signals (tracking adjustment).
Use these buttons to adjust an image with vertical
fuzzy lines, or to change numeric settings.
Enter Executes a menu selection.
Resize Switches the display dot mode and resize mode for
VGA, SVGA, XGA, and SXGA input (for resolutions
that do not match the projector’s output).
Mute Turns off audio.
– Volume +
Adjusts the volume.
Blank Clears the screen and switches to a blue or black
display, or a user logo.
Button Function
Enter button


