34 Using Your Projector
WHITE INTENSITY—
Press and use and to display white
intensity.
NOTE:
1
If you adjust the settings for Brightness, Contrast, Color Temperature,
Saturation, Sharpness, Tint, and White Intensity the projector automatically
switches to Custom mode.
2 Saturation, Sharpness, and Tint are only available when input source is from
A/V in.
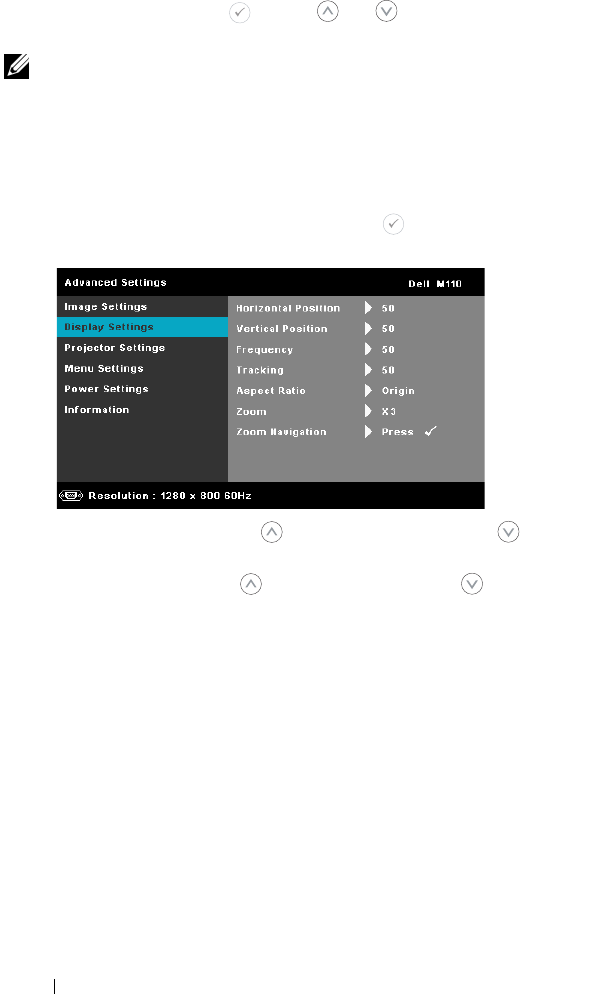
DISPLAY SETTINGS (IN PC MODE)—Select and press to activate display settings.
The display settings menu provides the following options:
H
ORIZONTAL POSITION—
Press to move the image right and to
move the image left.
VERTICAL POSITION—
Press to move the image up and to move
the image down.
FREQUENCY—
Allows you to change the display data clock frequency to
match the frequency of your computer’s graphics card. If you see a
vertical flickering wave, use the Frequency control to minimize the
bars. This is a coarse adjustment.
TRACKING—
Synchronize the phase of the display signal with the
graphic card. If you experience an unstable or flickering image, use
the Tracking to correct it. This is a fine adjustment.
ASPECT RATIO—
Allows you to select the aspect ratio to adjust how the
image appears. Options are: Origin, 16:9, and 4:3.
• Original — Select Origin to maintain the aspect ratio of the image
projector according to the input source.
• 16:9 — The input source scales to fit the width of the screen to project a
16:9 screen image.


