Preparations • 21
First Time Settings
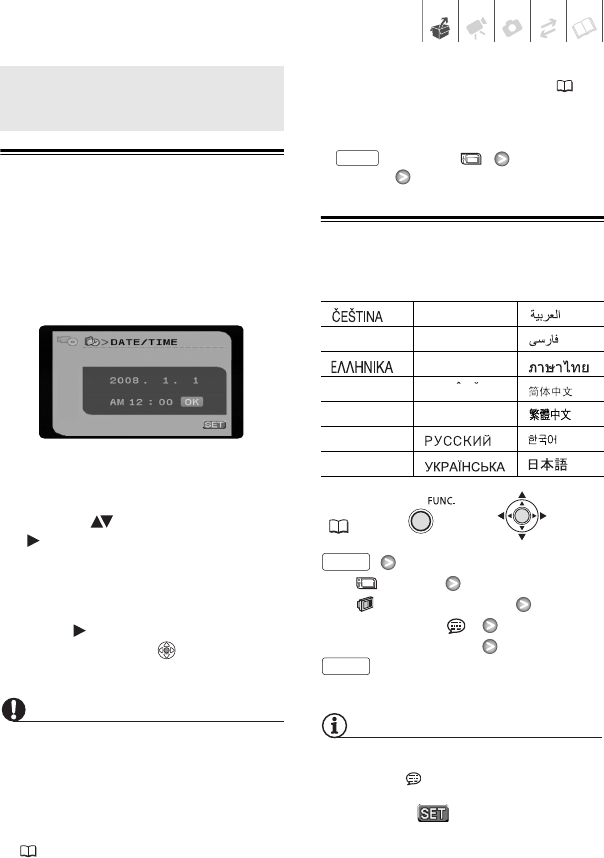
Setting the Date and Time
You will need to set the date and time of
the camcorder before you can start
using it. The [DATE/TIME] screen will
appear automatically when the
camcorder’s clock is not set.
When the [DATE/TIME] screen appears,
the year will be displayed in orange and
indicated with up/down arrows.
1 Change ( ) the year and move
( ) to the month.
2 Change the rest of the fields
(month, day, hour and minutes) in
the same way.
3 Move ( ) the cursor to the [OK]
button and press to start the
clock and close the menu.
IMPORTANT
• When you do not use the camcorder for
about 3 months, the built-in
rechargeable lithium battery may
discharge completely and the date and
time setting may be lost. In such case,
recharge the built-in lithium battery
( 75) and set the time zone, date and
time again.
• The date appears in a year-month-day
format only in the first setup screen. In
subsequent screen displays the date
and time will appear as day-month-year
(for example, [1.JAN.2008 12:00 AM]).
You can change the date format ( 66).
• You can also change the date and time
later on (not during the initial setup). To
open the [DATE/TIME] screen, press
and select [DATE/TIME
SETUP] [DATE/TIME].
Changing the Language
Options
Default value
[ MENU]
[ DISPLAY SETUP]
[LANGUAGE ]
Desired language
NOTES
• If you changed the language by mistake,
follow the mark next to the menu
item to change the setting.
• The display that appears in some
menu screens refers to the name of
buttons on the camcorder and will not
change, regardless of the language
selected.
First Time Settings
[][MAGYAR] []
[DEUTSCH] [MELAYU] []
[][POLSKI] []
[ENGLISH]
[][]
[ESPAÑOL] [TÜRKÇE] []
[FRANÇAIS]
[][]
[ITALIANO] [][]
FUNC.
(20)
FUNC.
ROMAN
FUNC.
FUNC.
D126_NTSC_PAL_E.book Page 21 Tuesday, January 15, 2008 12:15 PM


