54
Shooting – The Basics
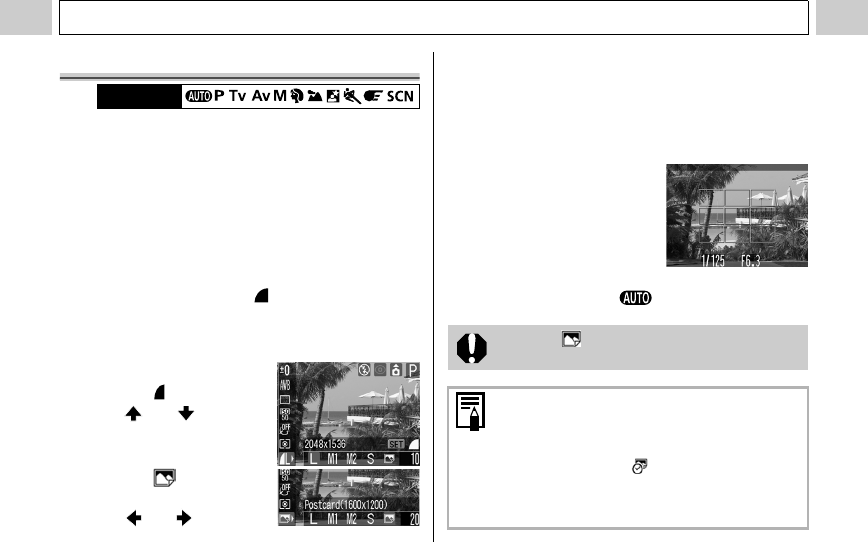
Postcard Print Mode
You can shoot images with the optimal
resolution and compression for postcard size
printing.
• When printing standard image data to postcard
size, sometimes the top and bottom sides may
not get printed.
• By shooting images in the Postcard Print mode,
you can check the printing area (vertical/
horizontal ratio of 3:2) beforehand. In addition,
the resolution locks to M1 (1600 x 1200) and the
compression locks to the (Fine) setting,
rendering smaller data sizes.
1 Press the FUNC.
button.
2 Select L* using
the or button.
* The current setting is
displayed.
3 Select
(Postcard) using
the or button.
Mode Dial
z You can shoot the image right after selecting
settings by pressing the shutter button. The
menu displays again after the shot, allowing
you to change the settings easily.
4 Press the FUNC. button.
5 Shoot the image.
z When you press the
shutter button halfway,
the area that will not get
printed (the top and
bottom sides) grays out.
z Shooting procedures are
the same as for the
mode (p. 33).
Selecting cancels the [On] setting of the
digital zoom.
z This setting is not available with certain
Shooting modes. Please refer to Functions
Available in Each Shooting Mode (p. 159).
z When [Date Stamp] (p. 55) is set to [Date]
or [Date & Time], icon appears in the
LCD monitor.
z For printing instructions, refer to the Direct
Print User Guide.
EC156&157CUG_Eng.book Page 54 Friday, December 17, 2004 3:32 PM


