Page 41
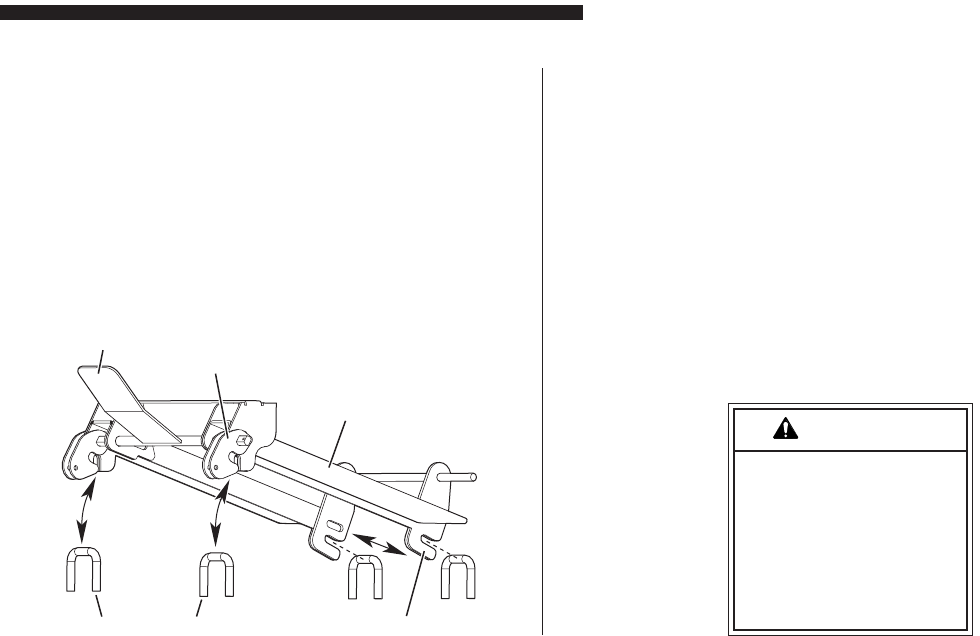
Floor-Mounted Strikers (4)
Seat Base
SEAT REMOVAL AND INSTALLATION
7KLUG5RZ3RZHU6HDW5HPRYDODQG,QVWDOODWLRQ
7KHPRGLÀHGVHDWEDVHVDUHHTXLSSHGZLWK´HDV\RXWµ
type attachments. The attachments engage recessed
ÁRRUVWULNHUV7KHWZRUHDUORFNLQJDWWDFKPHQWVDUH
released and latched using the latch handle. Once the
rear attachments have engaged the strikers, push the
latch handle down to lock the seat in position. Lift the
handle to release the rear attachments. Remove and
install the seats as detailed on pages 42 and 43.
CAUTION
Disconnect seat
ZLULQJKDUQHVV
EHIRUHUHPRYLQJ
VHDW)DLOXUHWRGR
VRPD\UHVXOWLQ
SURSHUW\GDPDJH
Rear Locking
Attachments (2)
Front Striker Attachments (2)
Latch Handle
7KLUG5RZ3RZHU6HDW:LULQJ+DUQHVVHV
Third row power seats are equipped with
electrical wiring harnesses. 6HDWZLULQJ
harnesses must be disconnected during
seat removal procedures. When remov-
ing seats, the VHDWHOHFWULFDOKDUQHVVDQG
SOXJPXVWEHVHFXUHGWRDYRLGGDPDJH.
When installing rear power seats, be certain
VHDWZLULQJKDUQHVVHVDUHUHFRQQHFWHG.
Failure to do so may result in power seat
functions being disabled.


