‐3‐
Operating Instructions
Removal
Important: Keep the actuating screw well lubricated.
1. Refer to the vehicle service manual, and follow the manufacturer's recommended procedure to
remove the Macpherson strut assembly from the vehicle.
2. Once removed, clamp the strut assembly in a vise.
3. Mark the coil spring in relation to the lower strut platform and top mount. This will aid in the correct
positioning for installation.
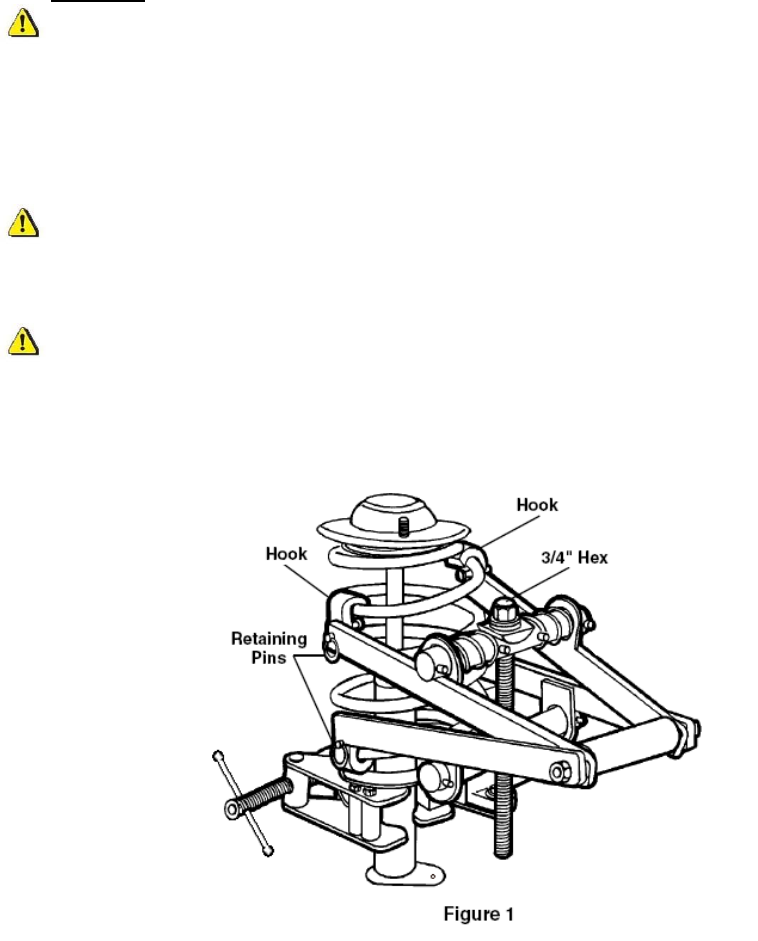
4. Place two hooks around the coil as close to the top of the spring as possible.
Note: The 3/4" hex on the forcing screw should be up. Place the other two hooks as close to the
bottom of the spring as possible. Push in the four retaining pins. (See Figure 1.)
5. Using an impact wrench or ratchet with a 3/4" socket on the actuating screw, compress the spring
only until it is loose in the spring mount.
WARNING: DO NOT EXCEED 30 FT. LBS. OF TORQUE ON THE ACTUATING SCREW.
Compressing the spring too far will cause premature tool failure that can result in severe
personal injury. Compress the spring only until it is loose in the spring mount.
6. Remove the piston rod nut. Carefully store the tool and spring assembly in a place where it cannot
roll off a bench or be dropped.
7. Remove the old strut. Compare the old strut with the new one to be sure you are installing the
correct strut. Dispose of the old strut.


