39
Lens Manager Menu
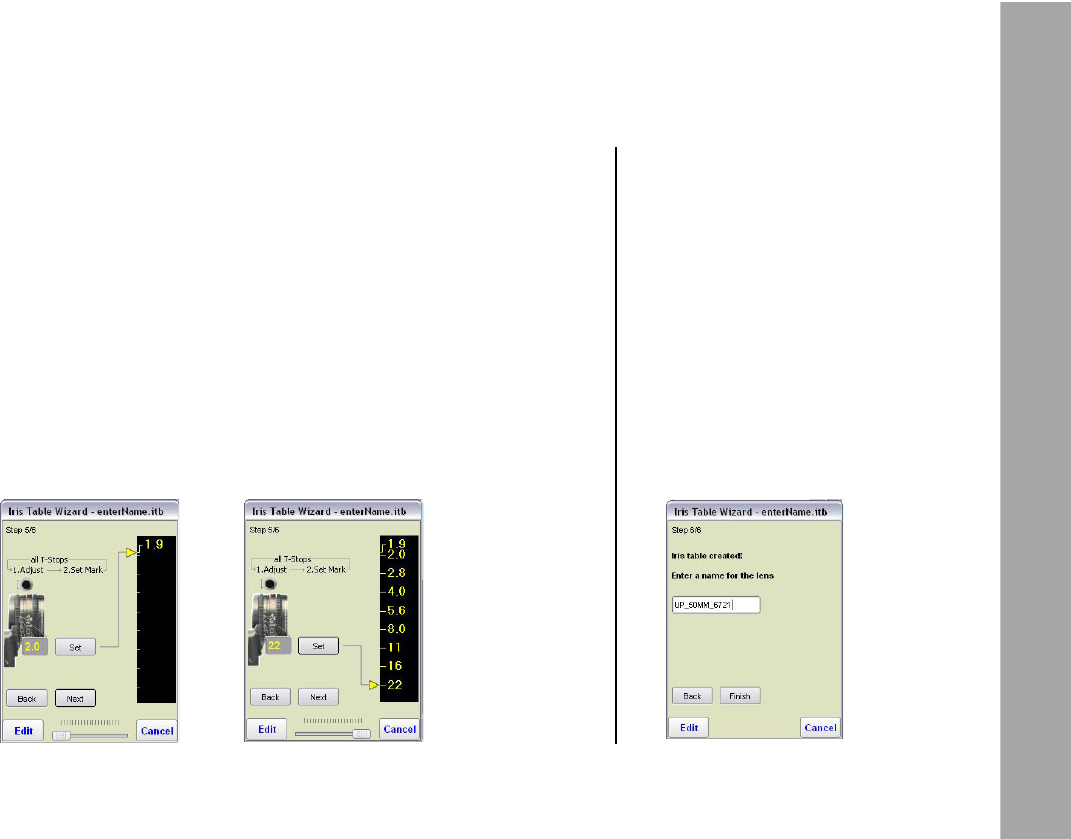
Step 4
Dene the T-Stop positions
● Make sure the iris is set to the T-Stop marked by the yellow
arrow (e.g. f1.9). Use the knob of the WRC-2 to adjust the
position. Alternatively you can use the slider on the bottom
of the screen.
● Click „Set“ to assign the postions to the iris.
● Go ahead like this until all T-Stops are assigned. If necessary,
click on „Back“ or „Next“ to reassign the positions.
● Set at least five T-Stops. When the yellow arrow is at the last
position, click next to finish the process.
Step 5
Name the Iris Table
● Enter an appropriate name for the
iris table including lens type, focal
lenght and some last digits of the
serial number.
(e.g. „UP_50mm_1234)
● Click „Finish“
● To activate the Iris Table, go to the
Lens Manager Menu and load the
Iris Table (see Chapter 13)


