45
• Press the CAL button on the WMU-1 to start the
calibration process before entering any values.
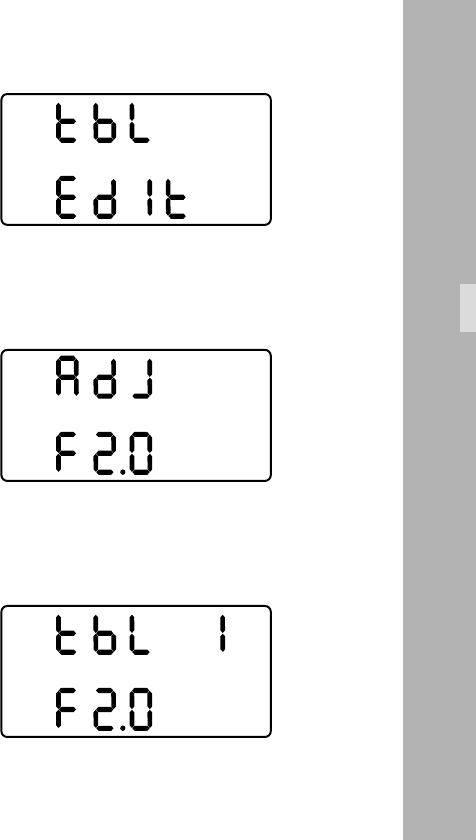
• Turn the handwheel until ‘TBL EDIT’ is displayed.
Press the SEL button to go to the input mode.
• Turn the handwheel to the left until the first T-stop of
the iris ring of the lens being used is shown in the
second line of the display.
This must be a full T-stop from the standard T-stop
range.
• Then press the SEL button. ‘ADJ’ now flashes in the
first line of the display.
• Adjust the iris ring of the lens to the displayed value
using the handwheel.
• The T-stop is assigned by pressing the SET button. This
is indicated in the first line with an ‘I’ next to ‘TBL’.
• In case you need to delete this assignment, press the
SET button again. The ‘I’ next to ‘TBL’ disappears again.
• Turn the handwheel until the next T-stop on the iris ring
of the lens being used is shown on the display. Assign
this and the next T-stops as described above.
Controlling the Iris


