


6 11
2
1
17
17
37
Indents
13
8
3
Warning
Decals
18
18
16
17
1
1
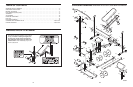
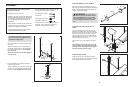
1.
Orient the Crossbar (3) so that the warning decals
are on top.
Attach the Crossbar (3) to one of the Uprights (1)
with two M8 x 55mm Bolts (18), two M8 Washers
(16), and two M8 Locknuts (17); do not tighten
the Locknuts yet.
Attach the Crossbar (3) to the other Upright (1)
in the same way.
2. Orient the Stabilizer (13) so that the indented
holes are facing the floor.
Attach the Stabilizer (13) to the Front Leg (8) with
two M8 x 42mm Carriage Bolts (37) and two M8
Locknuts (17); do not tighten the Locknuts yet.
To make assembly easier, read the assem-
bly tips at the top of this page before you
assemble the weight bench.
To make assembly easier, carefully read the
following assembly tips:
•
Assembly requires two persons.
• Because of its weight and size, the weight bench
should be assembled in the location where it will
be used. Make sure that there is enough clear-
ance to walk around the weight bench as you
assemble it.
• Place all parts in a cleared area and remove the
packing materials. Do not dispose of the packing
materials until assembly is completed.
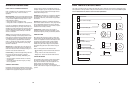
• For help identifying small parts, use the PART
IDENTIFICATION CHART on page 5.
• The included grease and the following tools (not
included) may be required for assembly:
T
wo adjustable wrenches
One hammer
One standard screwdriver
One Phillips screwdriver
Assembly will be more convenient if you have a
socket set, a set of open-end or closed-end
wrenches, or a set of ratchet wrenches.
ASSEMBLY
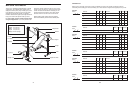
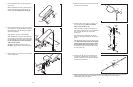
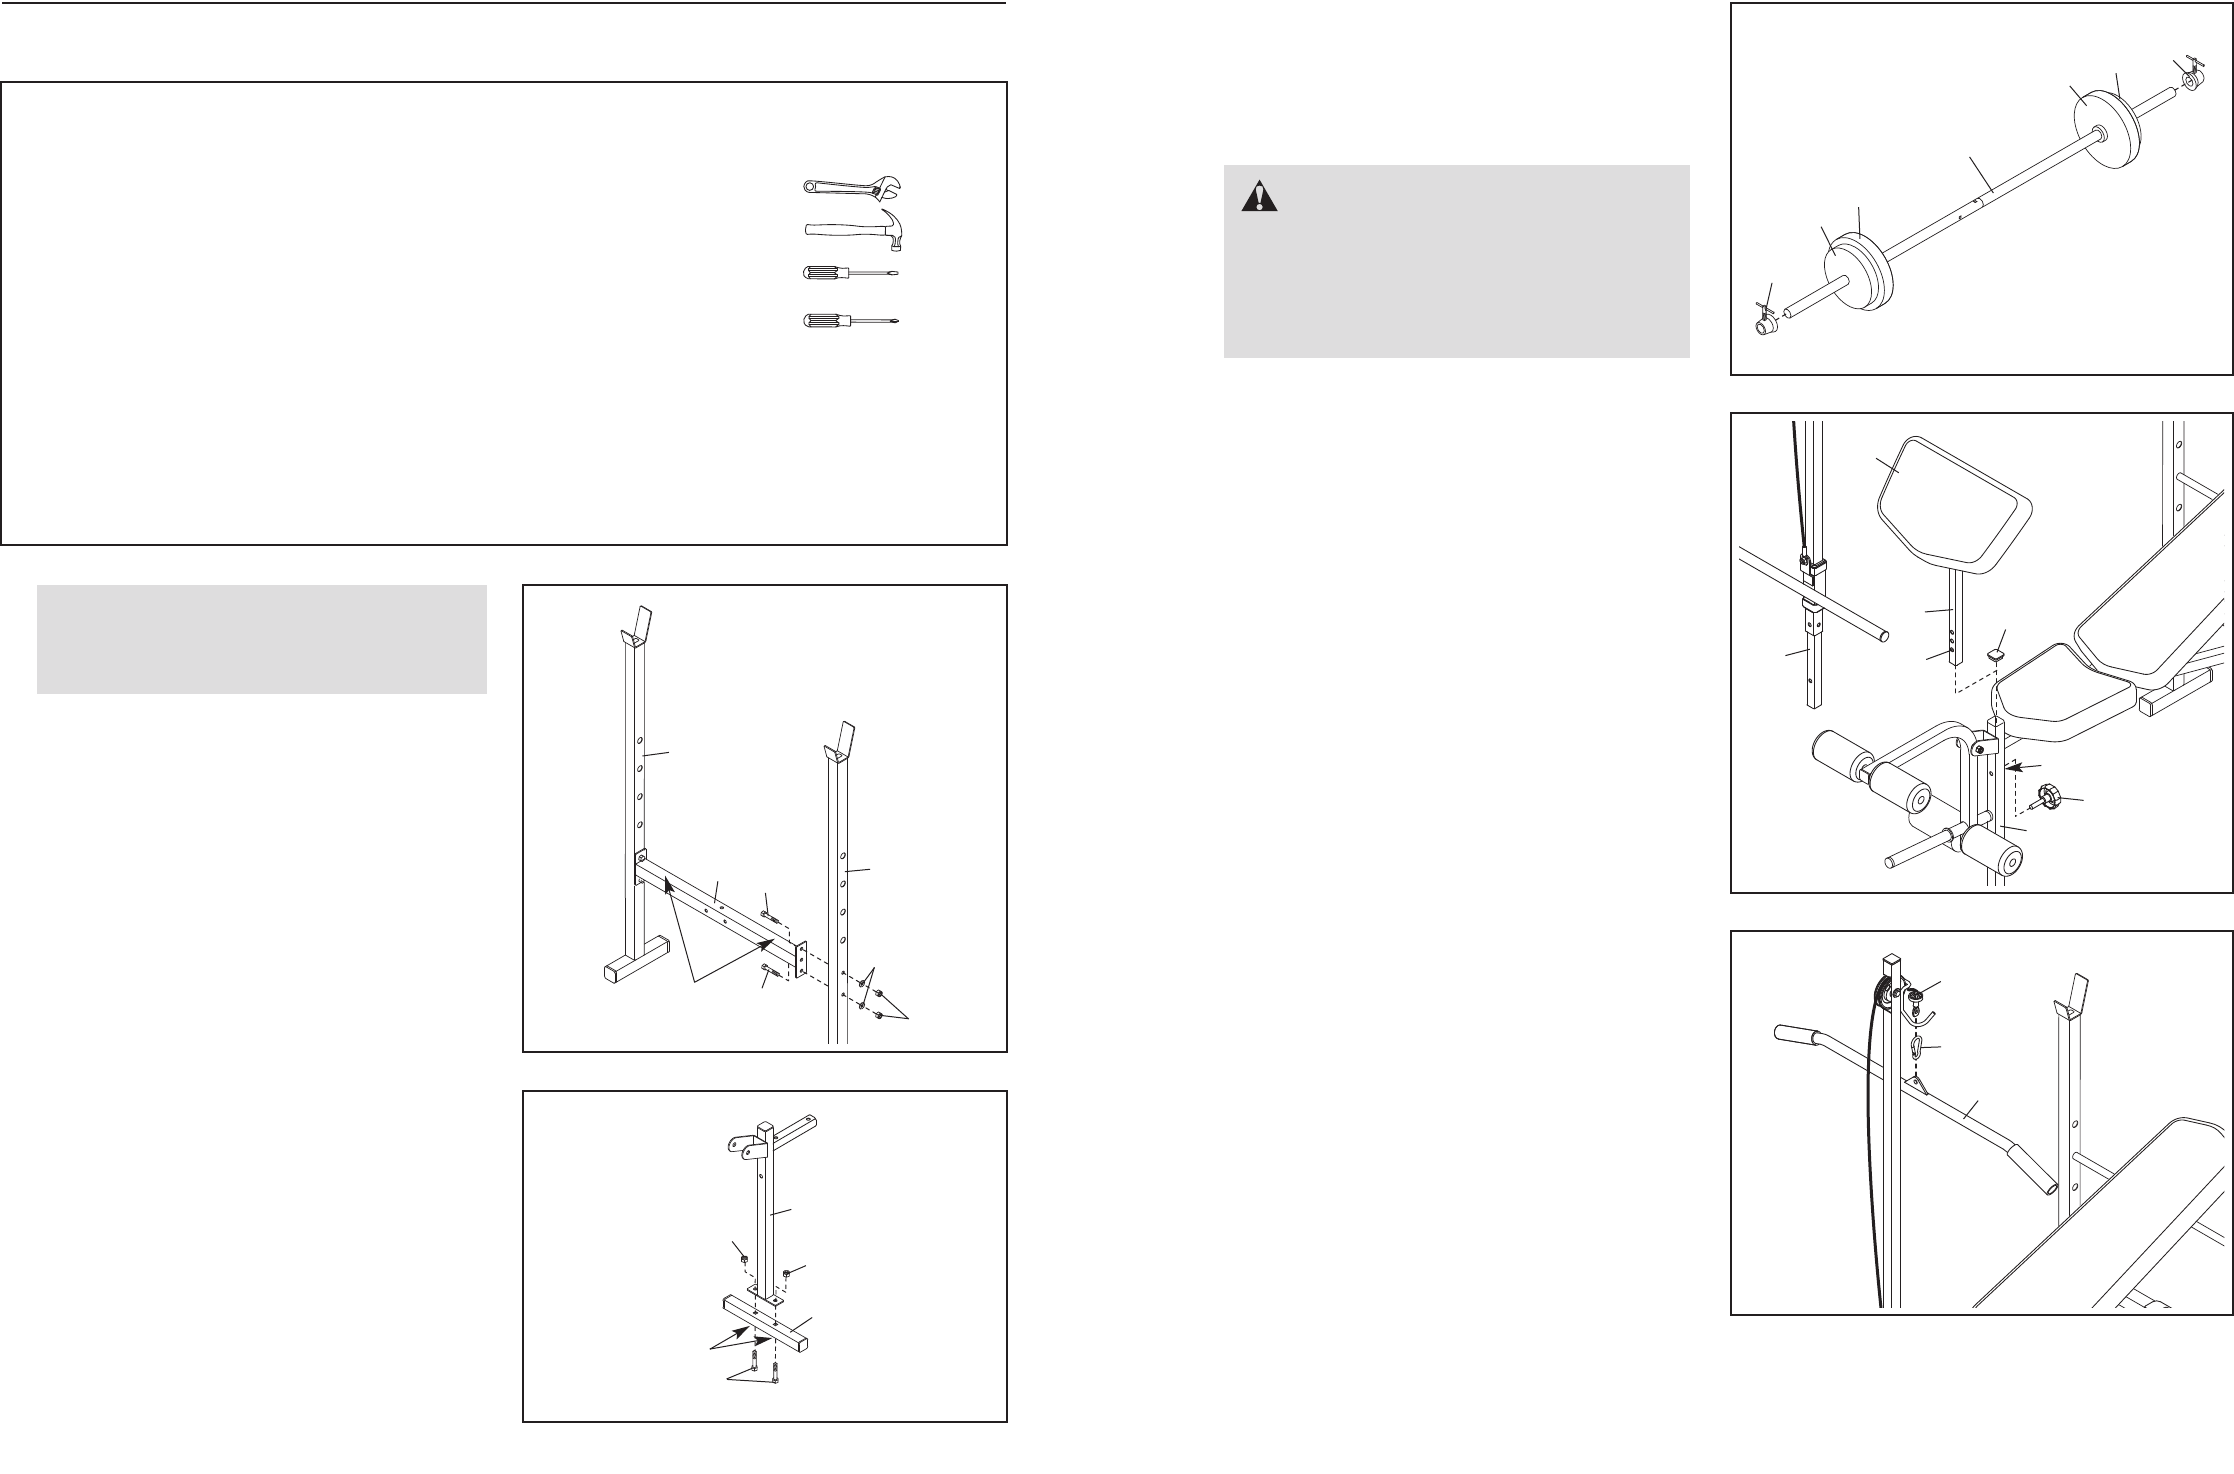
ATTACHING WEIGHTS TO THE BARBELL
Slide the same amount of Weight (38, 44) onto
both ends of the barbell. Then, slide the two Weight
Collars (42) against the Weights. Fully tighten the
h
andles on the Weight Collars.
38
44
Barbell
38
42
42
WARNING: Do not place more
than 100 lbs. (45 kg) on the barbell. Always
secure the Weights (38, 44) on the barbell
with the Weight Collars (42). Place an equal
amount of weight on each side of the bar-
bell.
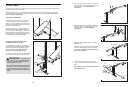
ATTACHING THE CURL PAD OR THE LAT
TOWER
For some exercises, the Curl Pad (45) must be
attached to the weight bench. Remove the 32mm
Square Inner Cap (53) from the Front Leg (8). Next,
insert the Curl Post (27) into the Front Leg, and
align an adjustment hole in the Curl Post with the
adjustment hole in the Front Leg. Then, secure the
Curl Post with the Curl Knob (31).
The Lat Tower (14) can be attached in the same
way.
Note: When the Curl Pad (45) or the Lat Tower
(14) are not being used, store them away from
the weight bench, and insert the 32mm Square
Inner Cap (53) into the Front Leg (8).
45
27
Hole
Adjustment Hole
53
8
31
14
44
50
19
15
ATTACHING THE LAT BAR
Attach the Lat Bar (15) to the Cable (19) with a
Cable Clip (50). Remove the Lat Bar when perform-
ing an exercise that does not require it.