


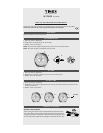
FOLDOVER CLASP BRACELET
Find spring bar that connects bracelet to clasp. Using a pointed tool (Fig. 1), push spring bar in
and gently twist bracelet to disengage. Determine wrist size, then insert spring bar in correct
bottom hole (Fig. 2). Push down on spring bar, align with top hole and release to lock in place
(Fig. 3).
Fig. 1
Fig. 2
Fig. 3
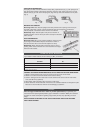
SOLID LINK BRACELET
Removing Links: Using a very small screwdriver, remove screws
by turning counterclockwise. Repeat until desired number of
links are removed. Do not remove links adjacent to clasp.
Reassembly: Rejoin bracelet parts and insert screw in end of
opening where it was removed. Turn screw clockwise until tight
and flush with bracelet.
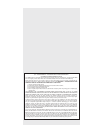
BRACELET LINK REMOVAL
Removing Links: Place bracelet upright and insert pointed tool in opening of link. Push pin
forcefully in direction of arrow until link is detached (pins are designed to be difficult to
remove). Repeat until desired number of links are removed.
Reassembly: Rejoin bracelet parts. Push pin back into link in
opposite direction of arrow. Press pin down securely into bracelet
until it is flush.
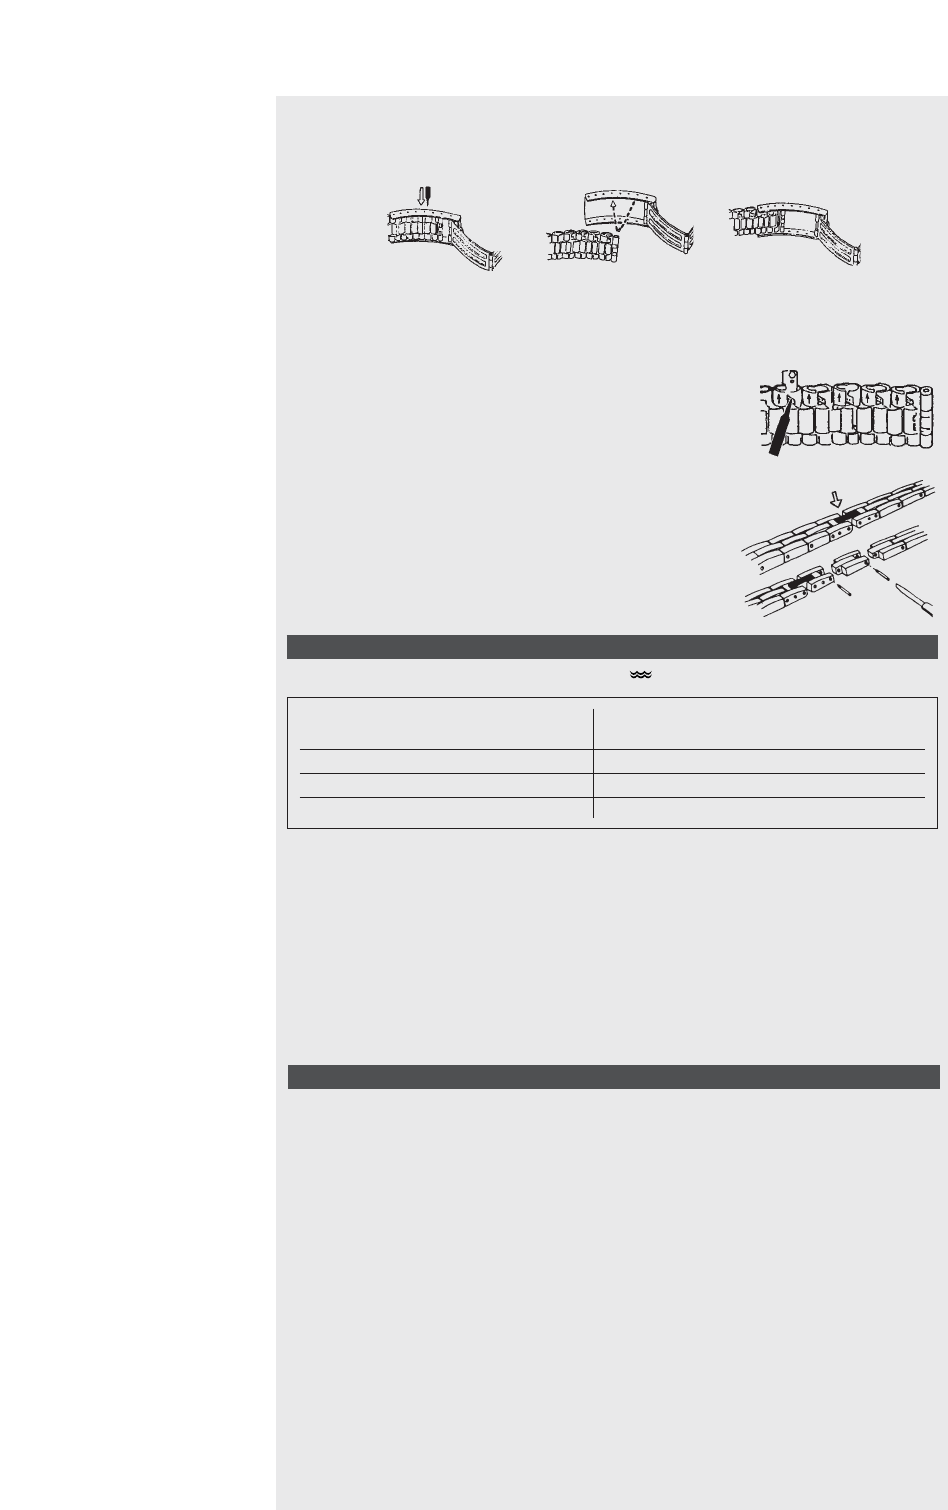
If your watch is water-resistant, meter marking or ( ) is indicated.
Water-Resistance Depth p.s.i.a.* Water Pressure Below Surface
30m/98ft 60
50m/164ft 86
100m/328ft 160
200m/656ft 284
*pounds per square inch absolute
WATER AND SHOCK RESISTANCE
BATTERY
Timex strongly recommends that a retailer or jeweler replace battery. If applicable, push
reset button when replacing battery. Battery type is indicated on caseback. Battery life estimates
are based on certain assumptions regarding usage; battery life may vary depending on actual
usage.
DO NOT DISPOSE OF BATTERY IN FIRE. DO NOT RECHARGE. KEEP LOOSE BATTERIES
AWAY FROM CHILDREN.
WARNING: TO MAINTAIN WATER-RESISTANCE, DO NOT PRESS ANY BUTTONS UNDER WATER.
1. Watch is water-resistant only as long as crystal, crown and case remain intact.
2. Watch is not a diver watch and should not be used for diving.
3. Screw-in setting crown and case back must be screwed into case to assure water-resist-
ance (see Set Time). (Optional)
4. Rinse watch with fresh water after exposure to salt water.
5. Shock-resistance will be indicated on watch face or caseback. Watches are designed to pass
ISO test for shock-resistance. However avoid damaging crystal/lens.