


UUssiinngg YYoouurr CCaarrdd RReeaaddeerr
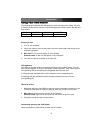
The following table illustrates the designation for each card port on the reader. Be sure
to use the correct slot as indicated, to avoid damaging your Flash Cards or the data that
they contain:
Inserting a Card
1. Turn on your computer.
2. Insert your memory card into the proper slot on the card reader, with the top of the
card facing upwards..
3. Mac users: A new icon will appear on your desktop.
Windows users: A new icon will appear in “My Computer.”
4. The card can now be accessed as an extra disk.
LED Indicators
The LEDs on the card reader are your best indication of the reader’s activity. The red
light indicates whether or not your card reader is receiving power. Each card slot has a
corresponding LED as indicated by the designated letters for each slot.
A solid green light, indicates that a card is detected in the corresponding slot.
A flashing green light indicates that data is being accessed from the card in the
corresponding slot.
Removing a Card
1. Make sure that none of the LEDs on the front of the card reader are flashing. If you
remove the card when the LEDs are flashing, data may be lost from your card.
2. Mac users: drag the memory card icon to the Trash bin.
Windows users: right-click on the drive icon and choose to eject the card.
3. Physically remove the card from the reader.
Permanently removing the Card Reader
Use this procedure to permanently uninstall the card reader.
Instruction Manual
3
SLOT A SLOT B SLOT C SLOT D
SMC/Others CF/MD/Others SD/MMC/Others MS/MSPro/Others