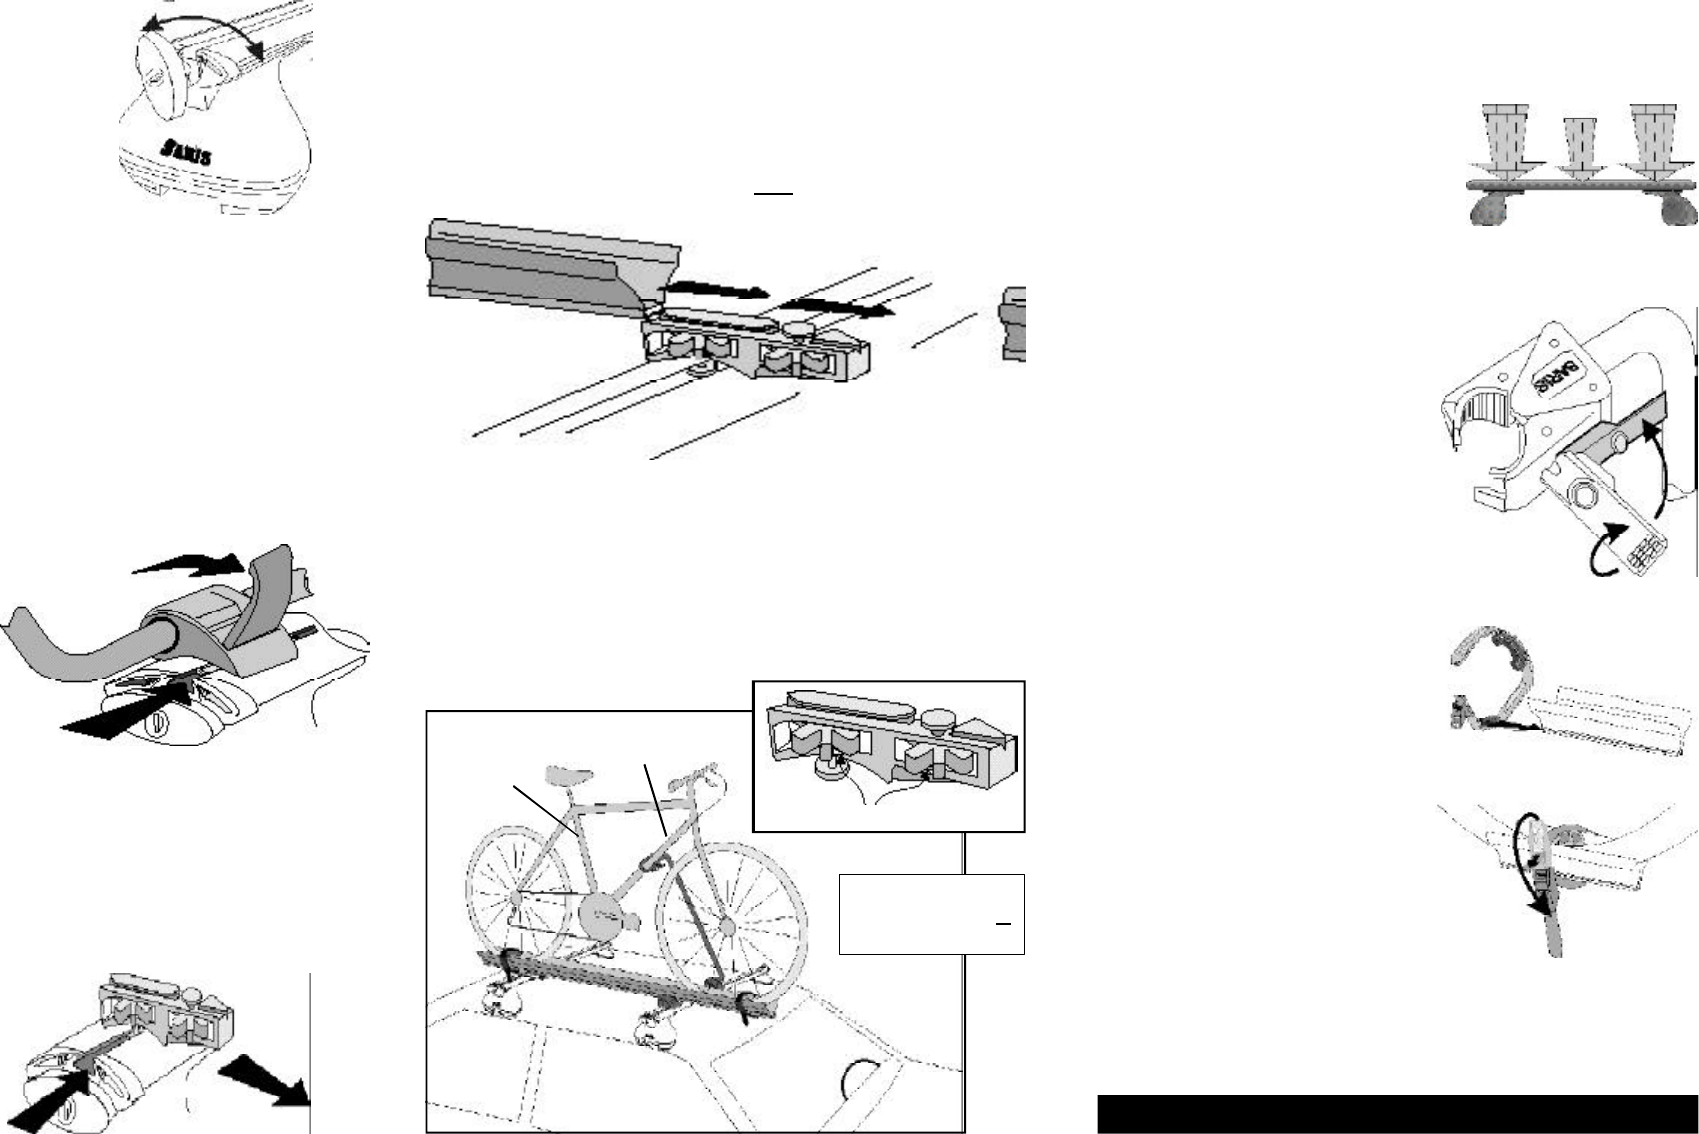
Step 2-
Open accessory tracks.
Turn knob 1/2 turn toward gray arrow
(loosening rack slightly) until the word
"LOCK" is upside down.
C)
Wheel Tray
•Loosen daisy dial attached to upright bracket.
•Align attachment block and upright bracket.
•Slide tray channel from back to front (along block to upright bracket).
Note: Slide tray forward enough to overhang load bar approximately
12-14 inches.
•Tighten upright bracket daisy dial against wheel tray. Note: Retighten
daisy dial after the first two hours of initial use.
Step 4-
Tighten all parts.
• Adjust and straighten all components.
• Close levers to hold upright arm in place.
• Secure attachment block to load bar and attachment block to wheel tray
by turning daisy dials in direction of arrows.
down
tube
seat tube
Step 5-
Mount additional accessories.
•Distribute bikes evenly along load bars.
•To carry 3 or more bikes, it may be
necessary to alternate direction bikes
face. To do so, reverse entire setup
such that bikes face the opposite
direction.
•Balance load evenly.
Instructions continued on back...
arrows
Direction of opposite
load bar
Step 3-
Slide components into tracks.
A) Upright Arm
•Lift levers of upright arm.
•Align tabs with load bar
accessory track.
•Slide component into
track.
•Close levers.
Note: Adjustment of
lever tension is preset. If
component will not slide into
track, loosen tension screw between tabs. If component still
slides when lever is closed, tighten tension screw.
B) Attachment Block
•Position curved side of block down
against load bar with wheel tray
dial toward opposite load bar.
•Align bolt head with
accessory track.
•Slide block into track.
Note: Upright arm can
be mounted to front or
rear load bar.
Step 6-
Load bikes.
•Lift bike and place tires in wheel tray.
(Bikes can face either direction.)
•Open upright clamp, fasten around
seat tube with arm next to rear tire or
down tube with arm next to front tire
(avoiding cables).
•Rotate clamp handle enclosing
clamp around bike tube (A) and
close handle (B). Clamp should
firmly grasp bike tube.
•Align tab of wheel straps with wheel
tray channel and slide into place.
Secure both tires. Center shim
over narrow tires and remove shim
for wide tires. Thread strap through
buckle and snap buckle down to
secure .
Note: When not in use, buckle
straps firmly or remove to prevent
loss.
B
A
Note:
For upright clamp locking capabilities, Lock Plug Kits are available through
your local Saris dealer. To complete a single key locking system,
purchase the Lock Plug item number identical to the number on your Saris
load bar key.
Insert Lock Plug per instructions before mounting upright arm to load bar.


