


6
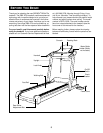
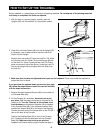
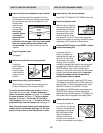
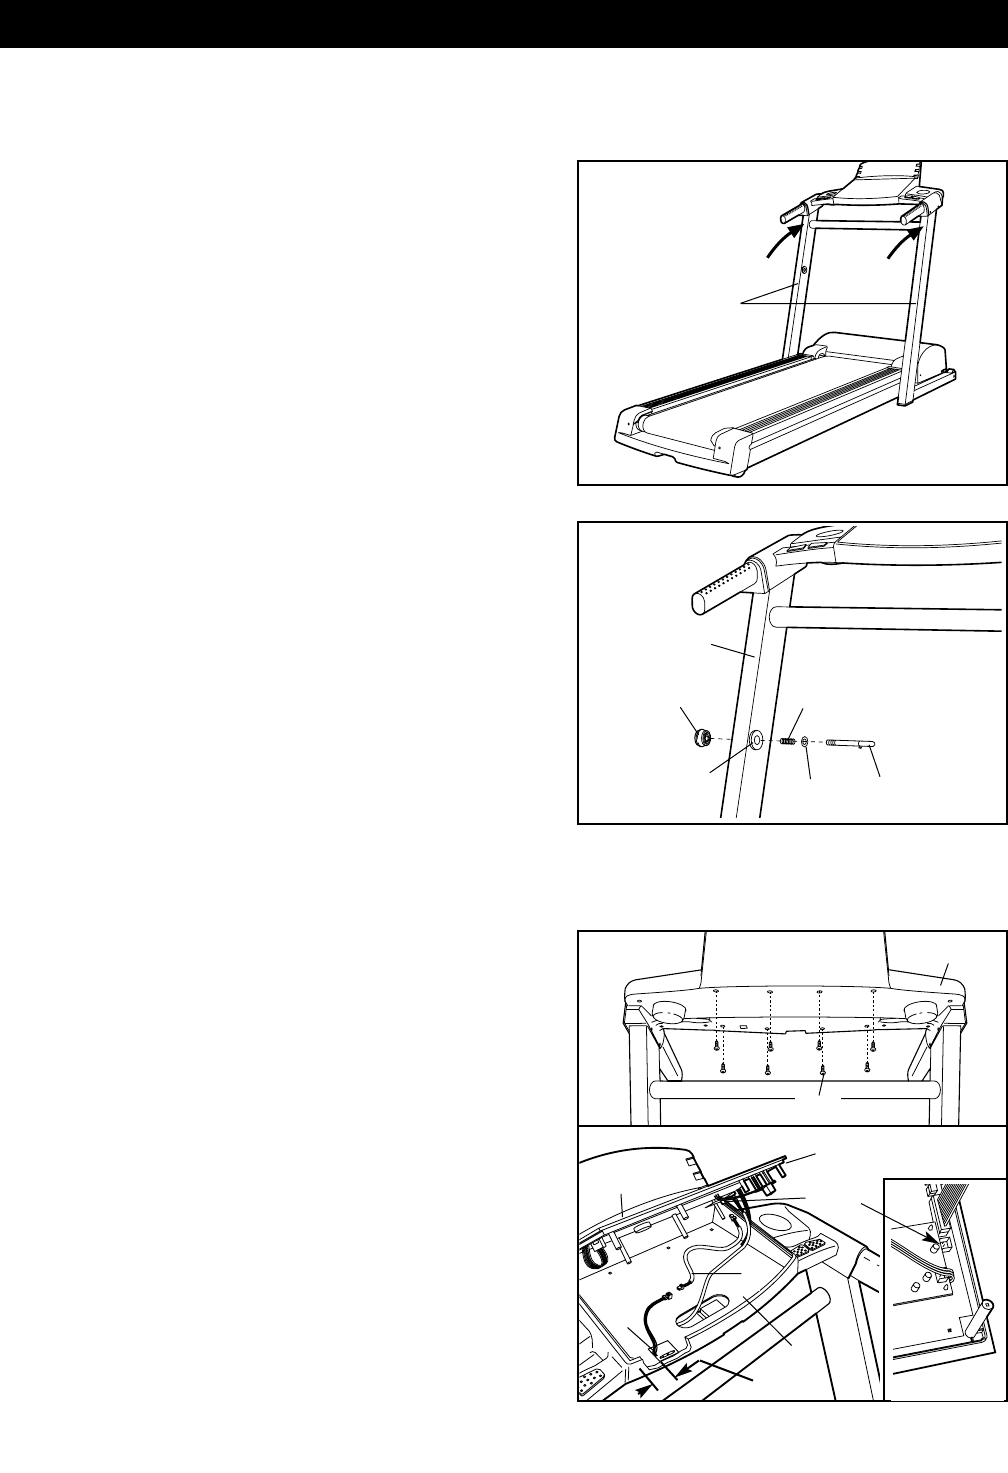
1. With the help of a second person, carefully raise the
Uprights (65) until the treadmill is in the position shown.
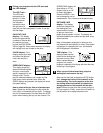
2. Press the Lock Knob Sleeve (68) into the left Upright (65).
If necessary, use a rubber mallet to tap the Lock Knob
Sleeve into the Upright.
Remove the Lock Knob (67) from the Lock Pin (72). Make
sure that the Lock Pin Collar (70) and the Spring (69) are
on the Lock Pin. (Note: If there are two Lock Pin Collars,
place one on each side of the Spring.) Insert the Lock Pin
into the left Upright (65) and tighten the Lock Knob onto
the Lock Pin.
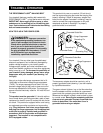
3. Make sure that all parts are tightened before you use the treadmill. Place a mat under the treadmill to
protect the floor or carpet.
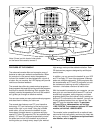
If you purchase the optional heart rate monitor (see page
20), follow the steps below to install the receiver included
with the heart rate monitor.
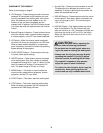
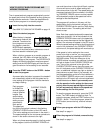
1. Remove the eight indicated Screws (66) from the back of
the Console Base (80).
2. Lift the Console (81) as shown; be careful not to pull
any wires. Peel the paper off the pad on the back of the
Receiver (A). Turn the Receiver so the cylinder is on
the side shown, and press the Receiver into the bottom
of the Console Base (80) in the indicated location. Next,
connect the Jumper Wire (B) to the wire on the Receiver.
Connect the other end of the Jumper Wire to the PULSE 1
jack on the back of the Console.
Position the Reading Rack (25) in front of the Console
(81). Carefully set the Console back onto the Console
Base (80). Make sure that no wires are pinched.
Reattach the Console with the eight Screws (see step 1).
65
1
Set the treadmill in a cleared area and remove all packing materials. Do not dispose of the packing materials
until setup is completed. No tools are required.
HOW TO SET UP THE TREADMILL
1
80
66
2
81
25
A
2 1/2”
B
80
PULSE 1
Jack
72
70
69
67
68
65
2