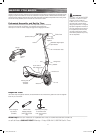
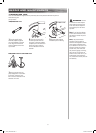
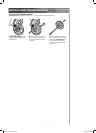
Adjusting the Handlebar Height
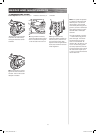
To use the brakes, squeeze the front and back brake levers to increase the
pressure on the brake. The brake lever is fi tted with a cable adjuster to compensate for cable stretch
and/or to fi ne-tune the lever movement to brake engagement. If brake is not engaging properly, follow
instructions for adjusting the brakes on page 5.
The E100 must be going 3 mph before the motor will start. Kick to 3 mph then activate the speed
control while simultaneously pressing the green“go” button to engage the motor.
Pull the quick-release lever
desired position and secure by
pushing the quick-release lever.
The tension of the quick-
release clamping mechanism
can be adjusted by tightening
or loosening the bolt with
to properly engage the quick-
release clamp may cause the
T-tube to move up or down
while riding, which may cause
you to lose control and fall.
With the quick-release properly
adjusted and engaged, the
handlebars will not move up or
tighten. You should be able
to open and close the quick-
release lever by hand, and the
T-tube should move up and
down freely with the quick-
brake is capable of skidding
unsuspecting rider. Practice
in an open area free from
obstacles until you are familiar
with the brake function. Avoid
skidding to a stop as this can
cause you to lose control or
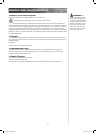
Check the Razor web site for any updates on the latest
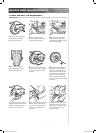
Turn power switch off before conducting any maintenance procedures.
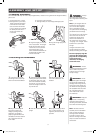
To adjust the brake cable
play, thread the brake lever
adjuster in or out 1/4 to 1/2 turn
until the desired brake adj
ust-
ment is attained. Most
adjustments are complete at
this step. If brake still needs
further adjustment, proceed to
step 2.
Inspect the brake pads (A)
for proper alignment against
the wheel or excess wear. To
realign brake pads, loosen the
fi xing nut (B) and adjust the pad
to contact the rim. Retighten
and test the function, readjust
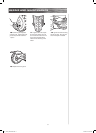
If the brake lever adjuster is
threaded outward and the brake
still has too much slack, use the
rear brake adjuster for addi-
E_Series_Manualv10.indd 5 3/10/06 2:10:57 PM