


11
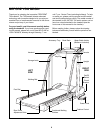
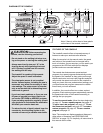
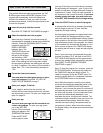
DIAGRAM OF THE CONSOLE
Refer to the drawing on the opposite page.
A. Workout graphsÑThese graphs show the settings
of the seven preset programs. During the AEROBIC
program, for example, the graph shows that the
speed of the treadmill will gradually increase during
the first half of the program, and then gradually
decrease during the last half of the program.
B. Mode indicatorsÑThese indicators show when the
manual mode is selected and when one of the
seven preset programs is selected.
C. Step-by-step instructionsÑThese instructions
provide a quick overview of console operation.
D. LED trackÑThis display shows your progress
around a 1/4-mile ÒtrackÓ as you exercise.
E. TIME/PACE displayÑWhen the manual mode is
selected, this display shows both the elapsed time
and your current pace (in minutes per mile). When a
preset program or a custom program is selected, the
display will show the time remaining in the program
and your current pace.
F. SPEED/INCLINE displayÑThis display shows the
speed of the walking belt and the incline level of the
treadmill. This display is also used to enter your age
into the console.
G. CALORIES/FAT CALORIES/PULSE displayÑThis
display shows three numbers: the approximate
number of calories you have burned, the number of
fat calories you have burned, and your heart rate.
H. DISTANCE/LAPS displayÑThis display shows the
distance that you have walked and the number of
1/4-mile laps you have completed. This display is
also used to enter your weight into the console.
I. RECORD buttonÑThis button is used to create and
modify custom programs.
J. USER 1 and 2 buttonsÑThese buttons are used to
select the two custom programs.
K. PROGRAM SELECT buttonÑThis button is used to
select the manual mode and the seven preset
programs.
L. START buttonÑThis button is used to start the
walking belt.
M. STOP/PAUSE buttonÑThis button is used to stop
the walking belt.
N. Key with clipÑThe key turns the console on and off.
The clip is worn on the waistband of your clothes.
O. INCLINE buttonsÑThese buttons are used to
change the incline of the treadmill. The incline range
is 1.5% to 10%.
P. SPEED buttonsÑThese buttons are used to change
the speed of the walking belt. The speed range is
0.5 mph to 10 mph. Note: When the START button
is pressed, the walking belt will begin to move at 1.0
mph.
Q. SET AGE buttonsÑThese buttons are used to enter
your age into the console. You must enter your age
to use the FAT BURN, AEROBIC, or FITNESS
TEST program.
R. SET WEIGHT buttonsÑThese buttons are used to
enter your weight into the console.
Note: Each time one of the buttons is pressed, a tone
will sound. If a button is pressed at the wrong time (for
example, if a SPEED button is pressed while the
walking belt is stationary), a different tone will sound.
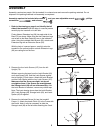
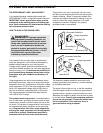
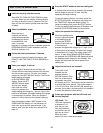
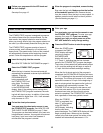
HOW TO TURN ON THE POWER
Locate the on/off
switch on the front
of the treadmill.
Make sure that the
on/off switch is in
the ÒonÓ position.
Plug in the power cord (see page 9). All displays
and indicators on the console will flash once.
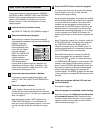
Note: If the key is in the console when the power
cord is plugged in, the letters ÒPOÓ will flash in the
SPEED/INCLINE display. If this occurs, remove
the key.
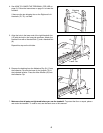
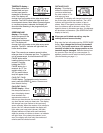
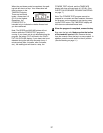
Stand on the foot
rails of the treadmill.
Find the clip
attached to the key
and slide the clip
onto the waistband
of your clothing.
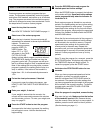
Next, insert the key into the console. After a
moment, the MANUAL indicator, one indicator in
the LED track, and the TIME/PACE display will
light. In addition, the word ÒAGEÓ will appear in the
SPEED/INCLINE display and the letters ÒLbSÓ will
appear in the DISTANCE/LAPS display.
1
2
3
ÒOnÓ
Position