


page 8
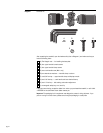
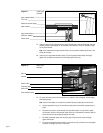
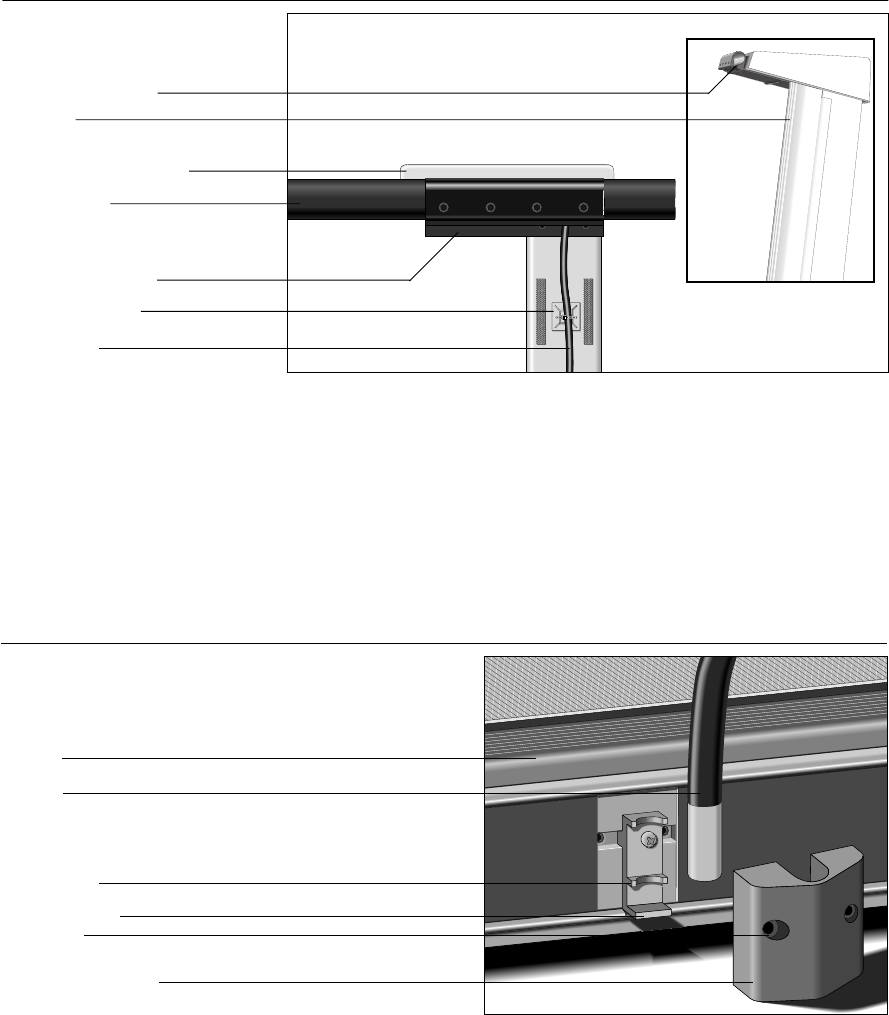
21. Insert the upper end of a handrail into the upper handrail clamp until the black foam wrap just
touches the clamp. See Diagram 9. Set the base of the handrail on the floor. Repeat this step
for the other handrail.
Note: Look underneath the upper handrail clamp to be sure that the handrail ends meet in the
middle of the clamp.
22. Insert the four upper handrail clamp screws (C) into the upper handrail clamp and finger-
tighten.
Do not tighten the screws more than finger tight at this point.
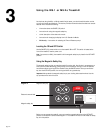
Attach lower
handrails
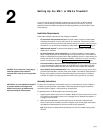
23. To mount the lower portion of the handrails to the treadmill, refer to Diagram 10 while taking
the following steps:
Note: Perform these steps on one side of the treadmill before proceeding to the other side.
a. Use the supplied hex key (G) to remove the screws that hold the lower handrail clamp in
place.
b. Place the lower portion of the handrail onto the plastic cradle. You may need to gently
flex the lower portion of the handrail toward the front of the treadmill to securely seat the
end of the tube onto the projecting ledge of the cradle.
c. Re-install the handrail clamp over the tube, align the screw holes, insert and finger-
tighten each screw.
d. To secure the handrail inside the clamp, use the hex key (G) provided. Do not overtighten
the screw or damage may occur to the clamp.
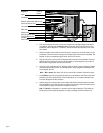
Upper handrail
Electronic console display
Trim strip
Upper handrail clamp
Diagram 9
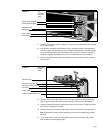
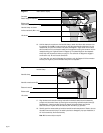
Install upper
handrails
Upper handrail clamp
Cable tie & fastener
Ribbon cable
Lower handrail clamp
Projecting ledge
Plastic cradle
Handrail
Side rail
Diagram 10
Screw hole