


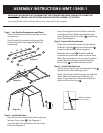
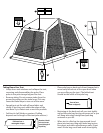
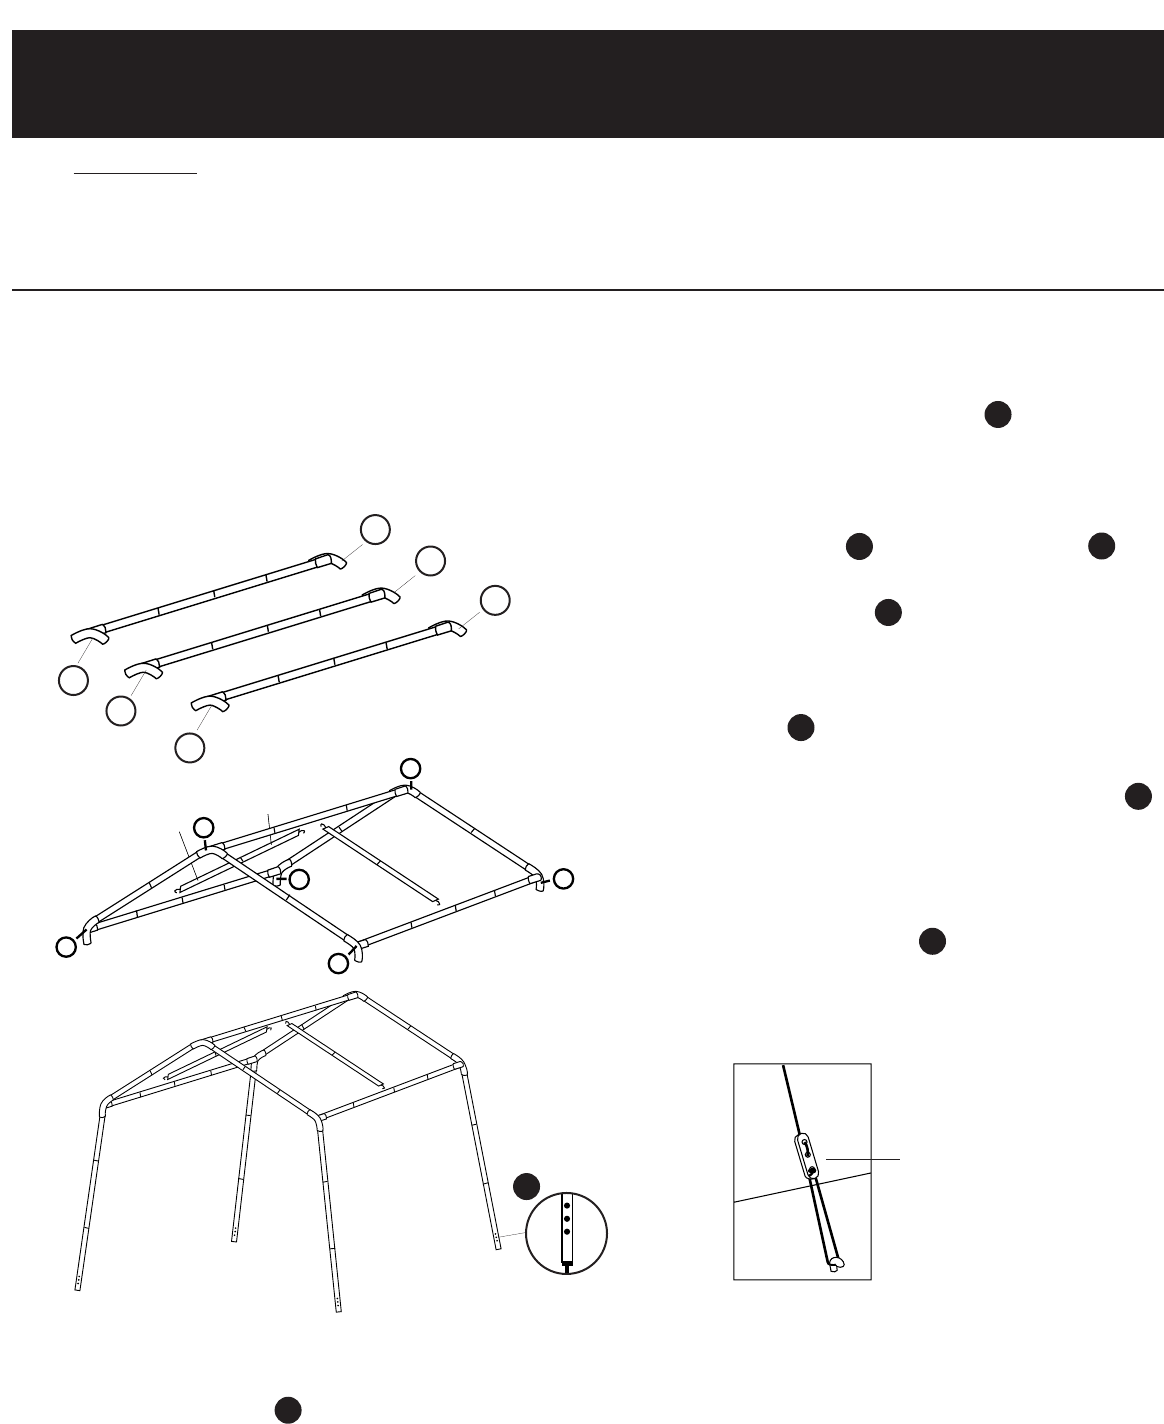
Step 1 – Lay Out the Screenhouse and Poles
Select a smooth, level site and spread out your
screenhouse.
Sort the poles by number and connect the
sections together. See diagrams below for
numbering.
Step 2 – Install the Poles
Insert the ends of each of the three roof poles
into the 3-way hubs . See Diagram 1.
Insert the four side roof poles into the 3-way
hubs. See Diagram 2.
Insert the leg poles into the hubs to raise the
screenhouse frame. Make sure that the pole
end with the holes in the sides ( ) is pointing
down. See Diagram 3.
Step 3 –Secure the Screenhouse
Drape the screenhouse body over the frames.
Hook the S-Hooks into one of the holes
located at the bottom of the leg poles.
Wrap the velcro tape , located inside the
screenhouse, around the poles to secure them.
When the screenhouse is in its proper location,
stake it down by driving stakes through the
four D-rings located on at the corners.
Step 4 – Install the Guy Lines
Tie the loose end of a guy line through D-ring
Repeat for the other three guy lines.
Make a loop at the end of the guy line with the
slider. Stake the looped end of the line out
about 3' from the base of the pole. Adjust the
slider until the line is taut .
ASSEMBLY INSTRUCTIONS: WMT-1390S-1
2B
2B
2B
2
2B
2B
2B
2
2B
2B
2B
2
1B
1
1
1B
1
T
L
5
5B
1B
R
R
L
5B
5
2
2B
2B
2B
T
2B
2B
2B
2
1B
1B
4
1B
1B
4
1B
1B
4
1B
1B
4
2B
2B
2B
2
E
H
B
D
A
G
Diagram 1
Diagram 2
Diagram 3
slider for adjusting
guy line tension
IMPORTANT: WE ADVISE YOU TO ASSEMBLE THE TENT ONCE BEFORE GOING CAMPING TO ASSURE THAT
ALL PARTS ARE PRESENT AND TO BECOME FAMILIAR WITH THE ASSEMBLY OF THE TENT.
To prolong the life of the tent floor,select a level, clean area for the campsite.
C
C
C
T
L
R
T
L
R
hub