


4
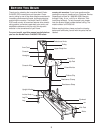
Place all parts of the ski exerciser in a cleared area and remove the packing materials; do not dispose of the
packing materials until assembly is completed. Assembly requires only the included flat wrench tool.
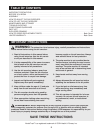
ASSEMBLY
1
3
73
72
2
Hole
1
2
74
92
Stud
Slots
93
94
76
2
76
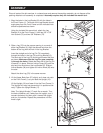
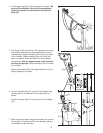
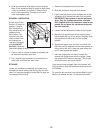
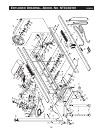
1. Align the holes in the Leg Bracket (2) with the holes in
the Front Frame (1). The ends of the Leg Bracket should
angle away from the Front Frame and the indicated hole
should be positioned as shown.
Using the included flat wrench tool, attach the Leg
Bracket (2) to the Front Frame (1) with two 3/8” x 5/8”
Hex Screws (73) and two 3/8” Washers (72).
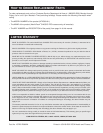
2. Slide a Leg (76) into the square opening in one end of
either Leg Bracket (2). Align the second hole from the
bottom of the Leg with the hole in the Leg Bracket.
Insert the straight end of a Leg Pin (74) completely
through the holes in the Leg (76) and Leg Bracket (2).
The bent end of the Leg Pin should point toward the floor
as shown. Make sure that the Leg Pin goes complete-
ly through the holes. Rotate the bent end of the Leg Pin
to secure it in place. Slide an Incline Clamp (92) onto the
stud and into the slots on the Leg Bracket (2). Slide an
Incline Washer (94) and tighten an Incline Knob (93) onto
the stud.
Attach the other Leg (76) in the same manner.
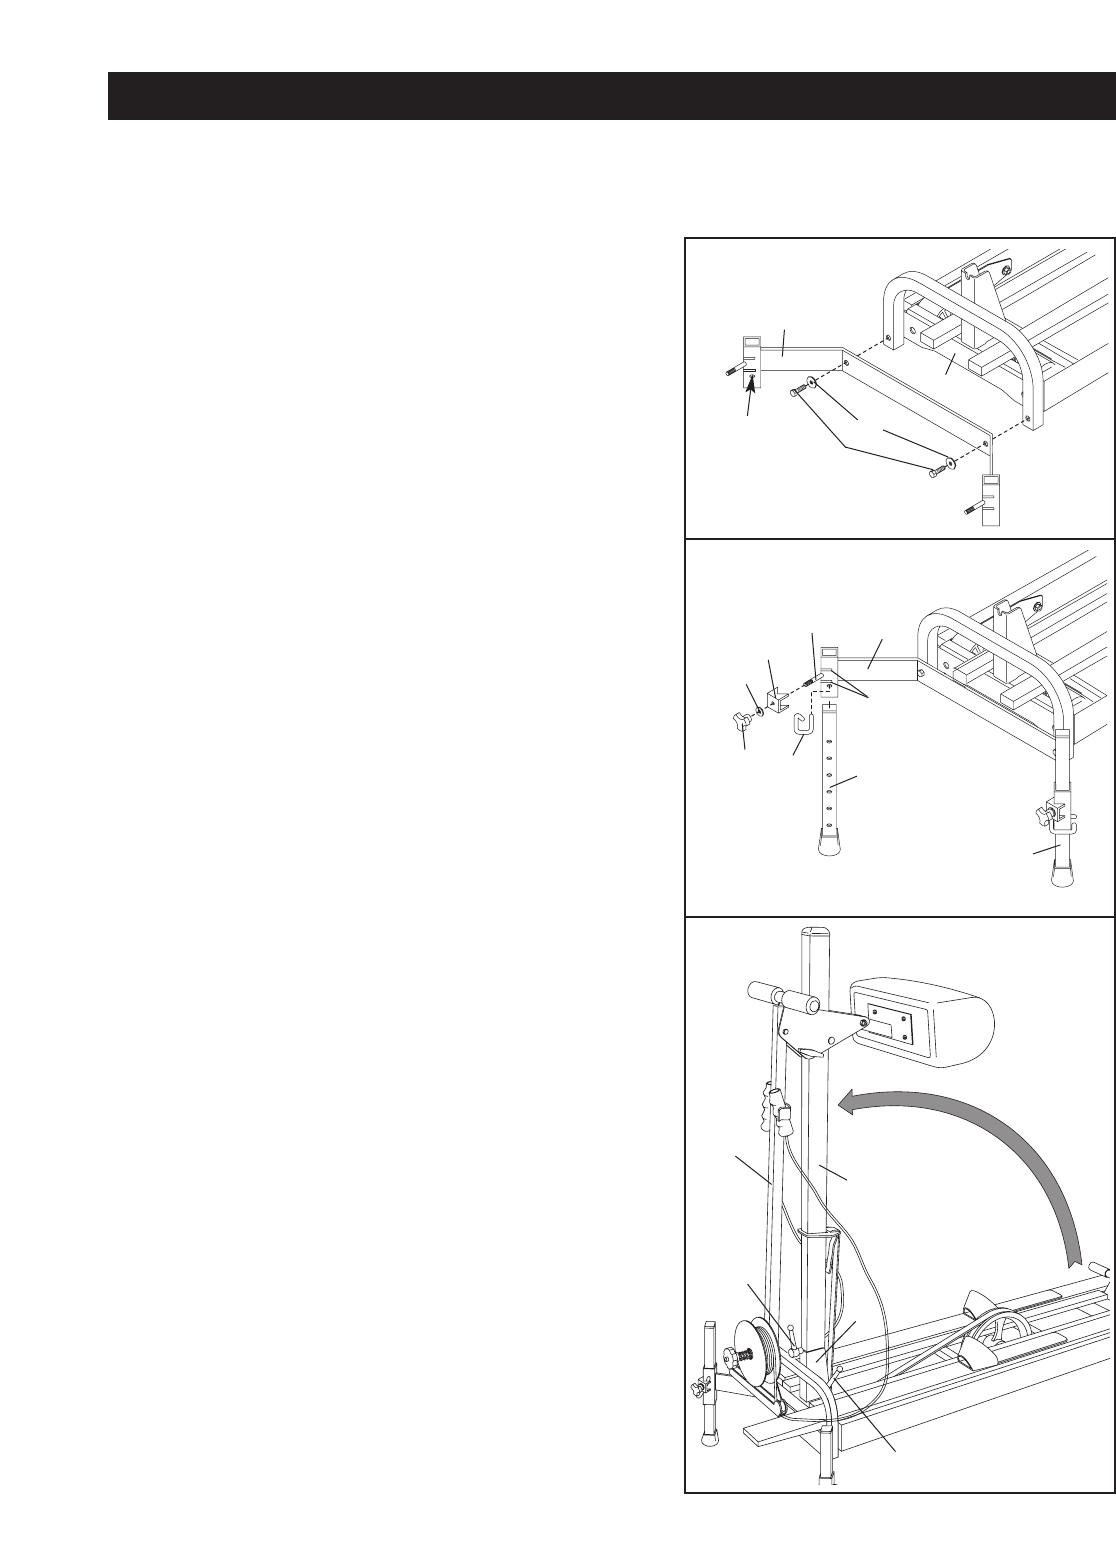
3. Lift the Upper Body Arm (27) slightly so it does not catch
on the Front Frame (1) as you raise the Upright (16).
Lift the Upright (16) and lower it into the Front Frame (1).
The Upright will snap into place when it is positioned cor-
rectly. Tighten the Upright Knobs (17).
Note: The Upright Knobs (17) work like a wrench. Turn
the knob clockwise, pull it away from the upright, turn it
counter-clockwise, and then push it toward the upright
and turn it clockwise. Repeat this proceedure until the
knob is tight.
27
16
17
17
1