


29
PROBLEM: The walking belt slows when walked on
SOLUTION: a. Use only a single-outlet surge suppressor that meets all of the specifications described on page 9.
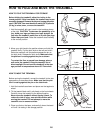
b. If the walking belt is overtightened, treadmill perfor-
mance may decrease and the walking belt may be-
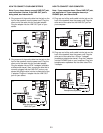
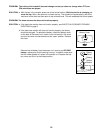
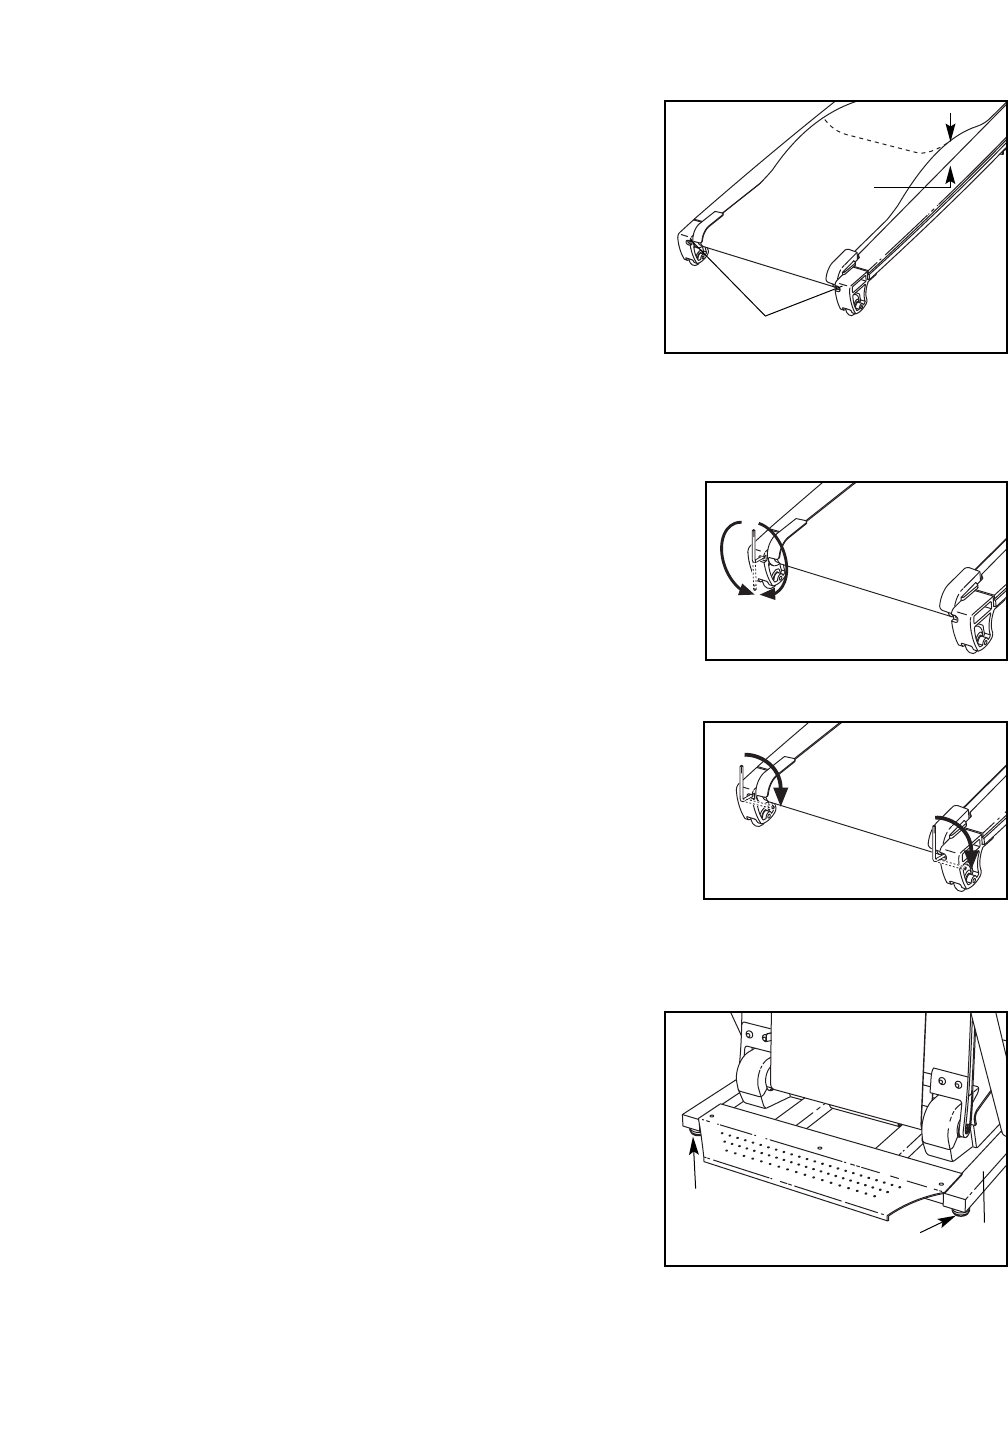
come damaged. Remove the key and UNPLUG THE
POWER CORD. Using the allen wrench, turn both
rear roller adjustment bolts counterclockwise, 1/4 of a
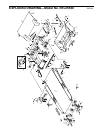
turn. When the walking belt is properly tightened, you
should be able to lift each side of the walking belt 3 to
4 inches off the walking platform. Be careful to keep
the walking belt centered. Plug in the power cord, in-
sert the key, and run the treadmill for a few minutes.
Repeat until the walking belt is properly tightened.
c. If the walking belt still slows when walked on, call our Customer Service Department, toll-free.
PROBLEM: The walking belt is off-center or slips when walked on
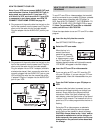
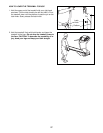
SOLUTION: a. If the walking belt is off-center, first remove the key and
UNPLUG THE POWER CORD. If the walking belt has
shifted to the left, use the allen wrench to turn the left
rear roller bolt clockwise 1/2 of a turn; if the walking belt
has shifted to the right, turn the bolt counterclockwise
1/2 of a turn. Be careful not to overtighten the walking belt.
Plug in the power cord, insert the key, and run the treadmill
for a few minutes. Repeat until the walking belt is cen-
tered.
b. If the walking belt slips when walked on, first remove the
key and UNPLUG THE POWER CORD. Using the allen
wrench, turn both rear roller bolts clockwise, 1/4 of a turn.
When the walking belt is correctly tightened, you should
be able to lift each side of the walking belt 3 to 4 inches off
the walking platform. Be careful to keep the walking belt
centered. Plug in the power cord, insert the key, and care-
fully walk on the treadmill for a few minutes. Repeat until
the walking belt is properly tightened.
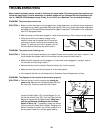
PROBLEM: The treadmill rocks during use
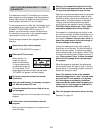
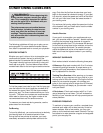
SOLUTION: a. If the treadmill rocks slightly during use, turn one or
both of the Leveling Feet (127) under the Upright (99)
until the the rocking motion is eliminated. Note: If nec-
essary, tip the treadmill forward and use a phillips
screwdriver to turn the Leveling Feet.
Rear Roller Adjustment Bolts
3”–4”
b
a
b
127
127
a
99