


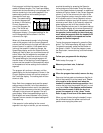
7. Make sure that all parts are tightened before you use the treadmill. Keep the included allen wrench in a
secure place. The allen wrench is used to adjust the walking belt (see page 24). To protect the floor or carpet
from damage, place a mat under the treadmill.
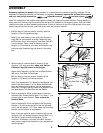
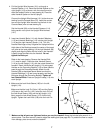
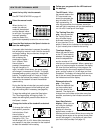
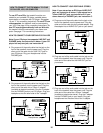
5. Insert two Handrail Bolts (111) with Handrail Washers
(112) and Handrail Bushings (113) into the right Upright
(110) and the right Handrail Spacer (114). Turn the
Handrail Bushings so they fit against the Upright with the
thick sides of the Bushings toward the center of the tread-
mill (refer to the inset drawing). Lift the right Handrail (89)
slightly and align the Bolts with the holes in the Handrail.
Loosely thread the Bolts into the Handrail. Do not
tighten the Bolts yet.
Refer to the inset drawing. Remove the Handrail Bolt
(111) used in step 3. Place the other Handrail Spacer
(114) on the left Upright (110), with the cutout toward the
treadmill. Reach inside the left Upright (110) and spread
the tabs on the Grounding Bracket (115) to allow a Bolt to
pass through the Grounding Bracket. Attach the left
Handrail (89) as described above. Make sure that the
Handrail Bushings (113) are turned properly and that the
Bolt goes through the Grounding Bracket. Tighten all
four Handrail Bolts. Press an Upright Endcap (116) into
each Upright.
5
111
111
112
113
Thick
Side
110
115
114
116
89
89
113
112
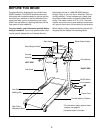
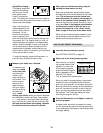
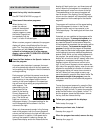
4. Pull the Upright Wire Harness (101) up through a
Handrail Spacer (114). Place the Handrail Spacer on the
right Upright (110) as shown, with the cutout turned to-
ward the treadmill (refer to inset drawing A). Place the
other Handrail Spacer on the left Upright.
Connect the Upright Wire Harness (101) to the wires ex-
tending from the Console Base (76). Insert the connec-
tors and the Upright Wire Harness into the hole in the
Console Base (refer to inset drawing B).
Set the Handrail (89) on the Handrail Spacers (114),
being careful not to pinch the Upright Wire Harness
(101).
4
101
110
89
76
114
110
114
76
101
A
B
Cutout
7
114
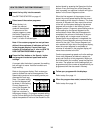
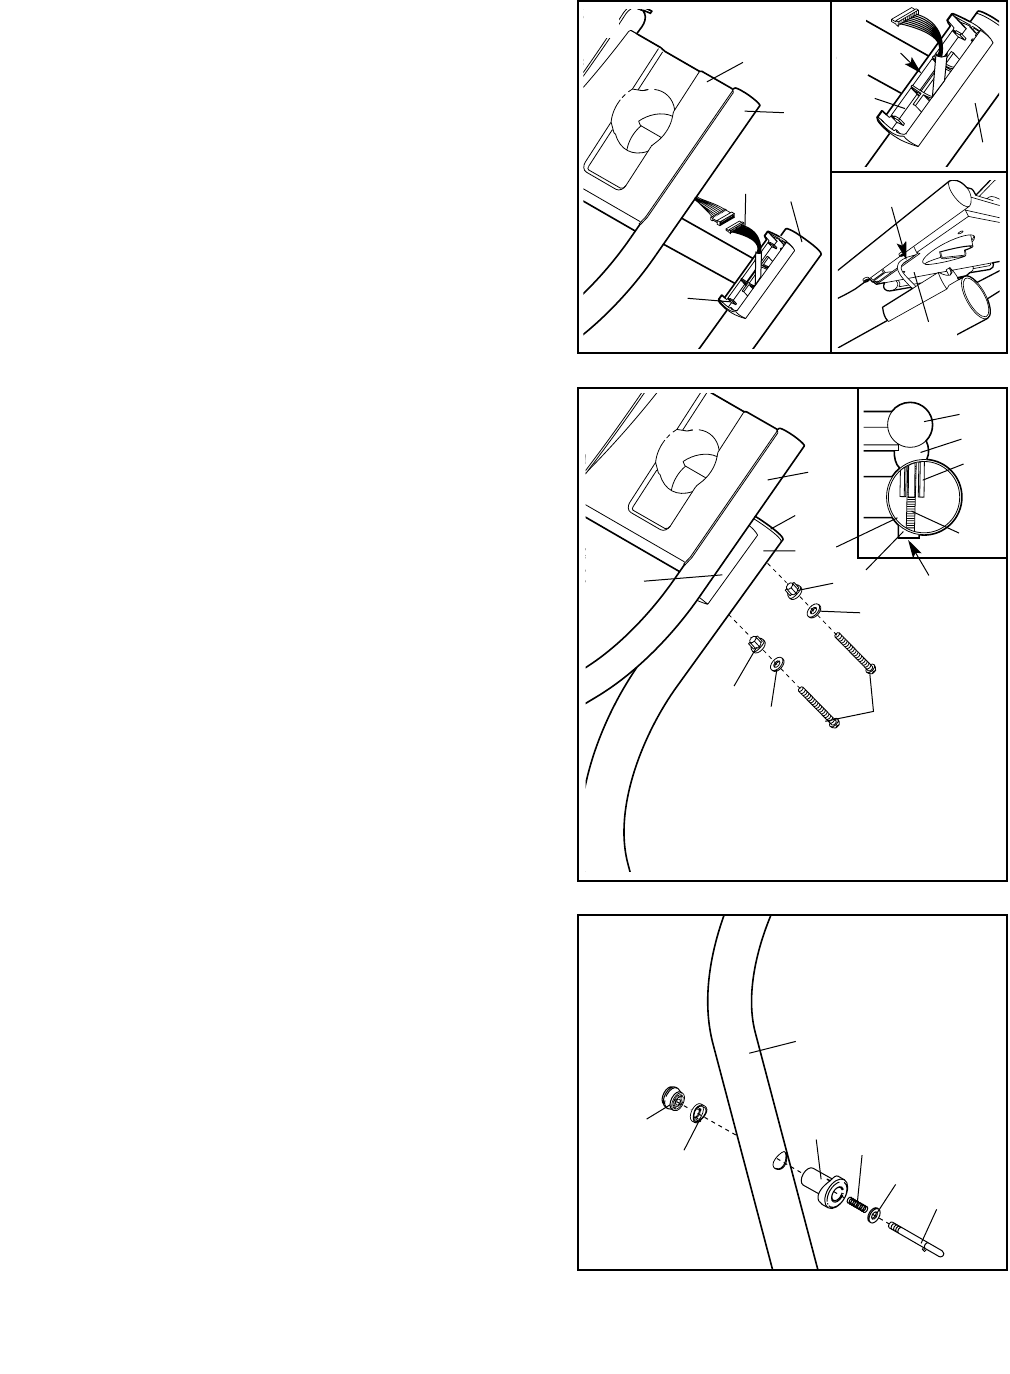
6. Make sure the Lock Knob Sleeve (106) is in the left
Upright (110).
Make sure that the Lock Pin Collar (105) and the Spring
(104) are on the Lock Pin (102). Insert the Lock Pin into
the Lock Knob Sleeve (106) and the left Upright (110).
Next, press the Lock Knob Spacer (107) onto the left
Upright. Tighten the Lock Knob (108) onto the Lock Pin.
110
107
106
108
104
105
102
6