4. SUPPLIED ACCESSORIES
SIB 16x40 Gyro is supplied in the following assembly:
- Device
- Objective lens caps
- Carrying Case
- Neck Strap
- Hand Strap
- DC regulator
- User’s manual
- Warranty card
Optional accessories
:
- Amber Filters (optional)
-
Night Vision eyepieces (optional)
1 pc.
2 pc.
1 pc.
1 pc.
1 pc.
1 pc.
1 pc.
1 pc.
2 pc.
2 pc.
5. OPERATION INSTRUCTIONS
5.1. Preparing the Device for Operation without Image
Stabilization
1. Remove the device from the case and adjust neck strap (7)
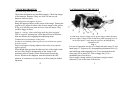
and hand strap (1) (fig. 1).
2. Remove the protective caps from the objective lenses and, if
necessary, mount the optional light filters.
3. Adjust the interpupillary distance-using lever (9).
4. Adjust the dioptric correction by rotating rings on the eyepieces (8).
5. Now the device can operate as a conventional 16
x
magnification binocular.
8
5.2. Preparing the Device for Operation with Image
Stabilization
1. Put the lens caps on the objective lenses. Take the power
supply unit in your left hand.
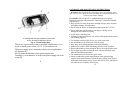
2. Pull out pin (3) on the power supply unit (fig. 2) and
disconnect the power supply unit from the device with an
easy movement towards you.
3. Insert six AA batteries into the cartridge (1) (fig. 2)
observing correct polarity.
4. Mount the cartridge with batteries into the power supply unit
(2) (fig. 1) and secure it by cramp (4) (fig. 2).
5. ATTENTION! To avoid damage of the cramp, while
mounting the cartridge into the power supply unit, particular
attention must be drawn to its position respecting to the body
of the power supply unit. While the cartridge is being
mounted into the power supply unit, the cramp should be
placed above the cartridge.
6. In order to connect the power supply unit to the device, pull
out pin (3) with an easy movement in the direction away
from you and then release the locator to bring the power
supply unit against the delimiter. Turn on the device by
setting supply voltage switch (4) (fig. 1) to ON position and
check the power supply unit for proper operation (indicator
(3) must glow brightly).
9


