


2
Life Fitness Rear-Drive Cross-Trainers
How To… Install the Clevis Repair Kit (Continued)
Service Tools Require: Phillips Screwdriver, Wire Brush & Two 9/16” Wrenches
Service Kit: GK61-00002-0046
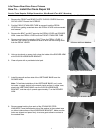
9. Install the new SHAFT provided into the PEDAL LEVER BUSHINGS.
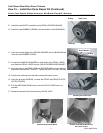
10. Install the new RUBBER O-RINGS onto the shoulder of the BUSHINGS.
11. Insert the beveled edge of the DELRIN WASHER over the BUSHING and
under the new RUBBER O-RING.
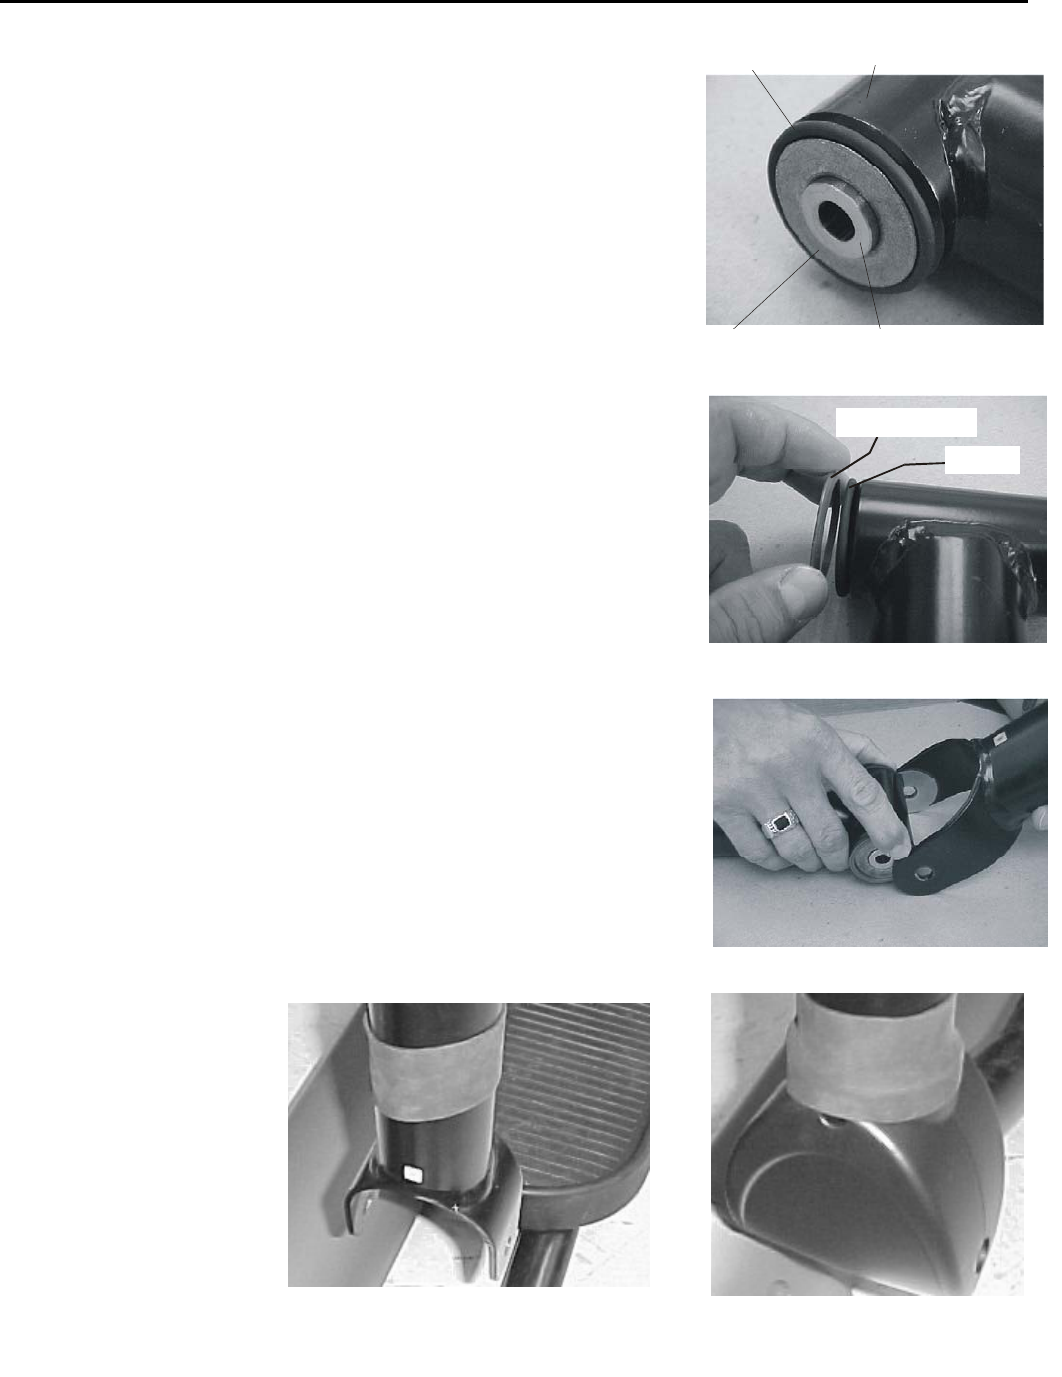
12. Compress the DELRIN WASHERS on both sides of the PEDAL LEVER
and insert the PEDAL LEVER into the CLEVIS HORSESHOE BRACKET.
13. Align the holes of the PEDAL ARM and ROCKER ARM, and re-install the
previously removed BOLT and NUT. Tighten the BOLT and NUT securely
14. Position the urethane band just above where the clevis covers.
15. Using the provided SCREWS, re-install the FRONT and REAR PLASTIC
CLEVIS COVERS.
16. Pull the URETHANE BAND down over the CLEVIS COVER as far as
possible.
17. Repeat the procedure for the remaining CLEVIS JOINT.
Pedal Lever
O-Ring
Bushing
Shaft
DELRIN Washer
O-Ring
Position urethene band
Stretch band over clevis covers
Installing the pedal lever
O-Ring Pedal Lever
Bushing Shaft
Installing the Pedal Lever
Stretch the Urethene Band Over
the Clevis Covers
Position the Urethene Band
M051-00K61-B076
Delrin Washer
O-Ring