


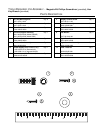


Step 1
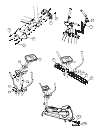
Before proceeding, familiarize yourself with the parts of the Cross-Trainer and make sure that you have received all
the items described in the Parts List.
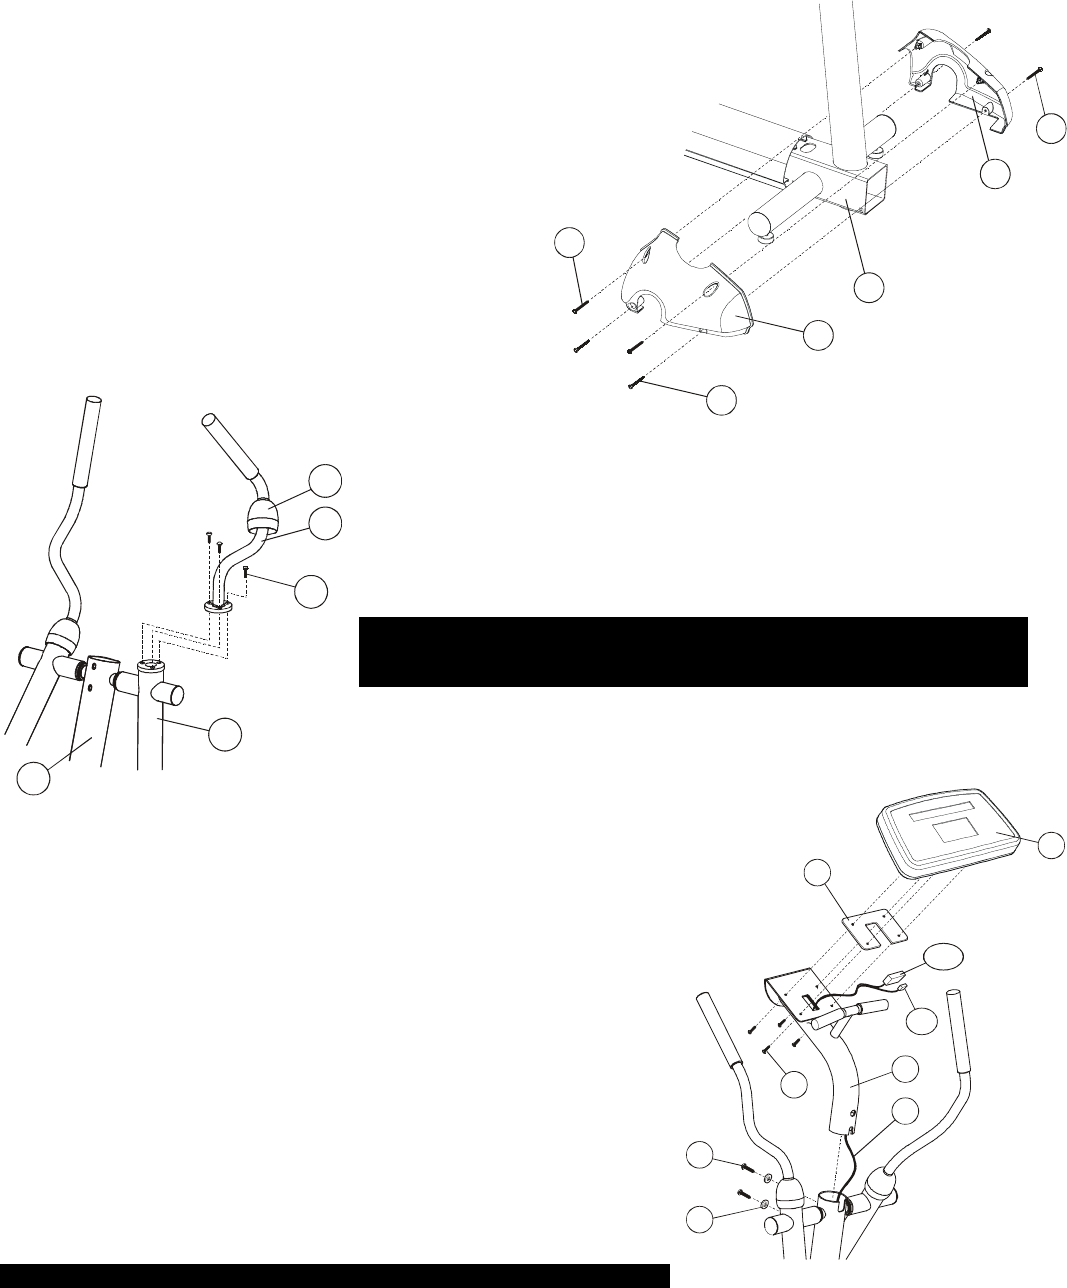
Step 2
Locate the left and right FRONT COVER (#9, #10). Using
two MOUNTING SCREWS (#3), mount the USER LEFT
FRONT COVER (#9) to the FRAME (A). Attach the USER
RIGHT FRONT COVER (#10) to the FRAME in the same
manner using two MOUNTING SCREWS (#3). Secure the
tops of the FRONT COVERS together using two
MOUNTING SCREWS (#3).
Step 3
Locate the LEFT USER ARM (#11). Secure the LEFT
USER ARM to the LEFT ROCKER ARM (B) using three
HEX KEY BOLTS (#1). Repeat the procedure for the RIGHT
USER ARM (#12). Tighten all bolts securely. Lower the
BOOT COVERS (C) down over the mounting plates.
Step 4
Detach and unwrap the WIRE HARNESS located at the top of the
MONOCOLUMN. Holding the CONSOLE SUPPORT ASSEMBLY (#7) with
the handgrips facing upward, feed the WIRE HARNESS (D) up through the
neck and out the top access hole. Carefully lower the CONSOLE
SUPPORT ASSEMBLY onto the MONOCOLUMN.
CAUTION: BE CAREFUL NOT TO PINCH THE WIRE HARNESS WHEN
ASSEMBLING THE CONSOLE SUPPORT ASSEMBLY (#7)
TO THE MONOCOLUMN (E).
Step 5
Using two HEX KEY BOLTS (#1) and 2 FLAT WASHERS (#8), secure the
CONSOLE SUPPORT ASSEMBLY to the MONOCOLUMN (E). Tighten the
bolts securely.
Step 6
Attach the 3-PIN (3P) and 10-PIN (10P) CONNECTORS to the back of the
CONSOLE ASSEMBLY.
Step 7
Place the CONSOLE ASSEMBLY SPACER (#16) onto the CONSOLE
SUPPORT ASSEMBLY (#7). Align the mounting holes in the CONSOLE
ASSEMBLY SPACER with those in the CONSOLE SUPPORT
ASSEMBLY.
Step 8
Secure the CONSOLE ASSEMBLY (#4) to the CONSOLE SUPPORT
ASSEMBLY (#7) using four MOUNTING SCREWS (#2). Tighten the
screws securely.
CAUTION: DO NOT OVER-TIGHTEN THE MOUNTING SCREWS (#3).
10
3
A
9
3
3
B
E
12
1
C
7
D
4
16
3P
1
2
8
10P
Model 5500HR Shown
Model 5500HR Shown
Model 5500HR Shown