


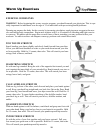
Assembly
7
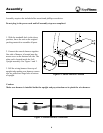
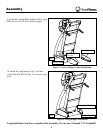
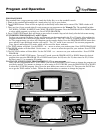
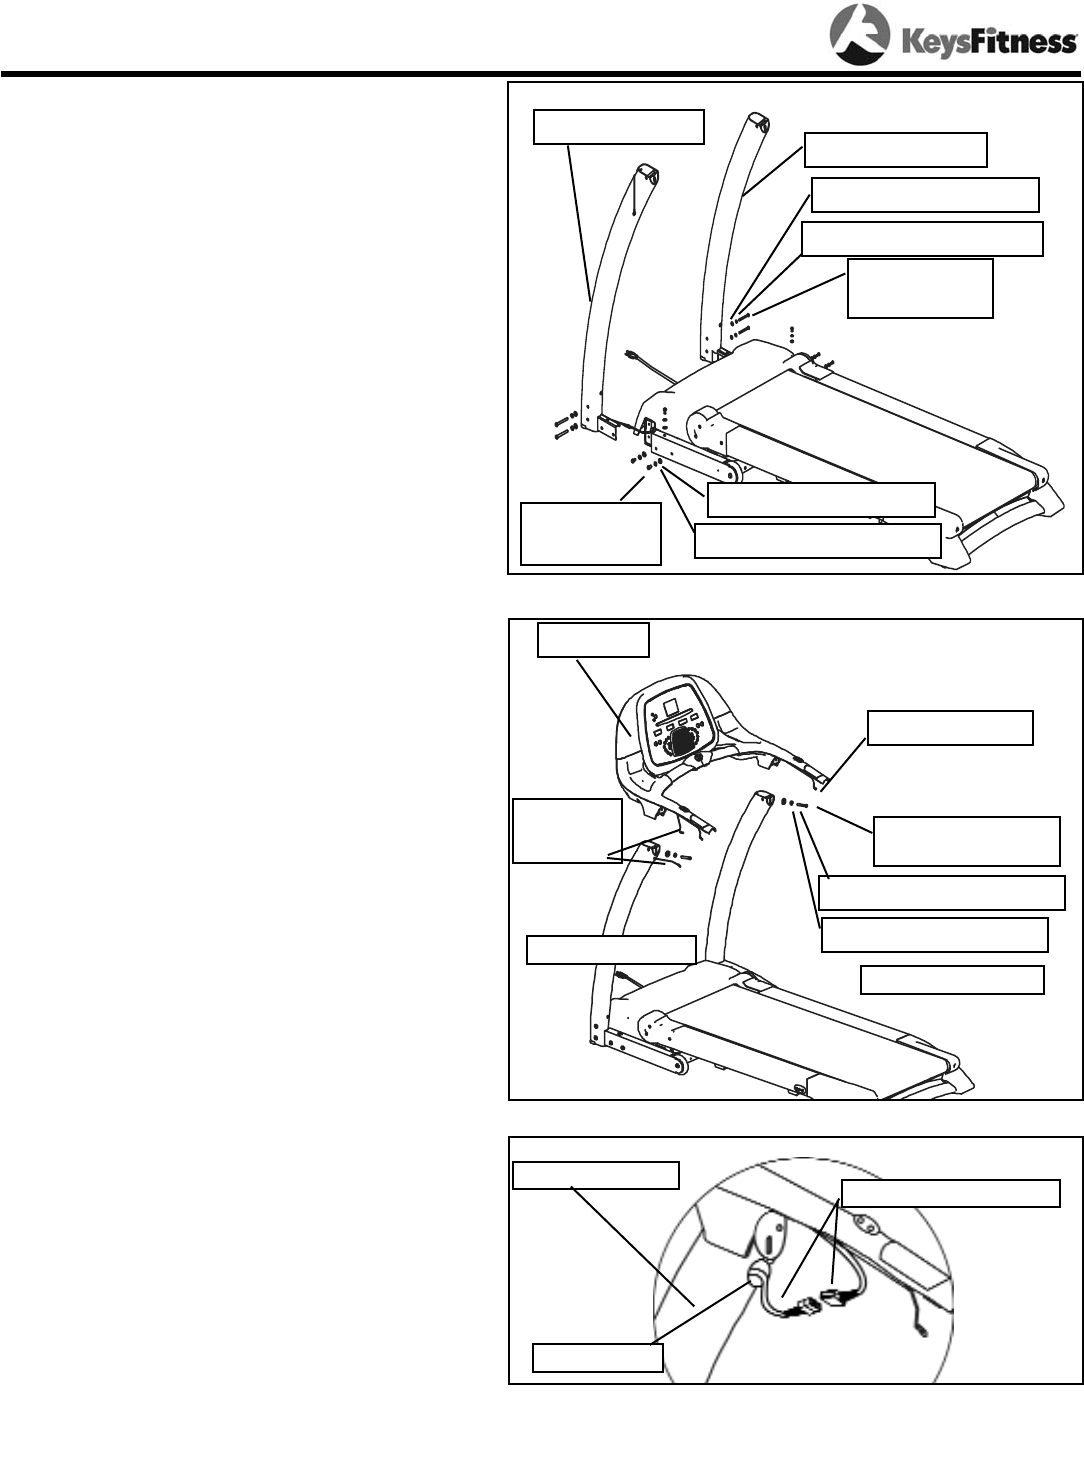
Figure 3: Left and Right Upright Installation
Figure 4: Console Installation
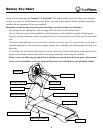
4. Install the Left and Right Uprights to the tread-
mill base frame by inserting the upright connect-
ing bracket into base frame as seen in Figure 3,
using Allen Bolt 5/16”-18 x 70 (Qty. 4), Spring
Washer 8 mm (Qty. 4), and Washer 9*16*1.6 mm
(Qty. 4).
Next, install the Allen Bolt 5/16”-18 x 15 (Qty.
6), Spring Washer 8 mm (Qty. 6), and Washer
9*16*1.6 mm (Qty. 6). Refer to Figure 3.
Note: Do not tighten hardware in step 3 until step
5 is completed.
IMPORTANT, PLEASE NOTE:
While sliding the upright connecting bracket into
the base frame, make sure the harness is installed
inside the upright and pay attention not to pinch
the wire harness. Excess Console Harness wiring
should be placed inside the Left Upright.
5. Connect the Console Harness together as shown
in Figure 4A.
Note: The upright console harness wire should be
inserted through grommet in left upright before
connecting to harness from console assembly.
6. Connect the Console to the Left and Right
Uprights by sliding the Console connecting brack-
ets into the end of the Left and Right Uprights as
shown in Figure 4. Tighten into place using 5/16”-
18x45 Shoulder Allen Bolt (Qty. 2), Spring
Washer 8 mm (Qty. 2), and Washer 9*16*1.6 mm
(Qty. 2).
LEFT UPRIGHT
LEFT UPRIGHT
RIGHT UPRIGHT
RIGHT UPRIGHT
SPRING WASHER 8 mm
SPRING WASHER 8 mm
SPRING WASHER 8 mm
CONSOLE
HARNESS
WASHER 9*16*1.6 mm
WASHER 9*16*1.6 mm
WASHER 9*16*1.6 mm
ALLEN BOLT
5/16”- 18x70
ALLEN BOLT
5/16”-18x15
CONSOLE
EKG HARNESS
SHOULDER ALLEN
BOLT 5/16”-18x45
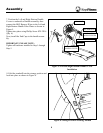
Figure 4A: Wiring Harness Installation
IMPORTANT, PLEASE NOTE:
While connecting the Console to the Left and
Right Uprights pay attention not to pinch the wire
harness.
LEFT UPRIGHT
CONSOLE HARNESS
GROMMET