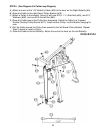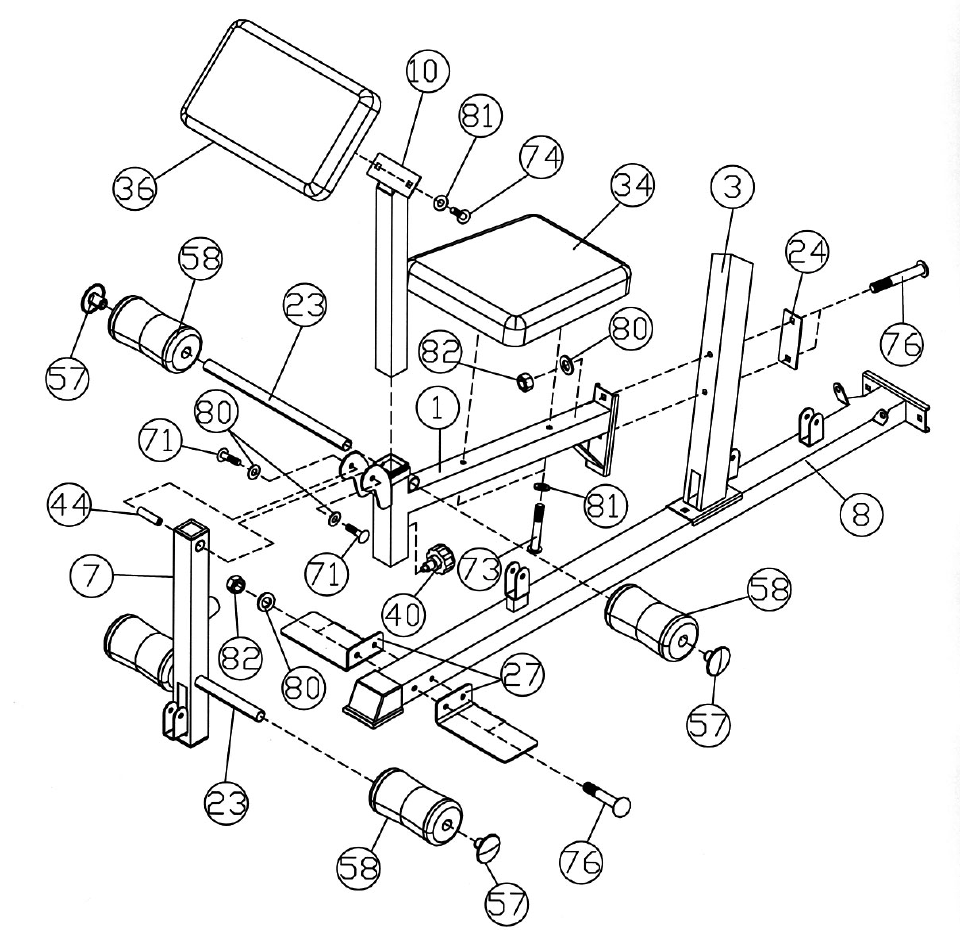
STEP 4 (See Diagram 4)
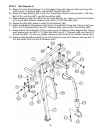
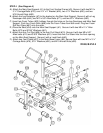
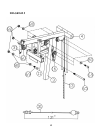
A.) Attach the Main Seat Support (#1) to the Front Vertical Frame (#3). Secure it with two M10 x
3 ½” Carriage Bolts (#76), one 4 ¾” x 2” Bracket (#24), two ∅ ¾” Washers (#80), and two
M10 Aircraft Nuts (#82).
B.) Attach the Leg Developer (#7) to the bracket on the Main Seat Support. Secure it with a Leg
Developer Axle (#44), two M10 x 5/8” Allen Bolts (#71), and two Ø ¾” Washers (#80).
C.) Insert two Foam Tubes (#23) halfway through the holes on the Leg Developer and Main Seat
Support. Push four Foam Rolls (#58) onto the Foam Tubes from both ends. Plug four Foam
Roll End Caps (#57) onto the ends.
D.) Place the Seat (#34) onto the Main Seat Support (#1). Secure it with two M8 x 2 ½” Allen
Bolts (#73) and Ø 5/8” Washers (#81).
E.) Attach the Arm Curl Pad (#36) to the Arm Curl Stand (#10). Secure it with two M8 x 5/8”
Allen bolts (#74) and Ø 5/8” Washers (#81). Insert the Arm Curl Stand into the front opening
on the Main Seat Support. Secure it with a Lock Knob (#40).
F.) Attach two Foot Plates (#27) to the Main Base Frame (#8). Secure them with two M10 x 3 ½”
Carriage Bolts (#76), Ø ¾” Washers (#80), and M10 Aircraft Nuts (#82).
DIAGRAM 4
9


