


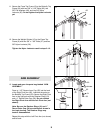
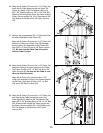
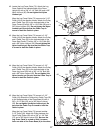
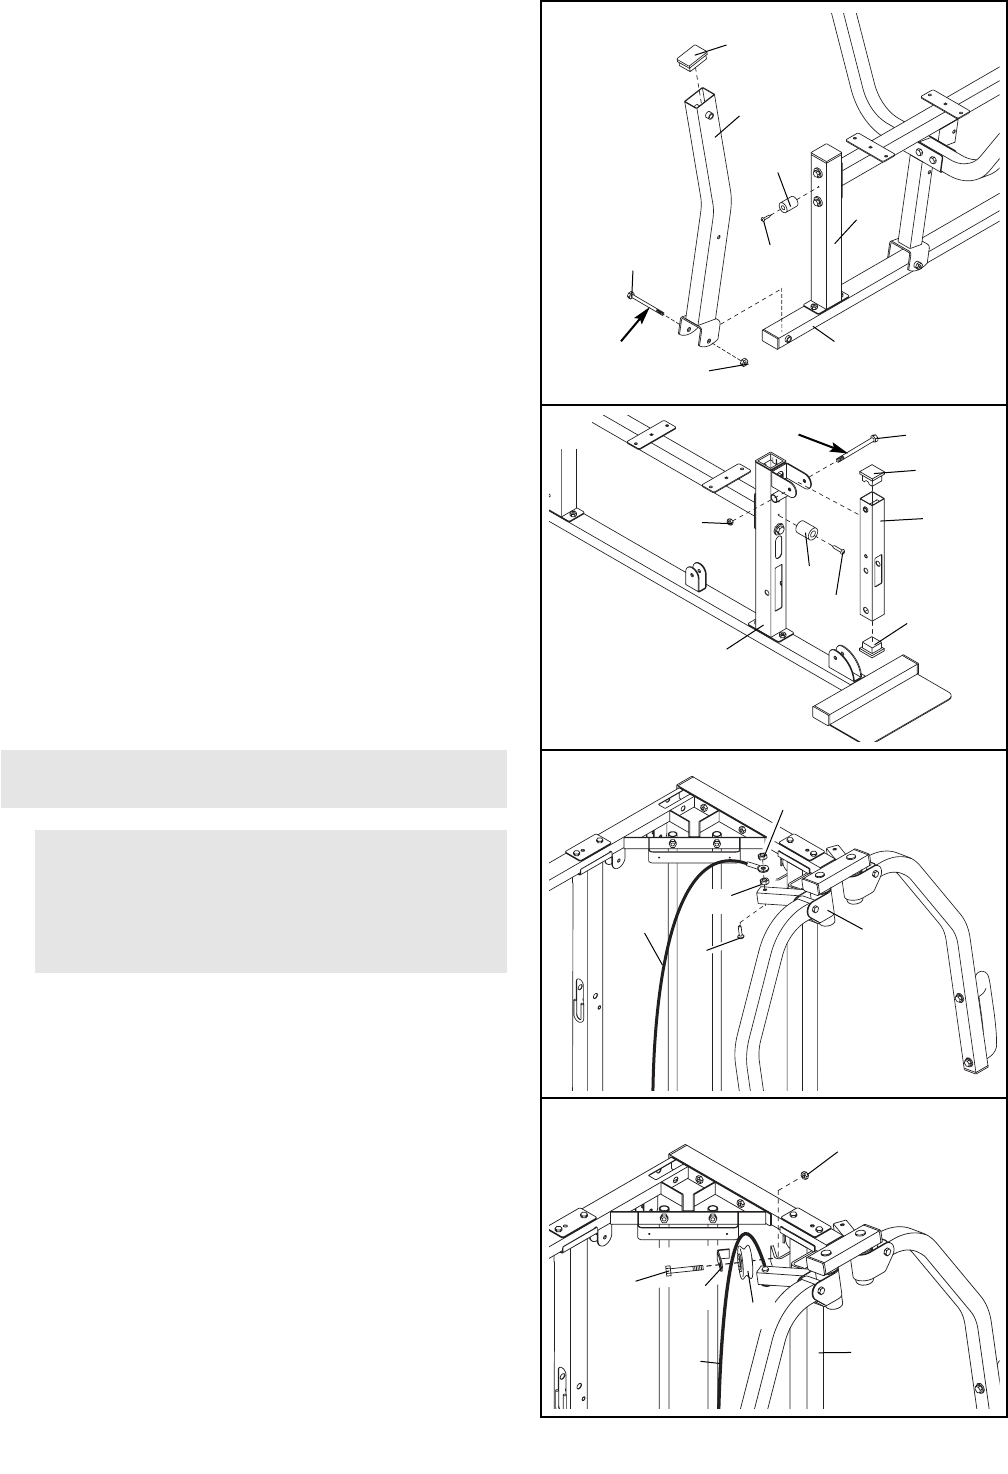
20.
Locate and open the parts bags labeled “CABLE
ASSEMBLY” and “PULLEYS.”
Secure a 3/8” x 2 1/4” Bolt (79) to the Right Pivot
Arm (85) with a 3/8” Nylon Jamnut (63).
Locate the Butterfly Cable (73), which is the
shorter cable of the two that have loops on both
ends. Attach the Butterfly Cable to the 3/8” x 2 1/4”
Bolt (79) with a 3/8” Nylon Jamnut (63). Note: Do
not fully tighten the Nylon Jamnut; the Butterfly
Cable must be able to pivot easily.
11
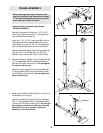
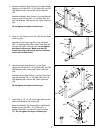
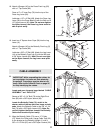
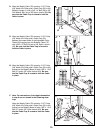
18. Attach a Bumper (40) to the Press Front Leg (20)
with a 1” Tap Screw (80).
Press a 2” x 3” Inner Cap (78) into the top of the
Press Leg Lever (90).
Lubricate a 1/2” x 4” Bolt (68). Attach the Press Leg
Lever (90) to the Press Base (6) with the Bolt and a
1/2” Nylon Jamnut (36). Note: Do not over tighten
the Nylon Jamnut; the Press Leg Lever must be
able to pivot easily.
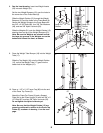
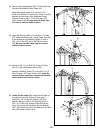
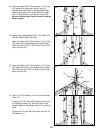
19. Insert two 2” Square Inner Caps (28) into the Leg
Lever (41).
Attach a Bumper (40) to the Butterfly Front Leg (3)
with a 1” Tap Screw (80).
Lubricate a 3/8” x 3” Bolt (88). Attach the Leg Lever
(41) to the Butterfly Front Leg (3) with the Bolt and
a 3/8” Nylon Jamnut (63). Note: Do not over tight-
en the Nylon Jamnut; the Leg Lever must pivot
easily.
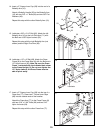
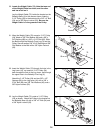
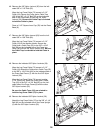
21. Wrap the Butterfly Cable (73) over a “V”-Pulley
(27). Attach the Pulley and a Large Cable Trap (32)
to the bracket on the Butterfly Upright (1) with a
3/8” x 2 1/2” Bolt (87) and a 3/8” Nylon Locknut (50).
18
36
68
20
80
6
78
40
90
CABLE ASSEMBLY
19
20
21
41
28
28
88
63
Lubricate
Lubricate
3
40
80
79
73
63
63
85
50
73
27
1
32
87
IMPORTANT: While assembling the cables, do
not overtighten the bolts and nuts attaching
the pulleys. The pulleys must be able to turn
freely. Refer to the Cable ID Chart on page 26
for help identifying the cables.