


05/03 P/N 211365B
3
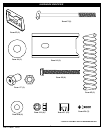
PARTS LIST (See Hardware Identifier)
Item
Qty. Part No. Description
1 1 206118 Warning Label
2 1 900033 Slam Jam Bracket, Black
3 1 203796 Bolt, “Tee” 3/8 - NC x 5 Long
4 1 200318 Bracket Reinforcement, Slam Jam
5 1 203472 Spring, Black
6 1 203470 Washer, Flat 5/8 I.D. x 1-1/2 O.D.
7 1 203795 Nut, Special 3/8-NC
8 4 201611 Hex Flange Bolt 5/16-18 x 3 Long
9 4 203104 Hex Flange Bolt 5/16-18 x 2 Long
10 4 203309 Washer, 1 O.D.
11 4* 203100 Hex Flange Nut, 5/16 x 18
12 1 Rim
13 12 200120 Clips, Net Holder (Red)
12 200121 Clips, Net Holder (Black)
14 1 204281 Net
15 1 200503 Cover, Black
200504 Cover, Red
16 2 200520 Screw, #8 x 1/2
17 1 202795 Logo, NBA
* QUANTITY USED MAY VARY BY MOUNTING METHOD.
WARRANTY CARD:
Please remember to complete your product
registration form either on-line at:
www.huffysports.com/warrantycard or mail-in
the enclosed postcard.
IMPORTANT! WRITE MODEL NUMBER FROM BOX ONTO PAGE 1 OF THIS OWNERS MANUAL
1.
2
3
4
7
6
5
2.
ENGLISH INSTRUCTIONS
IMPORTANT! WRITE DOWN MODEL NUMBER FROM BOX ON
PAGE 1 OF THIS OWNERS MANUAL
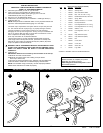
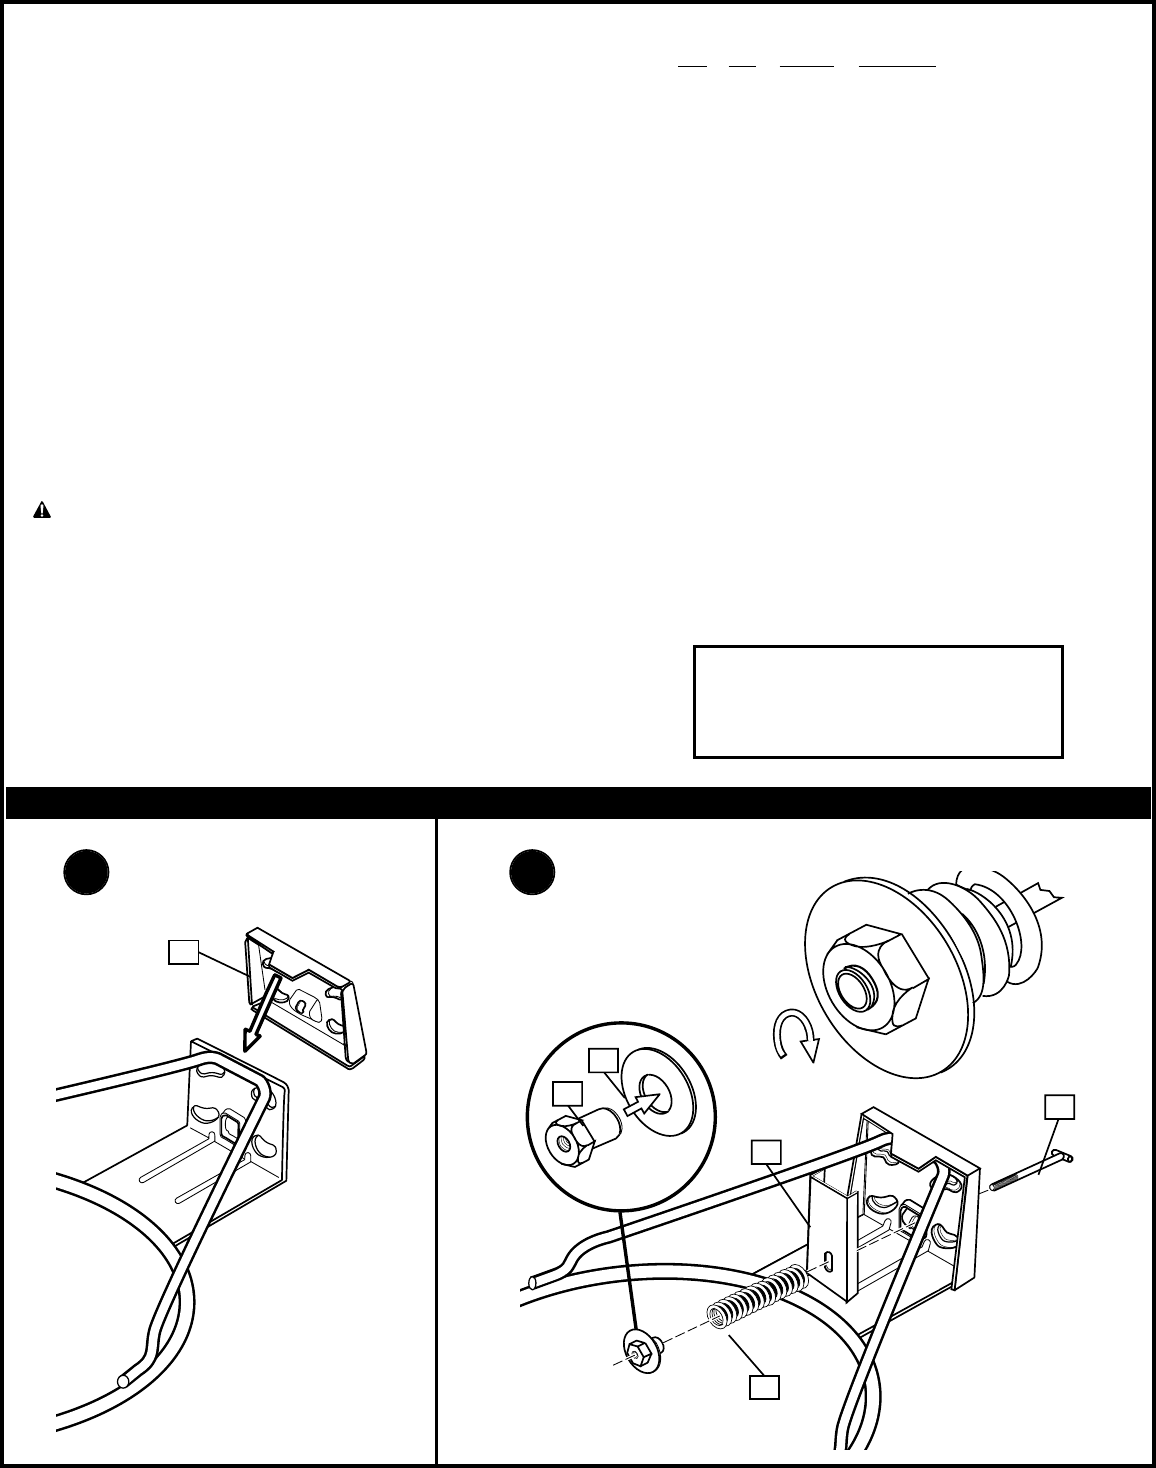
1. Place slam jam bracket (2) over rim (12) as shown.
2. Insert “Tee” bolt (3) through slam jam bracket and rim.
Place reinforcement bracket (4) and spring (5) over “Tee” bolt.
Install washer (6) and nut (7) as shown.
3. Secure rim (12) to backboard as shown.
4. Install cover (15) over spring return mechanism. Install logo decal (17)
5. Install net clips (13).
NOTE: Net clips should not slide with ease. It is very important that the net
clips are in the locked position before going on to next step.
The Quick Clip™ rapid release net system lets the net pull away from the
rim. This reduces the risk of player injury or property damage. However,
improper installation or a ball making contact at an odd angle may
disengage the net clip from the goal rim. Usually, the clip is reinstalled with
little or no problem. We hope that you agree this inconvenience is minor
when compared to the safety of the players.
Quick Clip: US Patent No. 5,792,010/5,795,253
The two outer hooks on net clip must face towards inside of goal rim.
Insert larger hole in net clip onto rim stud, push down on net clip, then
slide net clip right, locking or snapping securely into position (clips must
"snap" into place to insure a secure fit).
WARNING: USE OF THIS PRODUCT WITHOUT PROPER INSTALLATION
OF NET CLIPS, OR WHEN ALL NET CLIPS ARE NOT PRESENT COULD
RESULT IN BODILY HARM. BE SURE TO FOLLOW DIRECTIONS
CAREFULLY.
6. Install net (14).
IMPORTANT! Make sure net is held by all three hooks on the net clip.
A.Slide net into outer hook as shown.
B.Slide net into second outer hook creating a loop as shown.
Push loop to back of clip.
C.Pull loop up and through back of clip, snapping over the middle hook.
D.Pull net down to make sure it is held securely by all three hooks.
NOTE: If net releases during normal play, net was improperly installed.
Please review instructions to install net properly.