


P/N 21154401 01/04
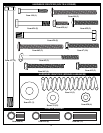
12
3
35
22
4
58
1
2
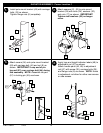
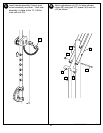
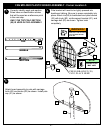
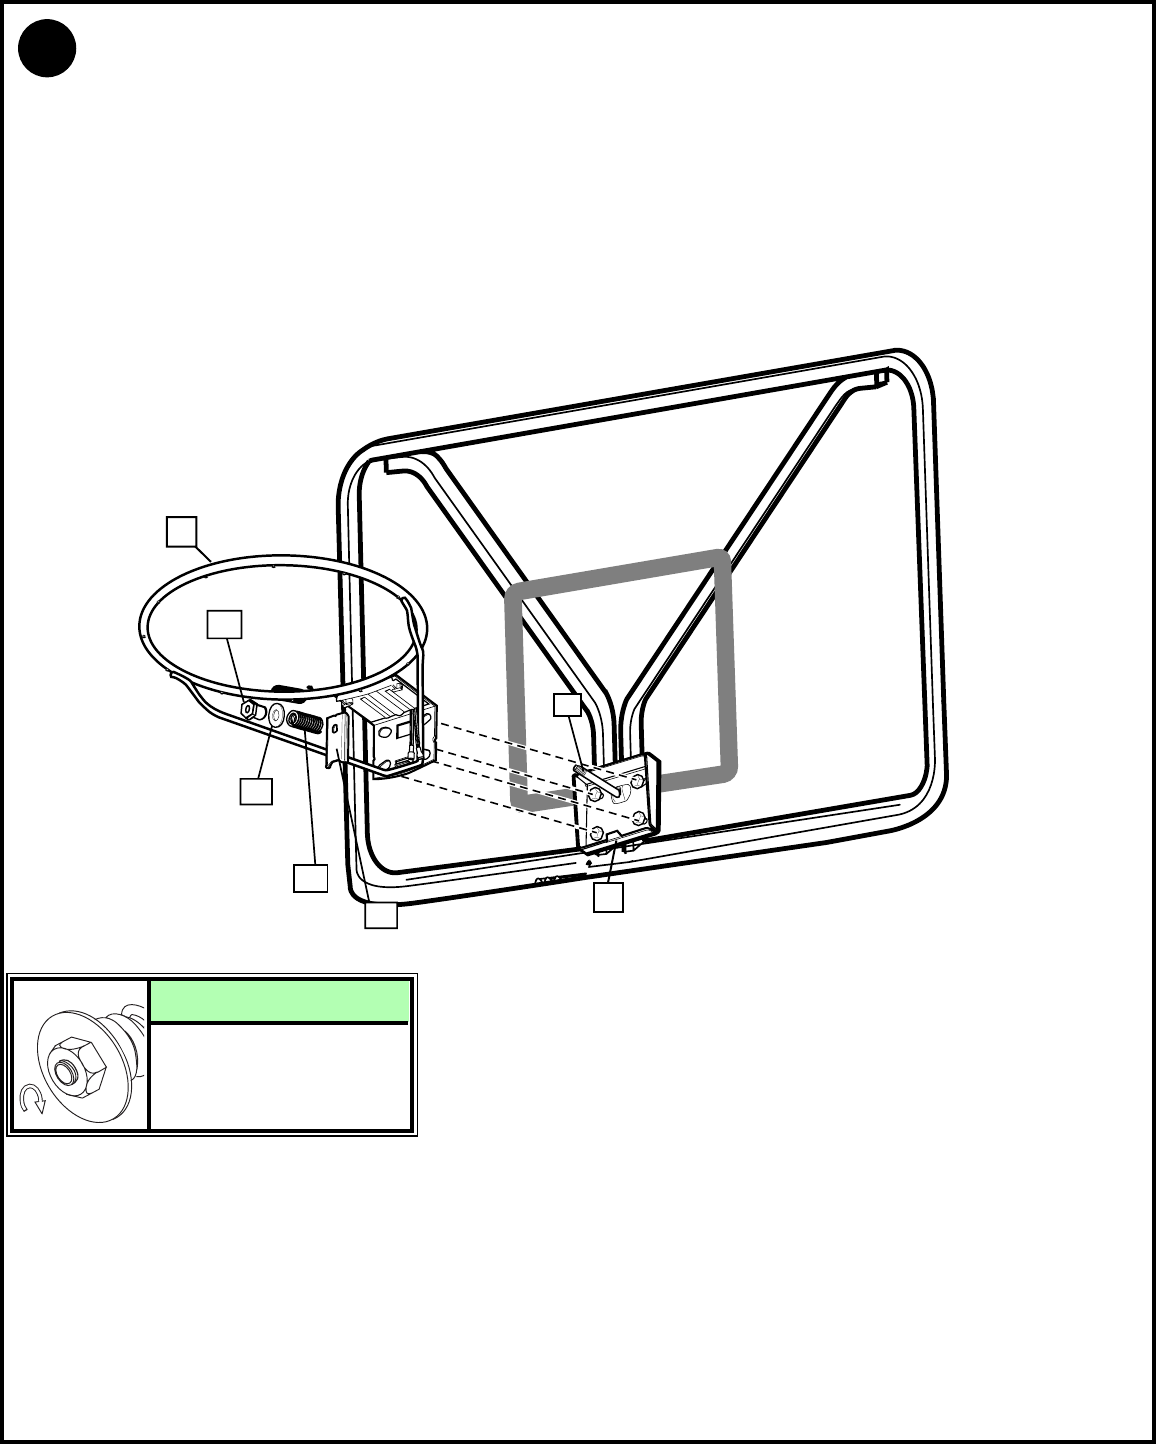
• Fit rim (58) securely into bracket (1) as shown.
• Install reinforcement bracket (3) onto “T” bolt (2) as shown.
• Install spring (4) onto “T” bolt (2) as shown.
• Install special nut (35) and washer (22) onto “T” bolt (2).
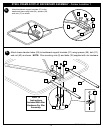
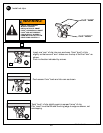
12.
Tighten nut (35) until
flush with end of "T" bolt
(2) as shown here.
NOTE: