


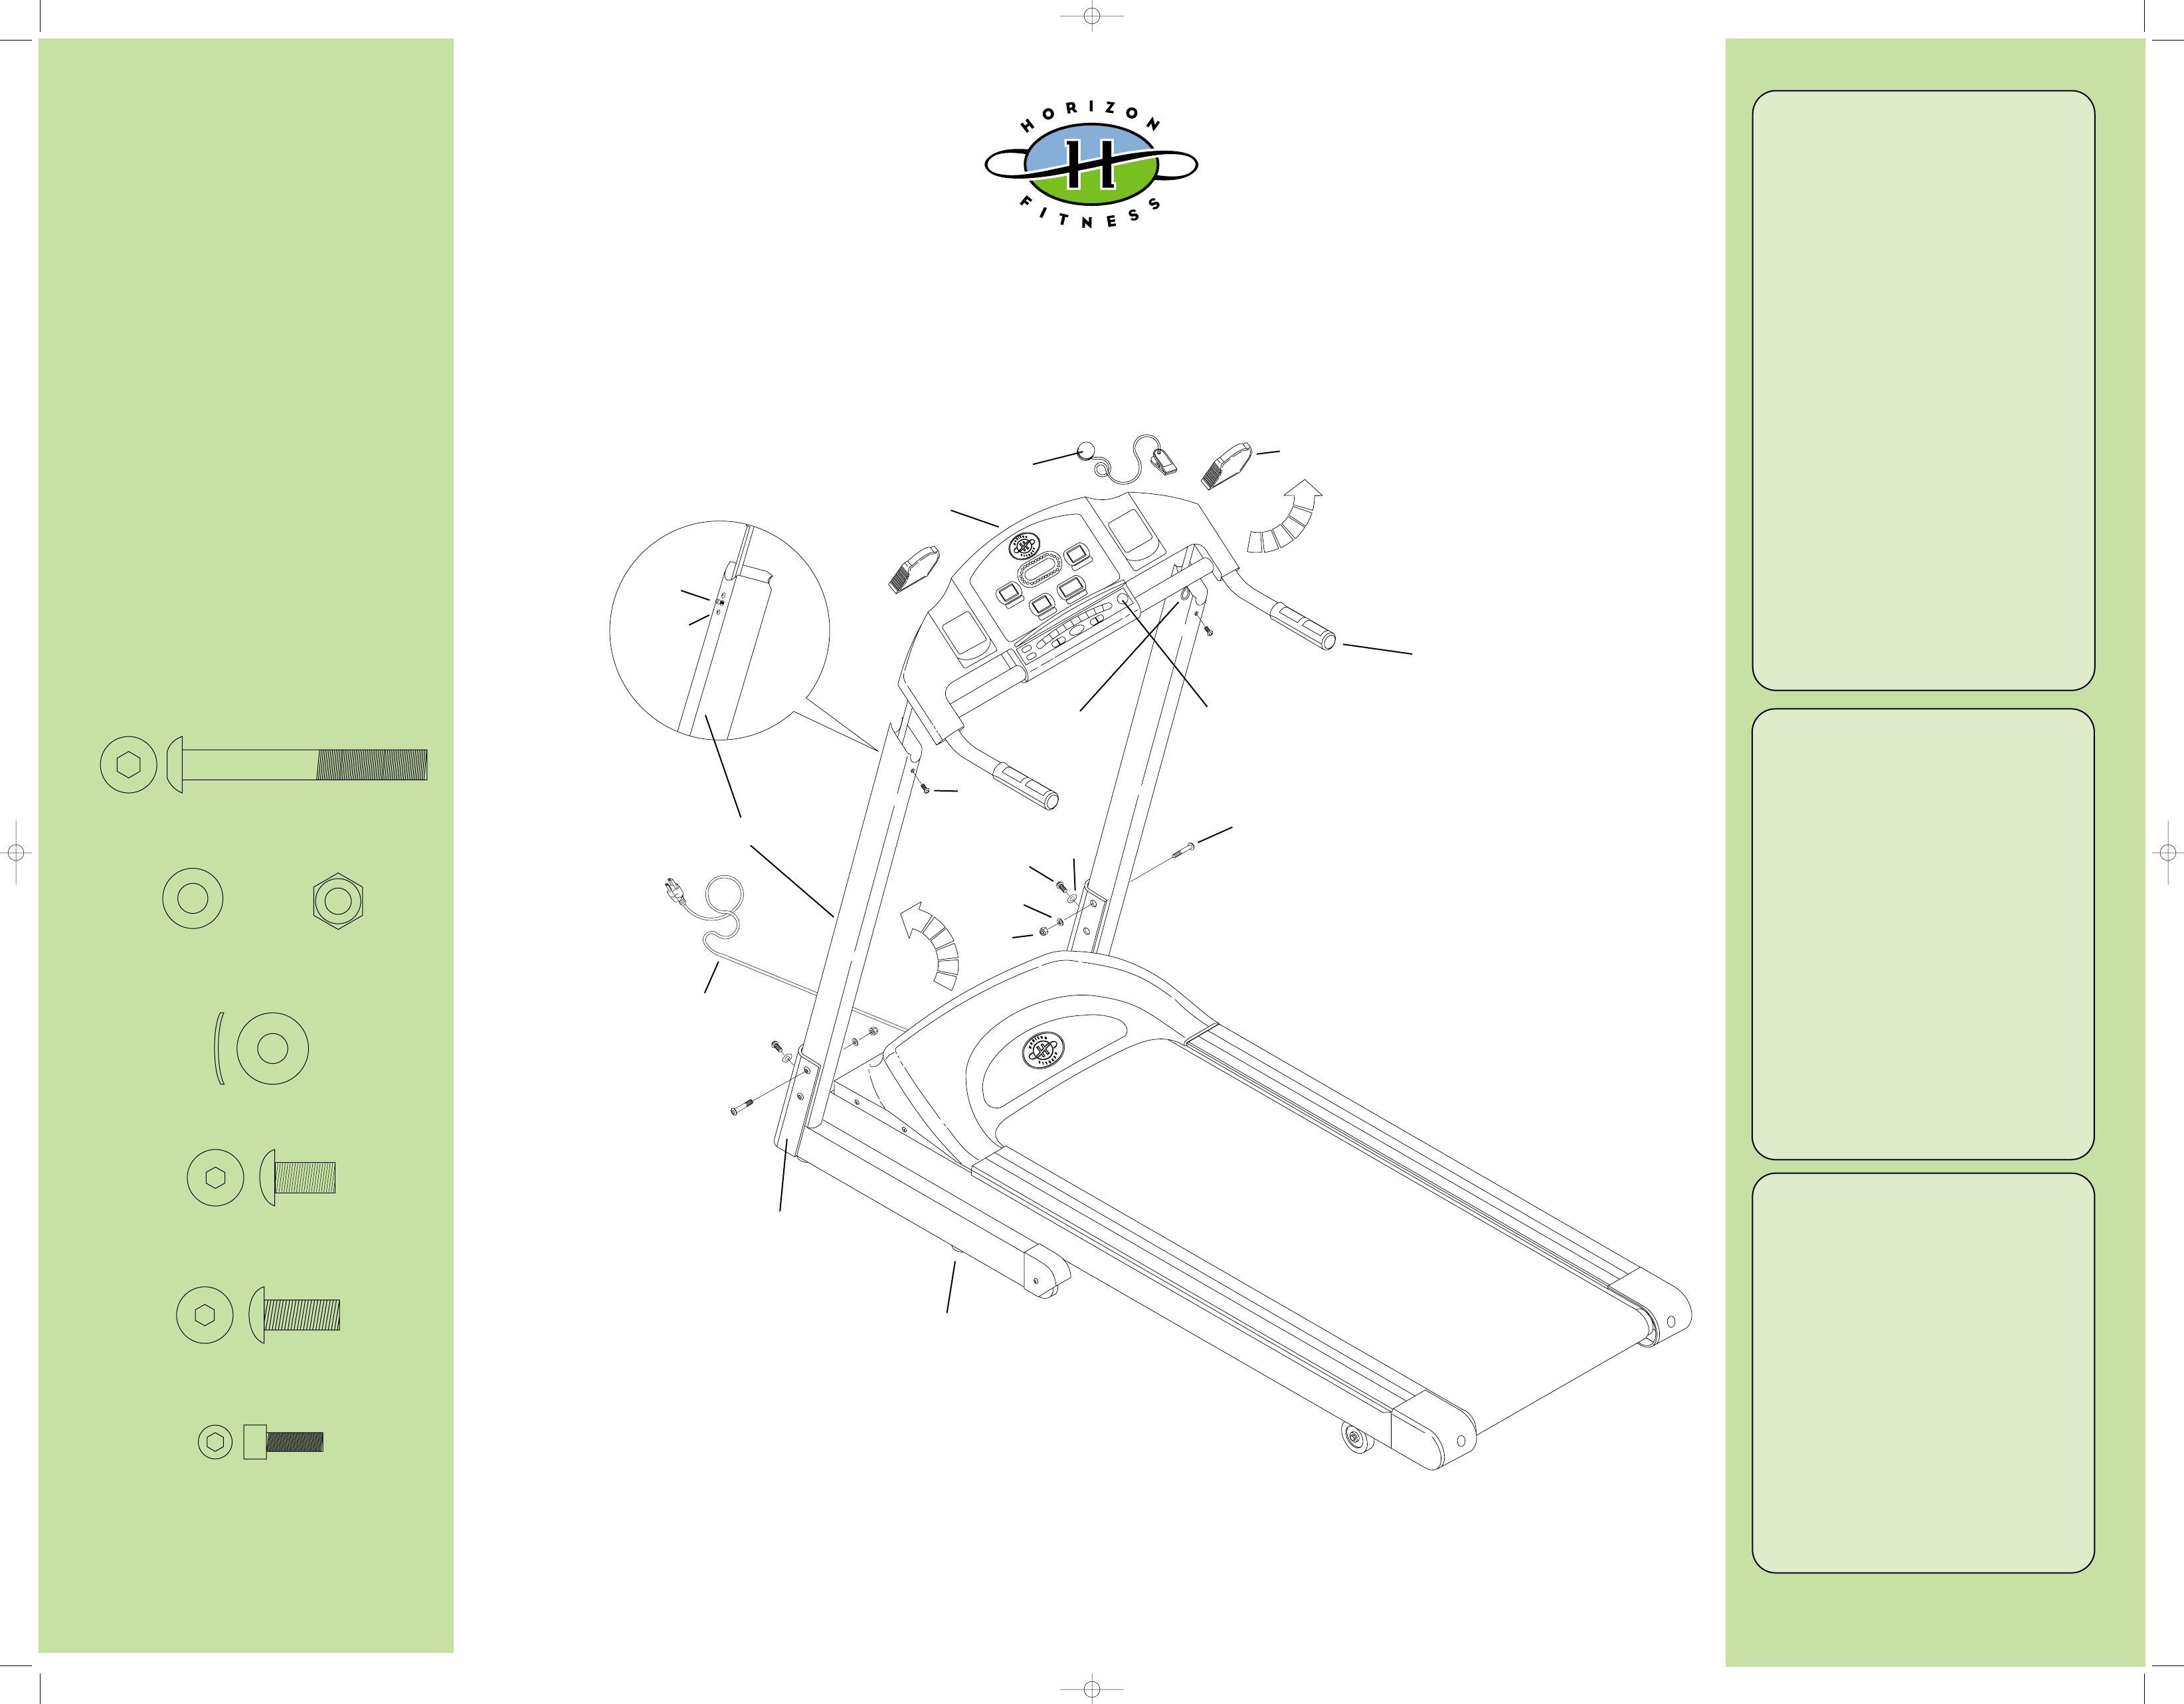
TREADMILL
Grip Pusle
Handlebars
Power Cord
Console Mast
Console Cable
Water Bottle Holder
Console Assembly
Safety Key
STEP 1
Install Console Assembly
a. Lift the console masts into the
upright position.
b. Align the console masts with
the holes in the base bracket.
Make sure that the console
masts are inserted completely
into the base bracket.
c. Insert a 60mm bolt (A) with a
16mm washer (B) and a 13mm
nylon nut (C) into the outside
base bracket holes on both the
left and right sides. Secure
using a 5mm Allen wrench and
13mm flat wrench. Tighten the
pre-installed 60mm bolt on
both the left and right base
brackets.
d. Insert a 16mm bolt (D) and arc
washers (H) into the front of the
base bracket on both the right
and left sides. Secure with a
5mm Allen wrench.
STEP 2
Install the Console Assembly
a. Tilt the console assembly back,
and lower the console assembly
into place by sliding the
console assembly axles into the
receiving tubes. Align the left
and right console assembly
brackets holes with the holes in
front of the console mast. Be
sure not to pinch the console
cable when lowering the
console assembly into place.
b. Insert a 20mm bolt (E) for both
the left and right console
assembly brackets.
STEP 3
Attach Console Assembly
a. Make sure the console assembly
is pressed down completely.
Insert a 15mm bolt (F) into the
back of the console mast to
secure the console assembly
on both the left and right sides.
Secure with a 5mm Allen wrench.
Tighten the pre-installed bolts
(G) on bolt the left and right
sides.
b. Insert the 2 water bottle holders
into the console.
CUSTOMER ASSISTANCE CENTER 1.888.993.3199
or www.horizonfitness.com
ASSEMBLY
GUIDE
Base Bracket
Levelers
NOTE: The assembly picture may not represent your exact treadmill model
F
G
E
A
D
H
B
C
Safety Key
Holder
UNPACKING
Unpack your treadmill and the contents
inside the box. Do not attempt to move
the treadmill until it is completely assem-
bled. Leave the treadmill in the bottom
portion of the treadmill box to assemble.
Unpack your treadmill where you will be
using it. Place your treadmill on a level
flat surface. It is recommended that you
place a protective covering on your floor.
Your treadmill will arrive almost com-
pletely assembled. You will only need to
attach the following items. Verify that the
following parts and tools are included:
Parts
• 1 Power Cord
(Alpine/Paragon II)
• 1 Safety Key
• 2 Water Bottle
Holders
• 1 Hardware
Pack (contents
listed below)
B) Base Bracket
16mm washer
Quantity: 2
H) Arc Washer
Quantity: 2
E) Console Assembly Bracket
20mm long bolt
Quantity: 2
D) Base Bracket
16mm bolt
Quantity: 2
A) Base Bracket
60mm bolt
Quantity: 2
C) Base Bracket
13mm nylon nut
Quantity: 2
F) Console Assembly
15mm bolt
Quantity: 2
Hardware (Actual Size)
Tools
• 5mm Allen Wrench/
Phillips Screw Driver
• Flat Wrench
• 8mm Allen Wrench
(Alpine)
• 6mm Allen Wrench
(Paragon II, Quantum II
& Omega II)
NOTE: It is recommended that you apply grease
to the threads of each bolt as you assemble
your Treadmill, to prevent loosening and noise.
Also, during each assembly step, ensure that
ALL nuts and bolts are in place and partially
threaded in before completely tightening any
ONE bolt.
treadmillv1.5.qxd 9/13/2001 2:33 PM Page 2