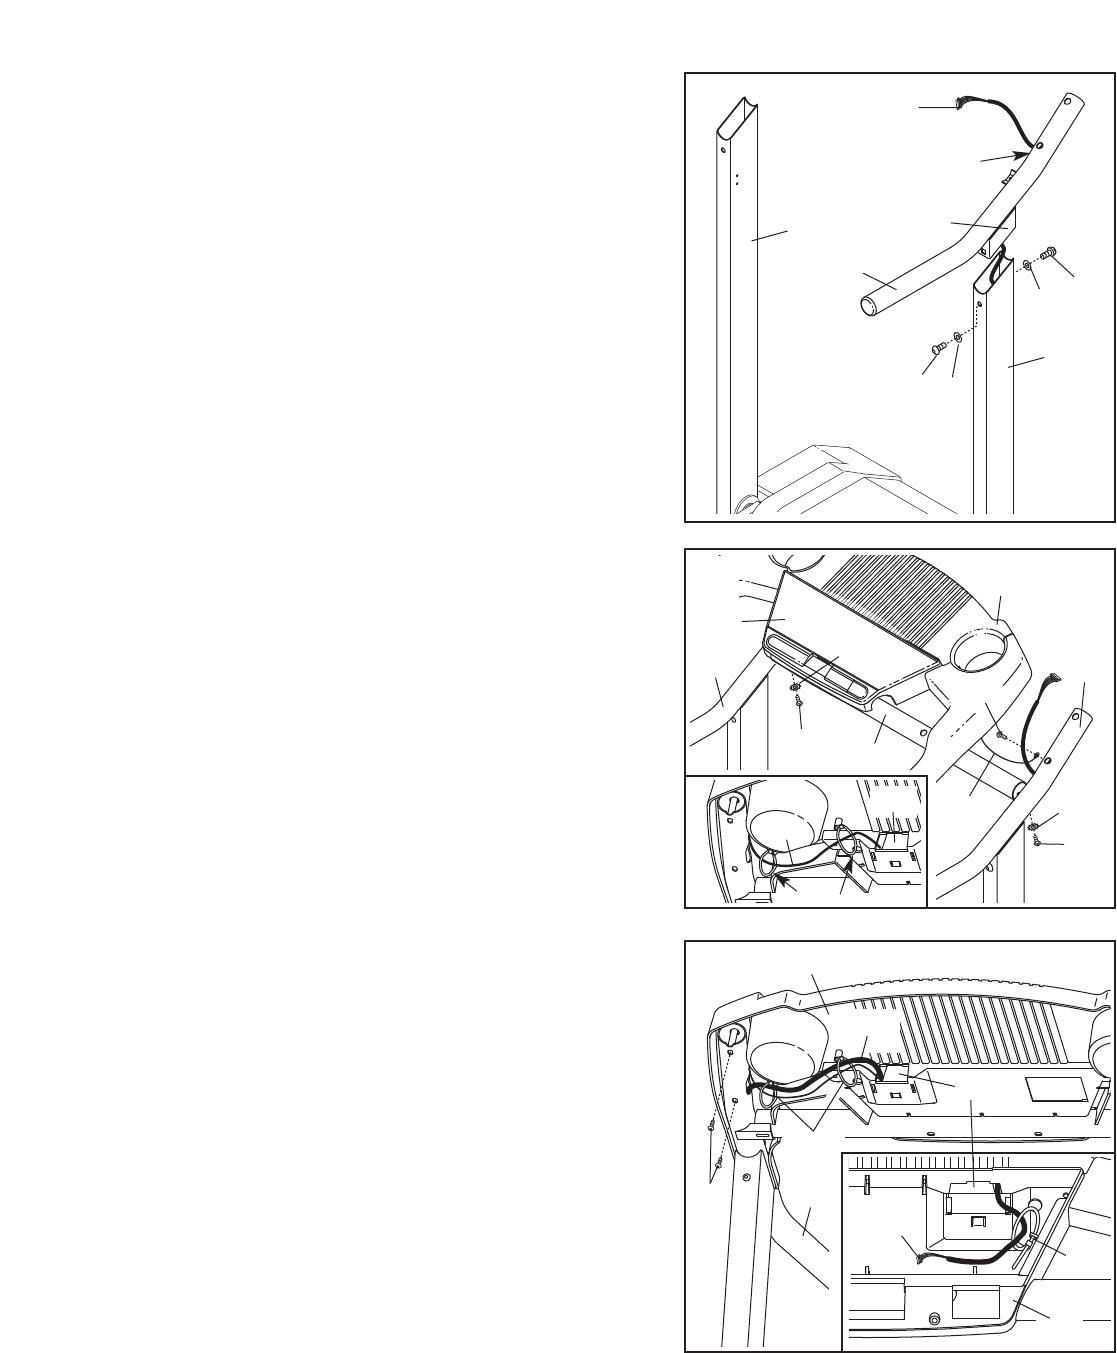
6
3
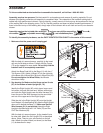
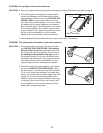
. With the help of a second person, position the treadmill
with the Uprights (62, 76) in the vertical position as
s
hown.
R
oute the Wire Harness (21) through the bracket on the
Right Handrail (47) and out the large hole on the side of
the Right Handrail. Insert the bracket on the Right
Handrail into the top of the Right Upright (62). Attach the
R
ight Handrail with two 1” Bolts (8) and two 1/4” Star
Washers (9) as shown. Do not tighten the Bolts yet.
Attach the Left Handrail (not shown) as described above.
Note: There is not a wire harness on the left side.
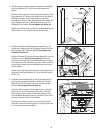
4. Hold the Crossbar (34) between the Handrails (1, 47).
Attach the Crossbar with two Crossbar Screws (53) and
two Crossbar Star Washers (88). Do not tighten the
Crossbar Screws yet.
Hold the Console (10) and the Console Base (46) near the
Handrails (1, 47). See the inset drawing. Route the
ground wire (A) from the Console Base through the open-
ing at the side of the Console Cover (96). Next, route the
ground Wire through the two indicated plastic ties on the
Console Base.
Attach the end of the ground wire (A) to the small hole in
the side of the Right Handrail (47) with a Silver Ground
Screw (91).
Large
H
ole
B
racket
4
7
62
21
76
34
A
1
53
53
47
46
3
9
9
8
8
88
88
46
96
Ties
47
5
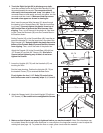
5. Place the Console Base (46) on the Right Handrail (47)
and the Left Handrail (not shown). Attach the Console
Base with four 3/4” Screws (13) (only two Screws are
shown). Do not tighten the Screws yet.
Insert the Wire Harness (21) through the two indicated
plastic ties on the Console Base (46). Next, insert the
Wire Harness up through the indicated opening in the
Console Base. Make sure that the Console Cover (96) is
securely attached to the Console Base.
See the inset drawing. Look at the top of the Console
Base (46). Insert the Wire Harness (21) through the plas-
tic tie on top of the Console Base.
21
21
Tie
46
13
4
91
10
A
Ties
96


