


Page 4
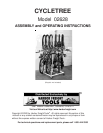
SKU 2628
Assembly
Refer to the Assembly Drawing on Page 6.
1. Form a square by facing both of the Base Brackets (#1) toward each other, and inserting
both of the Base Channeled Supports (#2) into the Base Brackets (#1), lining up the holes
on all four corners.
2. Put each of the Casters (#3) through the holes on the four corners of the base frame you
just constructed, from the bottom, so that the square frame sits on them.
3. Place Strut A (#6) on a top of the threaded caster bolt making sure the end with the most
severe angle faces the middle of the square. Refer to the Assembly Drawing on Page 6.
Secure it with a Flat Washer (#4) and Nut (#5).
4. On the opposite corner (diagonal), repeat step three with the other Strut A (#6).
5. On the two remaining corners, repeat the process in step three above, using both of the
Struts B (#8).
6. Set the Base Beam (#7) over the holes on the center of each of the Base Brackets (#1)
and secure it by putting a Bolt (#13) in from the top, and attaching a Flat Washer (#14) and
Nut (#15) from the bottom, on both sides. Make sure that the square receptacle on the Base
Beam (#7) faces up.
7. Slide the Base Post (#9A) through the flexible opening made by the top of the four Struts
and insert it into the square receptacle on the Base Beam (#7).
8. Line up the top of all four Struts with the two connection holes on the Base Post (#9A) and
secure both Struts A (#6) with a Bolt (#13), Flat Washer (#14) and Nut (#15). Next, secure
both Struts B (#8) with a Bolt (#13), Flat Washer (#14) and Nut (#15).
9. Insert the Center Post (#10A) into the Base Post (#9A) and secure it with 2 Bolts (#13A),
2 Flat Washers (#14A) and 2 Nuts (#15A). The Center Post (#10A) has various holes for
height adjustment.
10. Slide the Plastic Covered “T” Bar (#12A) onto the top of the Center Post (#10A) and
secure it with 2 Bolts (#13A), 2 Flat Washers (#14A) and 2 Nuts (#15A).
Warning: Hanging and dismounting of bicycles should only be done by adults who are
physically capable of safely handling and lifting the weight of a bicycle.
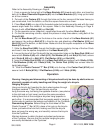
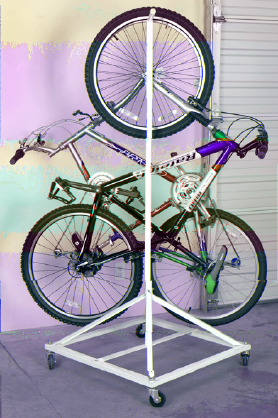
Hanging Bicycles
Hang one bicycle by threading the front wheel spokes through
the plasic covered “T” Bar, the next bicycle must be
hung the same way, but facing the opposite direction, (see photos
to the right and on front cover) continue the same procedure
making sure that all the contigious bicycles hang opposite to
each other. It is recommended that two people assist in hanging
the bicycles to maintain the balance and stability of the Cycletree.
Dismounting Bicycles Before lifting the front wheel off the
Plastic Covered “T” Bar (#12A), place a firm grip on the bicycle
frame, just behind the front fork, making sure that the bicycle
does not sway the wrong way, and carefully remove the bicycle
from the Cycletree.
Maintain balance to obtain the best and safest performance
of the Cycletree. Be sure that the multiple hanging bicycles
are evenly distributed on the Cycletree.
Operation
REV 12/03; REV 12/06