40 41
Workout Programs (Continued) Workout Programs (Continued)
HR Interactive Programs
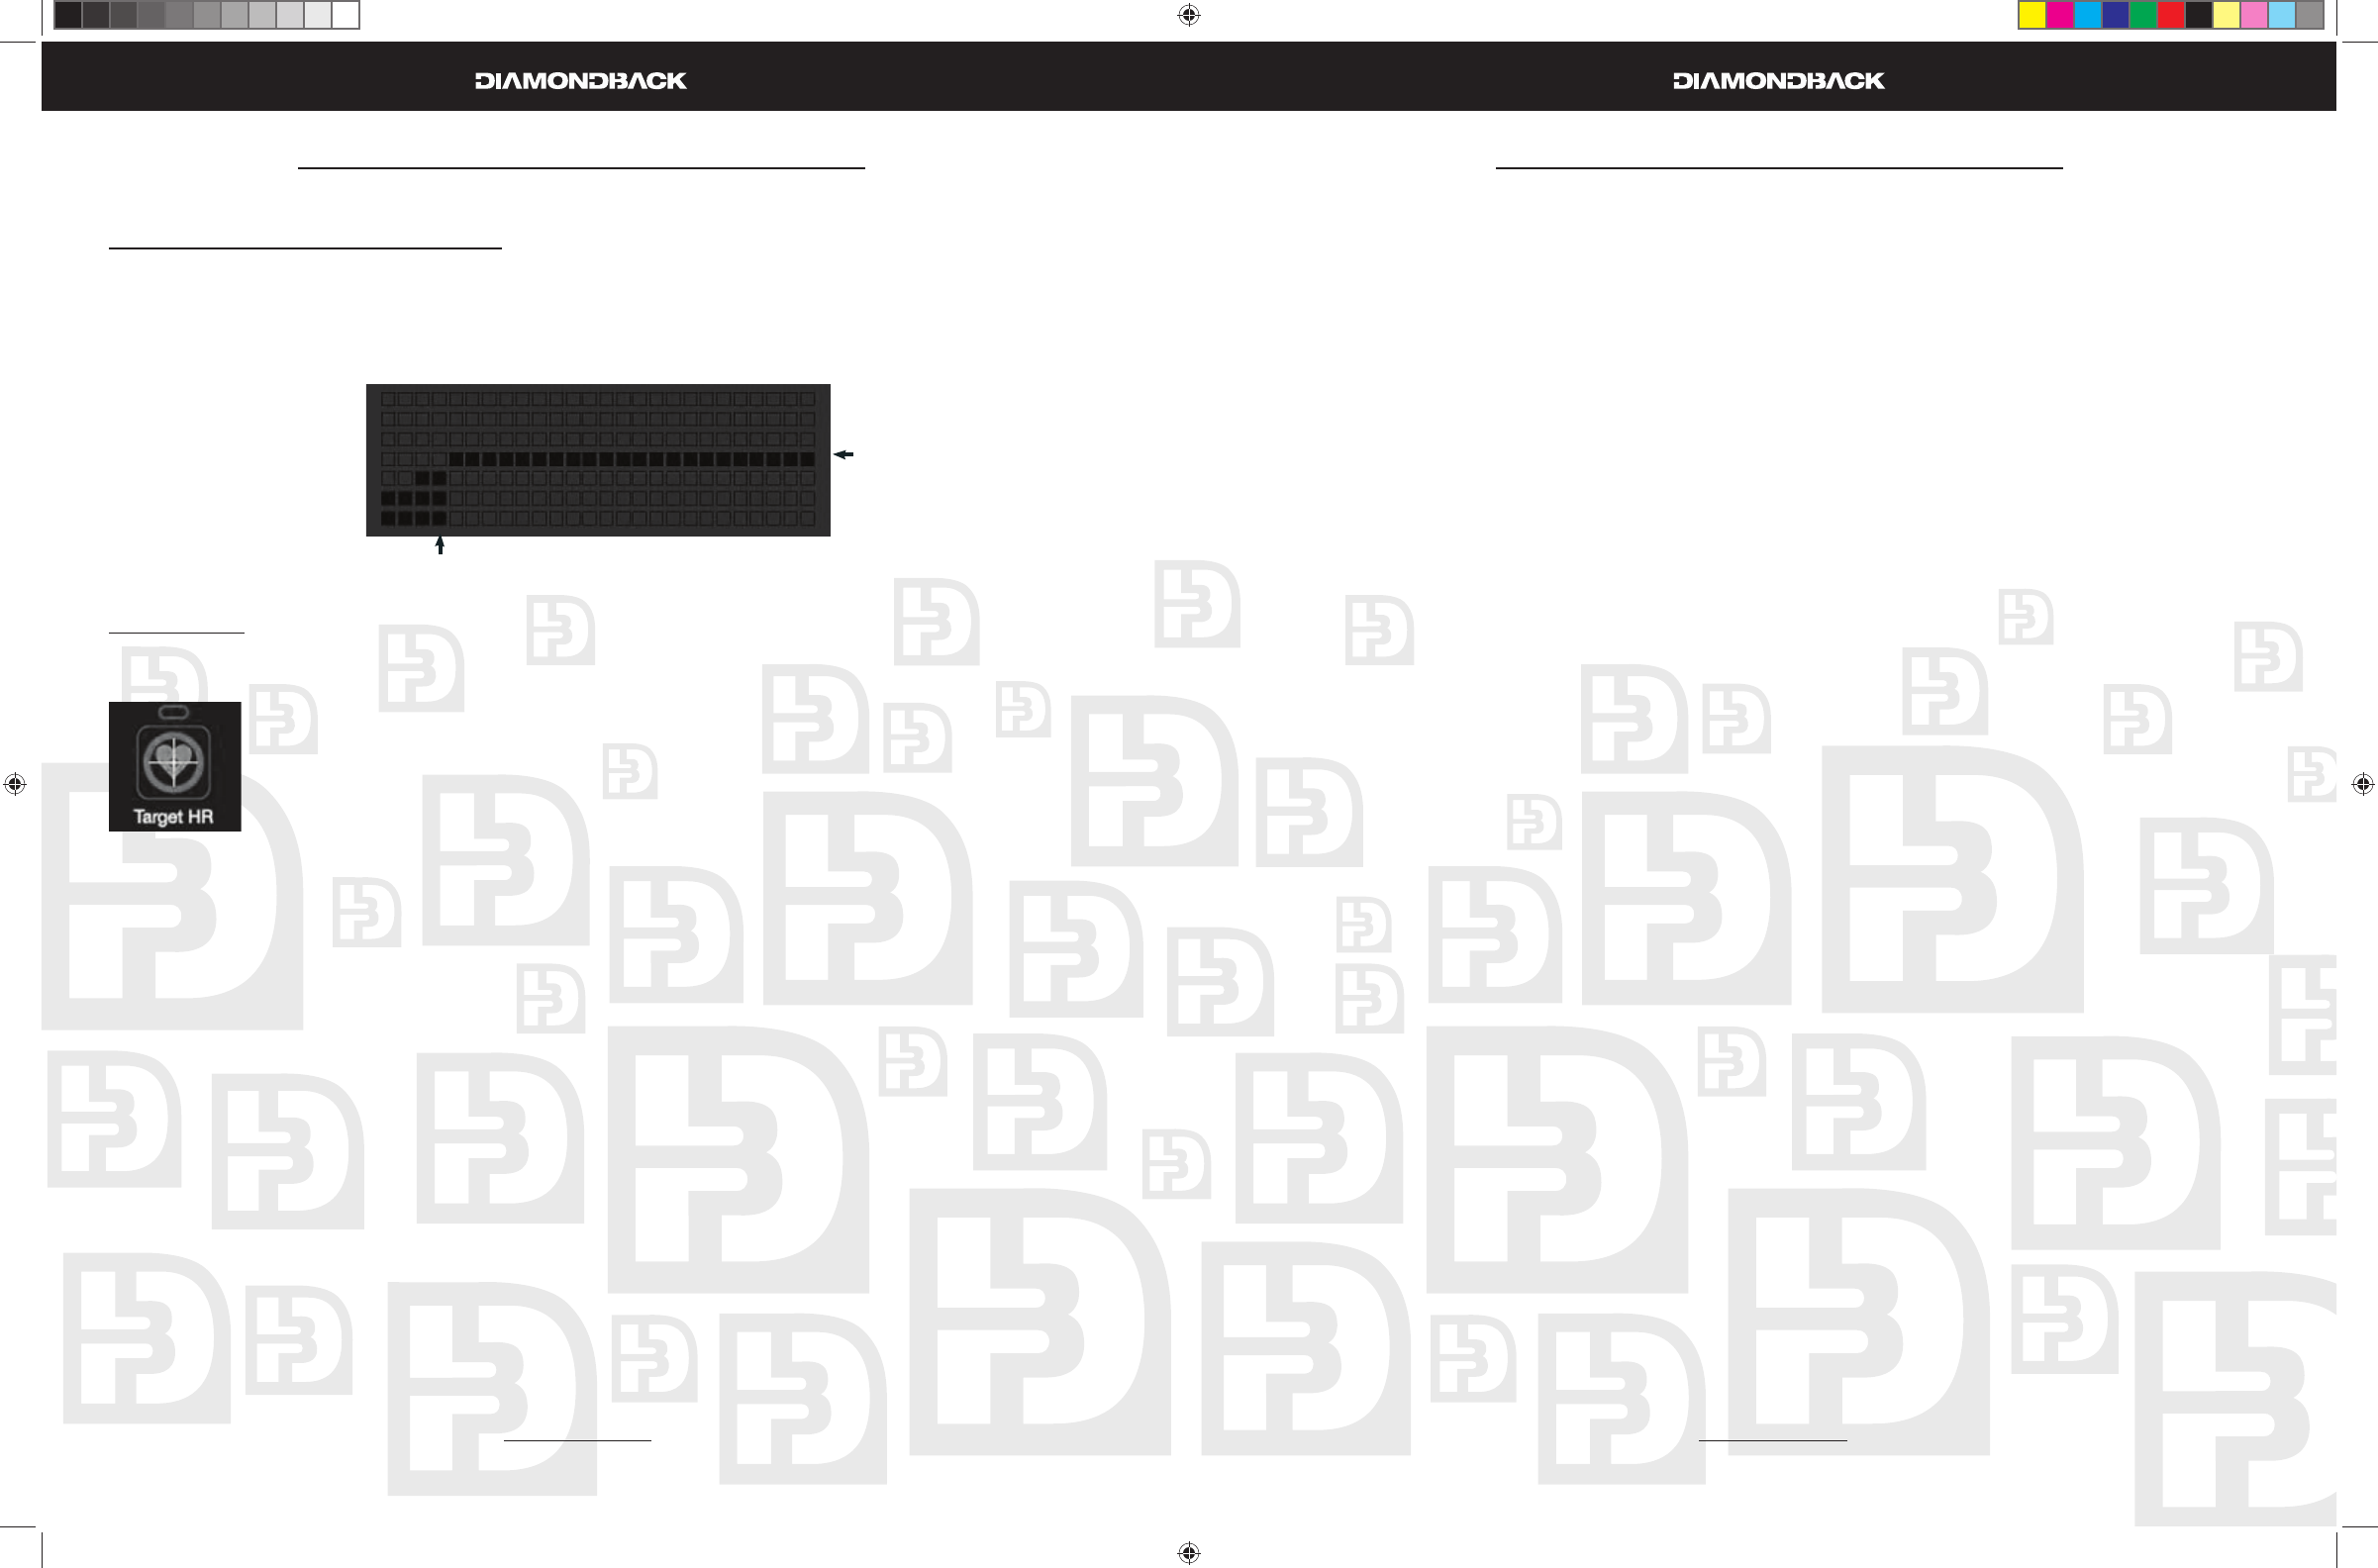
Dot matrix display during HR Interactive programs – The dot matrix display will display the % Max HR pro-
fi le, not intensity profi le. The row of target % Max HR LEDs will light up to indicate your goal; then the cur-
rent segment LEDs will light up and blink to show your actual heart rate. You could compare your actual
heart rate against your goal while exercising.
Target HR
Getting Started
The Target Heart Rate program is designed to keep you training at your chosen heart
rate level. Computer will adjust the intensity level automatically to ensure the target heart
rate is achieved and maintained during the entire program.
A CHEST STRAP OR HAND SENSORS MUST BE USED FOR THIS PROGRAM.
IMPORTANT: It is unsafe to exceed 95% of your maximum heart rate while exercising.
Please consult your physician before performing any Heart Rate based training program.
Beginning the Program
During idle mode, the message window displays a message “SELECT A PROGRAM”. To begin this pro-
gram, press the TARGET HR program key, the LED indicator above it will light up.
Entering the program
When the message display fl ashes, “TARGET HR” and “PRESS ENTER”, it indicates you are about to
select the Target HR program. Press ENTER Key to enter program setup mode or press the START/
STOP key to skip the set up mode and use default values.
Press ENTER key to enter program set up mode. The message display will take you through the pro-
gram setup mode step by step as below:
Enter Age
The message window will fl ash a message of “ENTER AGE”, then “AGE = XX” with the number 1.
blinking.
You may press 2. UP or DOWN keys to adjust the age.
After age adjustment, the message display will switch to display “PRESS ENTER” to indicate 3.
next step. Press ENTER to accept and enter Weight adjustment.
Enter Weight
The message window will fl ash a message of “ENTER WEIGHT”, then “WEIGHT = XXX LB” 1.
with the number blinking. (WEIGHT = XXX KG” for metric system)
You may press 2. UP or DOWN keys to adjust the weight
After weight adjustment, the message display will switch to display “PRESS ENTER” to indi-3.
cate next step. Press ENTER to accept and enter Time adjustment.
Enter your workout time:
The message window will fl ash a message of “ENTER TIME”, then “TIME = 30 MIN” and the 30 1.
will be blinking.
You may press 2. UP or DOWN keys to adjust the time. When the time setting reaches 60 min-
utes, the display will show “TIME = 1HR 00MIN” instead.
After time adjustment, the message display will switch to display “SET UP COMPLETED”, then 3.
“PESS START” to indicate next step. You may press, the ENTER or START/STOP key to
begin this program.
Or press the START/STOP key to accept current default values and begin the workout
Default time = 30 minutes•
Age and weight will be what was enter and saved in a previous workout•
During the Program
Once Start key is pressed, the Warm Up will be active. See Warm Up mode section for details.
Message/Data Display
When warm up mode is completed, the console will detect if there is a valid pulse before starting this •
program. If there is none, this program will not be started. The messages display will scroll “NO HR
DETECTED CHECK YOUR PULSE SENSOR” until there is valid pulse.
Once there is a valid pulse, this program will be active. The message display will turn into workout •
data display and display four default data: Time, Level, Pulse & Calories and the LED on top of the
Data Display key will be lit.
Press the • DATA DISPLAY buttons to switch the display to “RPM, Speed, Distance & Watts”. The
LED on the bottom of the key will light up.
Main Display
The Dot Matrix will activate and the 1st segment of the program’s profi le will start blinking•
If there is a valid Heart rate signal being detected a heart shape will start blinking and the Heart rate •
graph will light up with the percentage of maximum heart rate.
The message “Time” will light up in the date display and the Time will start counting down. To switch •
the data being displayed press the DISPLAY key to select from Time, Calories, Pulse and Distance
and to turn on and off the scan function.
Adjustment
Press • UP or DOWN key to adjust the desired Target HR. The dot matrix window will update the %
Max HR profi le accordingly. The pulse display will switch from displaying the actual HR to show the
current target HR and adjust as the key is being pressed. Minimum adjust value is 65% of Max HR.
Maximum adjust value is 85% of Max HR
91-100%
81-90%
71-80%
61-70%
51-60%
41-50%
31-40%
1-30%
Target % Max HR
Blinking – Actual Heart rate
900Ub.Sr OM.R1.indd 40-41900Ub.Sr OM.R1.indd 40-41 6/11/2008 9:56:26 AM6/11/2008 9:56:26 AM


