


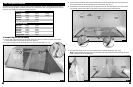
Detail A
Detail B
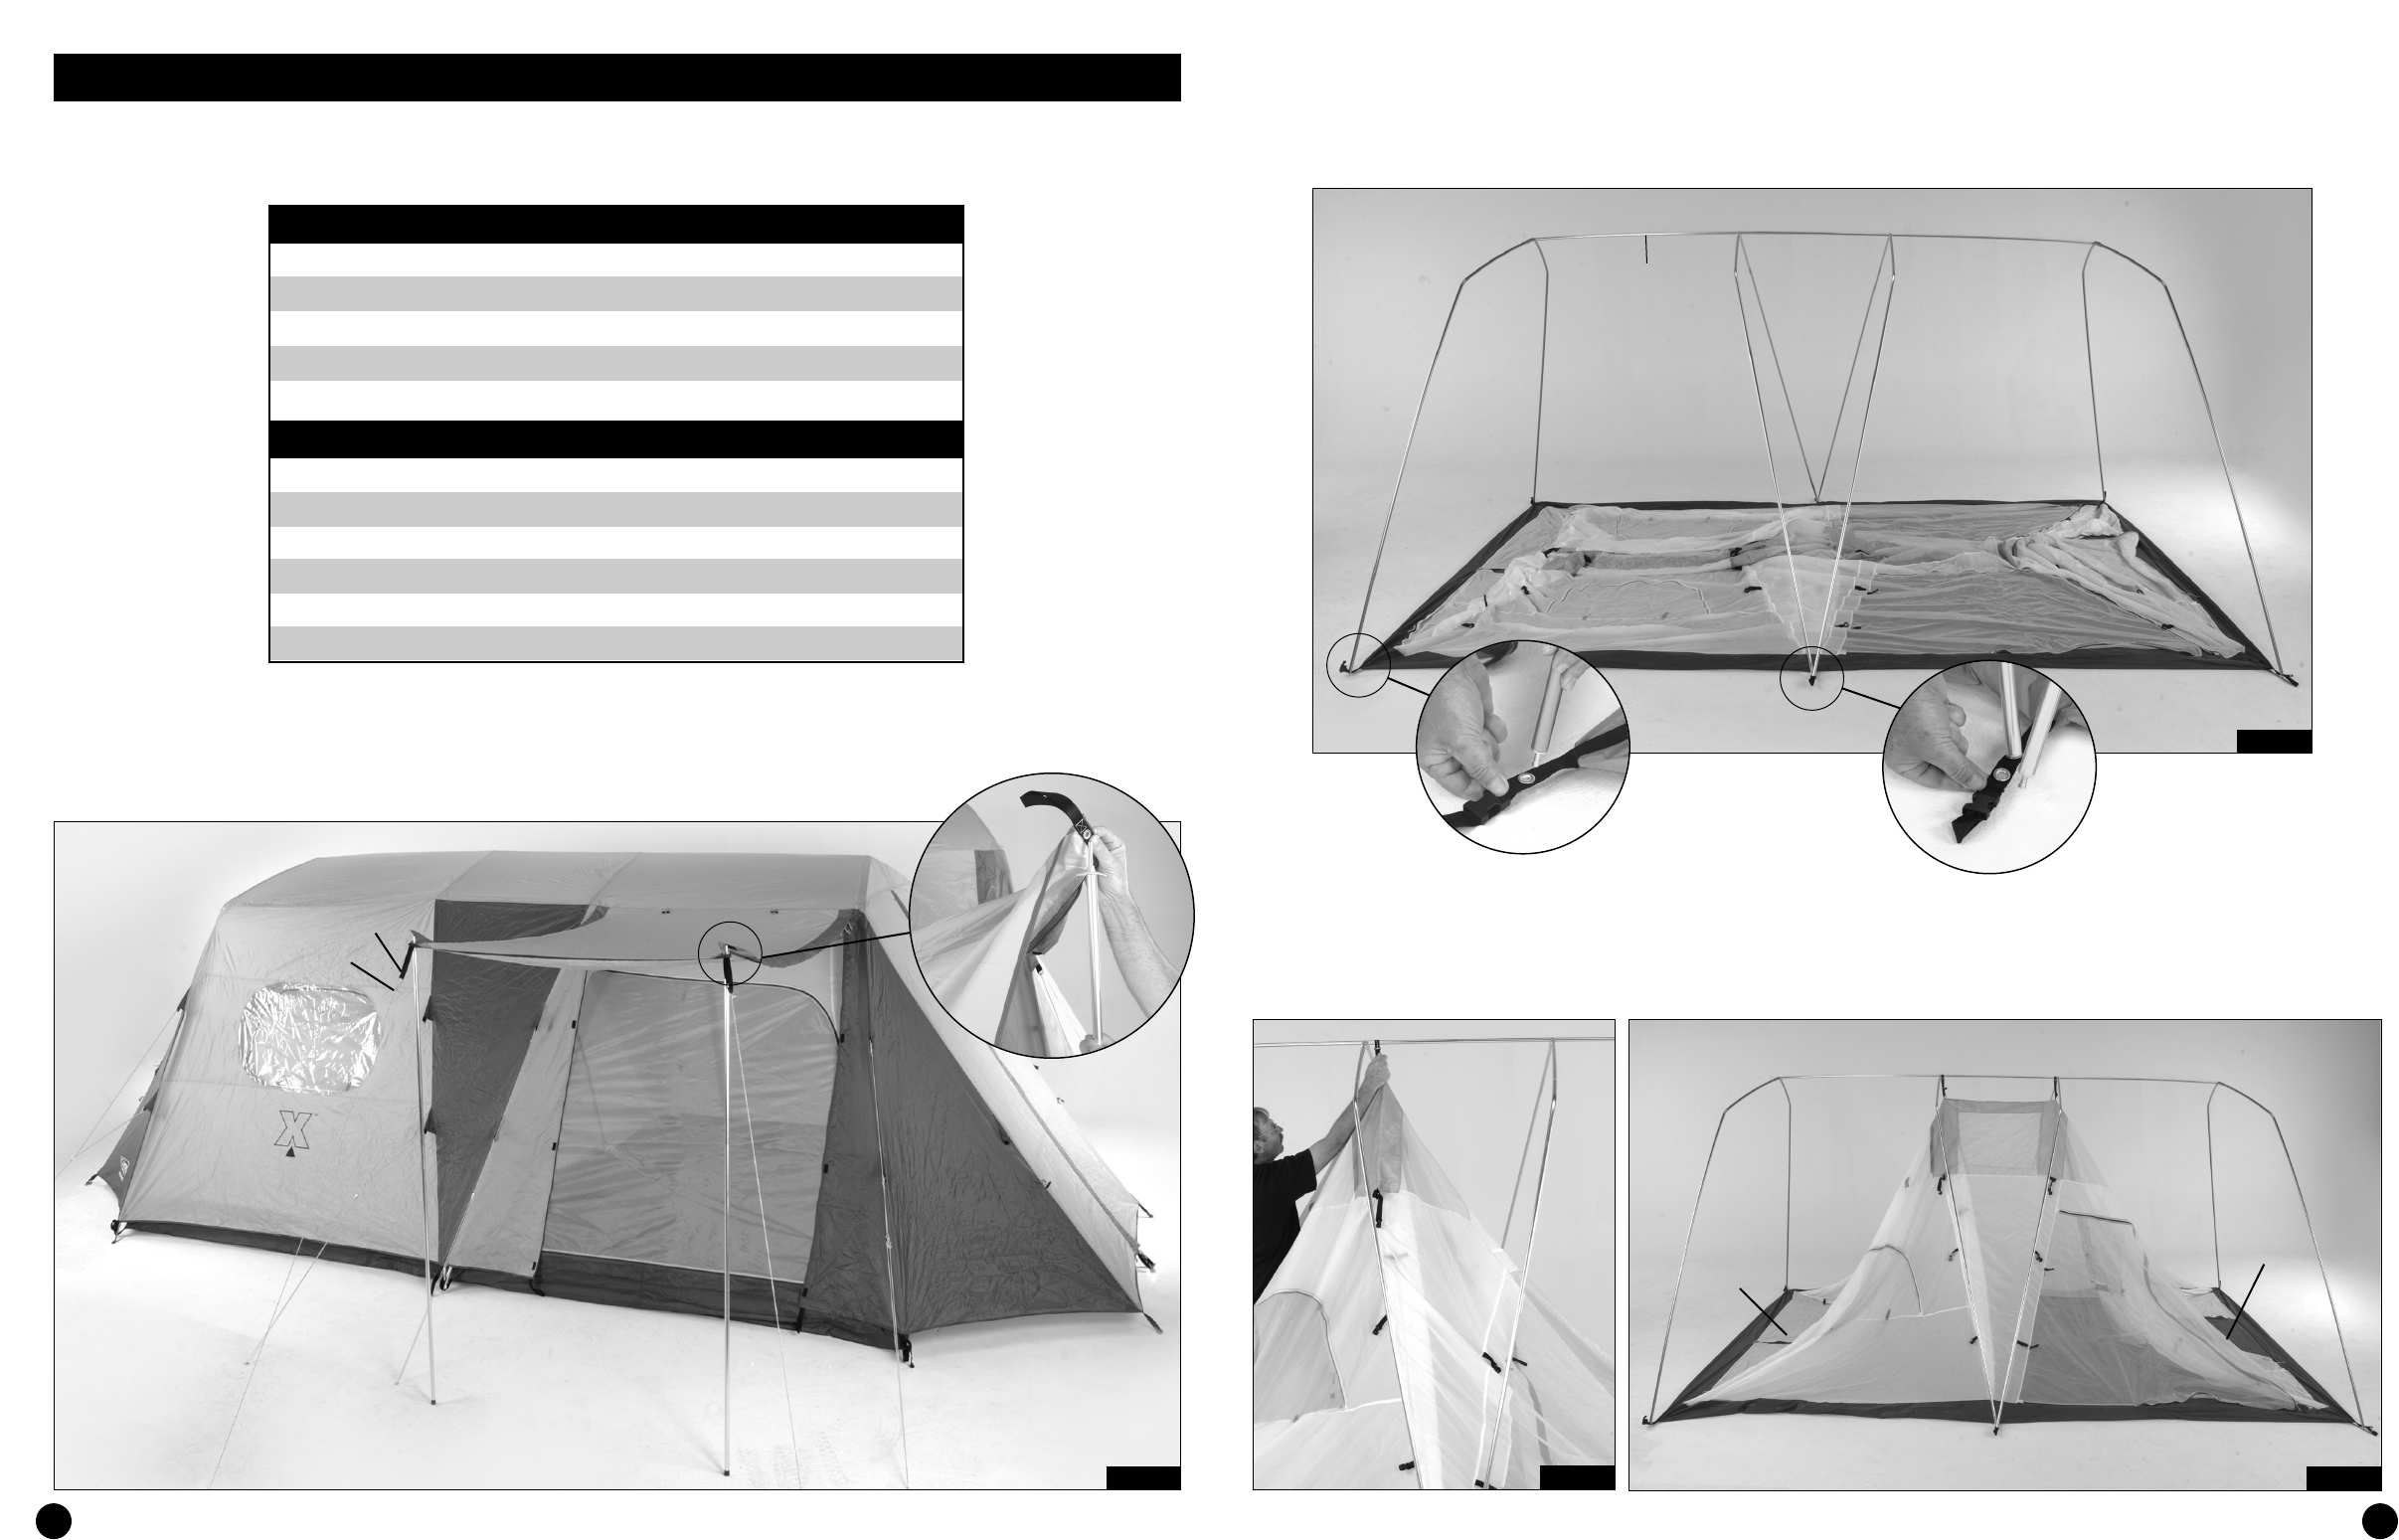
FIG. 3
Gold Leg
Poles
Chrome
Leg
Poles
Gold Leg
Poles
Center
Support Pole
3. Insert curved end of Gold Leg Poles into gold-colored fittings on Center Support Pole; then insert curved end of
Chrome Center Poles into chrome-colored fittings on Center Support Pole. (Fig. 3)
4. Insert bottom end of the four Gold Leg Poles into grommets on corner web straps (Detail A); then insert bottom
end of the four Chrome Center Poles into grommets on center front & back web straps (Detail B).
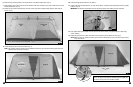
5. Snap both center hooks on top of tent onto middle section of the Center Support Pole. (Fig. 4 & 5)
NOTE: Unzipping Bedroom Door Panel and Living Area Door Panel will allow easier access to attaching the center
hooks of the tent to the Center Support Post.
FIG. 4
FIG. 5
6 3
Bedroom
Door
Panel
Living Area
Door Panel
The following chart is designed to show the variety of options available for access or ventilation with the X8 Tent. By
zipping or rolling up the flaps on the Rainfly, Inner Tent, or a combination of both, you can provide access, privacy or
maximum cross ventilation to enhance the camping experience.
To Assemble Right or Left Side Awning
1. Unzip the right or left side Awning Flap on Rainfly. Select which awning you prefer to use, then insert the two
furnished Awning Poles into grommets on web straps. (Detail A)
2. Tie guylines onto loops on the web straps, extend out, and secure with stakes. (Fig. 10)
FIG. 10
Guyline
Web Strap
Tent Configuration Section
Rainfly Options
Awning 1 Zipped Rolled Awning*
Awning 2 Zipped Rolled Awning*
Front Door Zipped Rolled
Back Door Zipped Rolled
*
See following Awning Assembly instructions below.
Inner Tent Options
Side Door 1 Zipped Rolled
Side Door 2 Zipped Rolled
Front Door Zipped Rolled
Back Door Zipped Rolled
Inner Door Zipped Rolled
2 Ceiling Vents Zipped Rolled
Detail A