


5
6
PRINTED IN SRI LANKA Rev. 12/04
Things You Should Know
•
Never store shelter, even for a short period of time, without drying it
thoroughly and brushing off caked dirt. Do not pack stakes or poles inside your
shelter. Use separate storage bag.
•
STAKES SHOULD BE REMOVED BY PULLING ON THE STAKE ITSELF.
NEVER PULL ON THE SHELTER FABRIC OR STAKE LOOP TO REMOVE STAKE.
•
SHELTER POLES SHOULD NOT BE LEFT TELESCOPED TOGETHER
DURING STORAGE.
WARNING: Keep all flame and heat sources away from this shelter fabric.
This shelter meets the flammability requirements of CPAI-84. The fabric will burn if
left in continuous contact with any flame source. The application of any foreign sub-
stance to the shelter fabric may render the flame-resistant properties ineffective.
THE COLEMAN CO., INC.
3600 N. Hydraulic • Wichita, Kansas 67219
1-800-835-3278 • www.coleman.com
MADE IN SRI LANKA
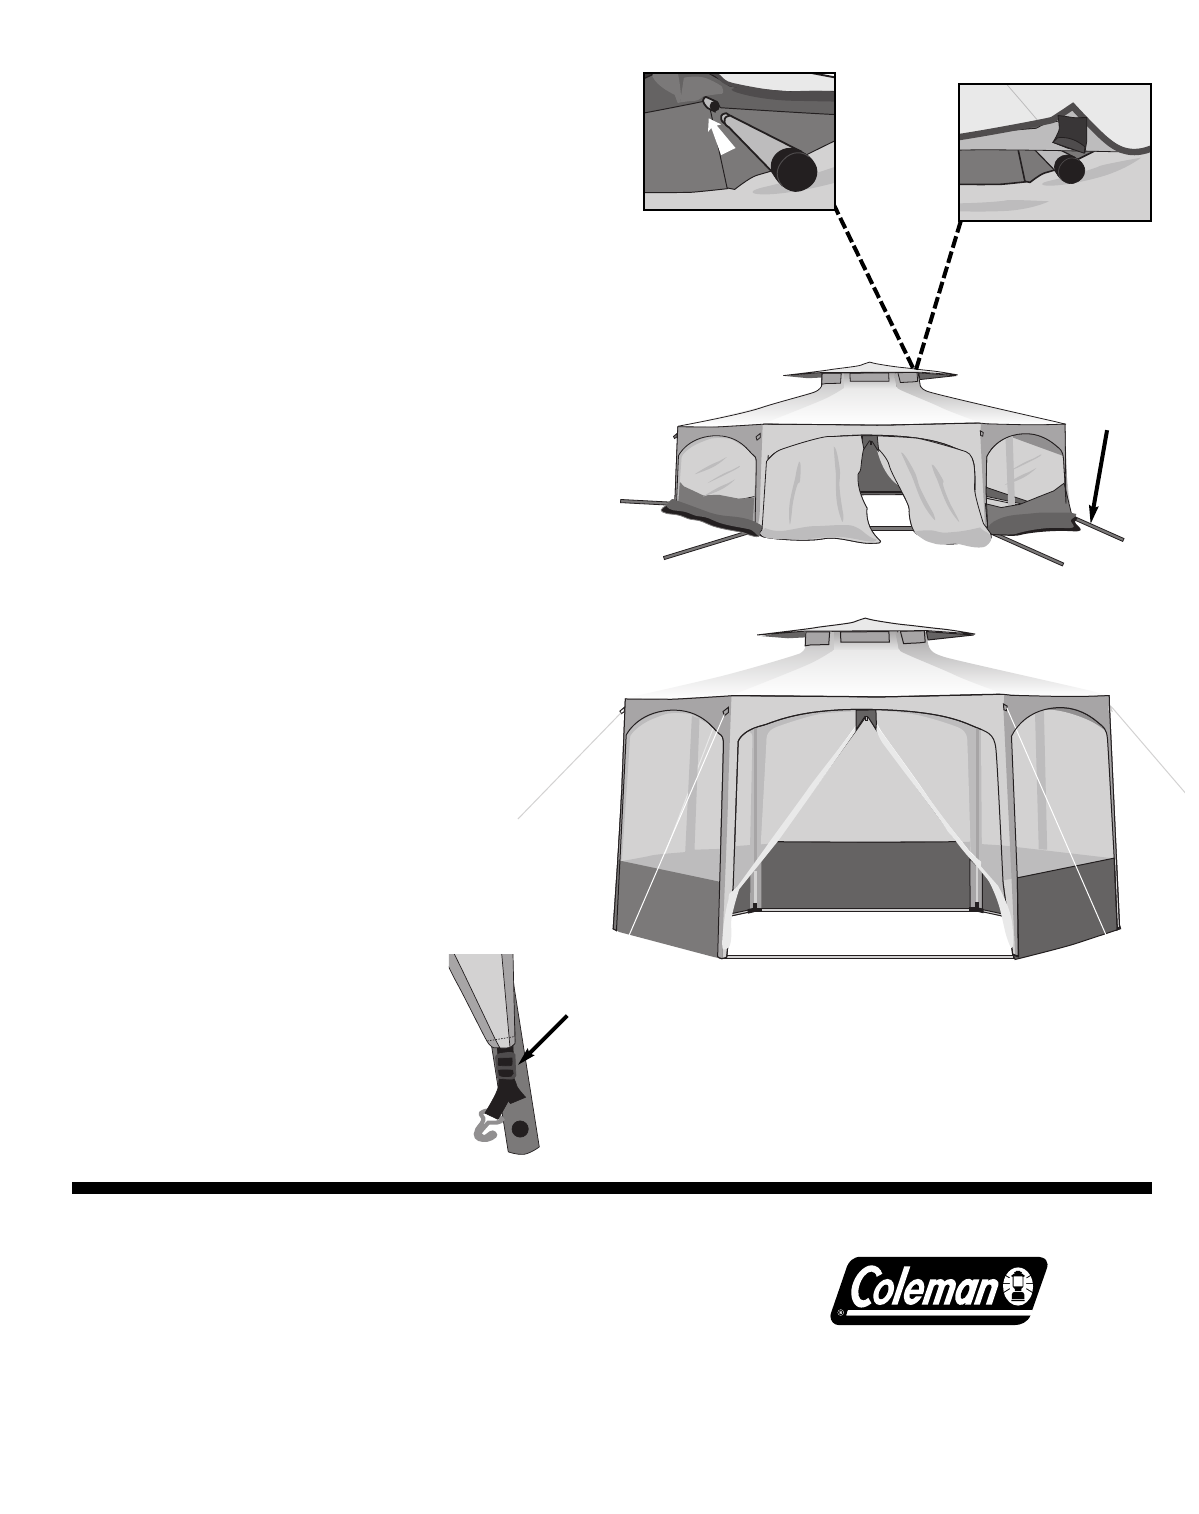
illus. 6 Fabric draped over
partially assembled frame
illus. 8
Completed shelter with guy
lines staked out
illus. 4
Cupola Eave Pole
connects to Cupola
Top Pole through
fabric opening.
illus. 5
Cupola Eave Pole
about to be inserted
into Pole Pocket on
underside of
cupola eave.
Attach Shelter to Frame
–Drape the canopy over the frame (illus. 6)
–You may need to stand inside the frame to adjust
the Cupola over the poles.
–Pull back the cupola eave fabric find the openings
for the Cupola Eave Poles. You should be able
line up the openings with the open end of the
Cupola Top Poles. (illus. 4)
–Connect the Cupola Eave Pole to the Cupola Top
Poles through the fabric opening. (illus. 4)
–Now pull the Cupola Eave fabric out over the
Cupola Eave Pole until you can insert the pole end
into the pole pocket on the underside of the eave
fabric. (illus. 5)
–Position the fabric corners over the pole corners.
(illus. 6)
–Secure fabric to frame by attaching hook & loop
fasteners around poles.
Stand-up Shelter and Connect
to Ground Poles
–Fully connect the Leg Poles to stand the shelter up.
–Align the Ground Pole assembly so the Hubs are
directly in front of the Leg Poles
–Lift one of the Leg Poles and insert it into the
Ground Pole Hub. Repeat for other Leg Poles.
(illus. 9)
–Insert the brass hook into the hole
near the base of the pole (illus. 7)
–Adjust hook straps to increase
tautness. (illus. 7)
–Attach guy lines to fabric guy
loops at each corner and
stake out. (illus. 8)
Leg Pole
illus. 7
Insert Brass Hook
into hole near the
base of the pole
Use to adjust
or tighten
fabric