9
I
I
n
n
s
s
t
t
a
a
l
l
l
l
i
i
n
n
g
g
t
t
h
h
e
e
C
C
o
o
u
u
n
n
t
t
e
e
r
r
w
w
e
e
i
i
g
g
h
h
t
t
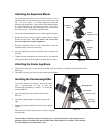
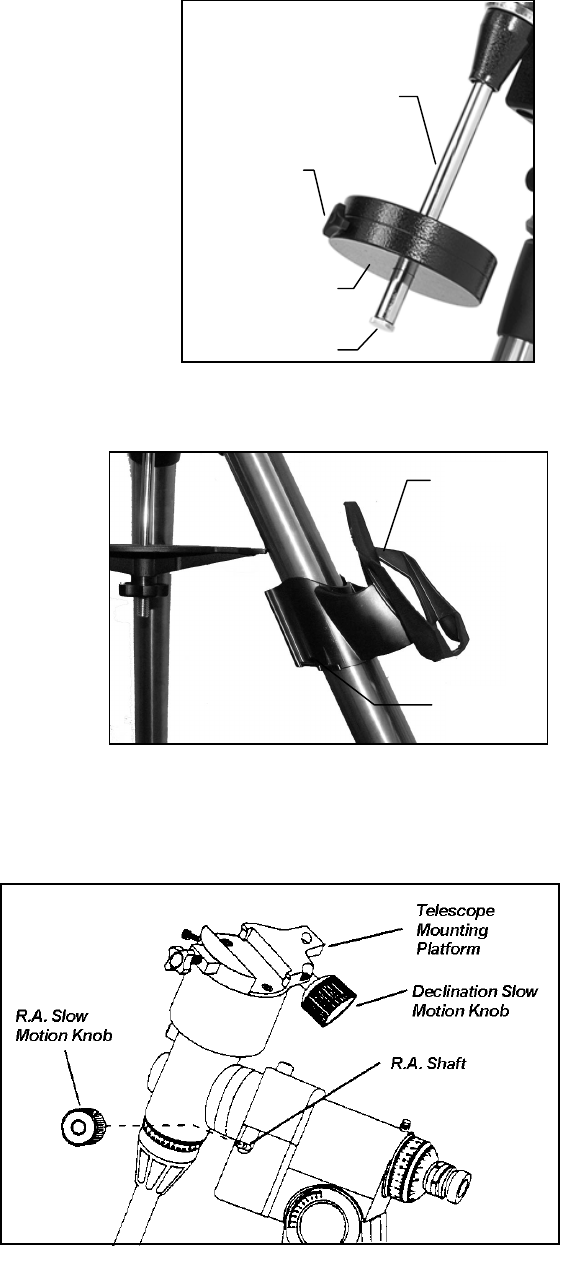
Depending on which AST telescope you have, you will receive either one or two counterweights. To
install the counterweight(s):
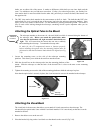
1. Orient the mount so that the counterweight bar points toward the
ground .
2. Remove the counterweight safety screw on the end of the
counterweight bar (i.e., opposite the end that attaches to the mount).
3. Loosen the locking screw on the side of the counterweight.
4. Slide the counterweight onto the shaft (see Figure 2-5).
5. Tighten the locking screw on the side of the weight to hold the
counterweight in place.
6. Replace the counterweight safety screw.
A
A
t
t
t
t
a
a
c
c
h
h
i
i
n
n
g
g
t
t
h
h
e
e
H
H
a
a
n
n
d
d
C
C
o
o
n
n
t
t
r
r
o
o
l
l
H
H
o
o
l
l
d
d
e
e
r
r
(
(
A
A
d
d
v
v
a
a
n
n
c
c
e
e
d
d
G
G
T
T
M
M
o
o
d
d
e
e
l
l
s
s
O
O
n
n
l
l
y
y
)
)
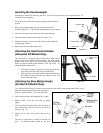
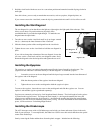
The Advanced GT telescope models come with a hand control
holder to place the computerized hand control. The hand control
holder comes in two pieces: the leg clamp that snaps around the
tripod leg and the holder which attaches to the leg clamp. To
attach the hand control holder:
1. Place the leg clamp up against one of the tripod legs and
press firmly until the clamp wraps around the leg.
2. Slide the back of the hand control holder downward into
the channel on the front of the legs clamp (see Fig 2-6)
until it snaps into place.
A
A
t
t
t
t
a
a
c
c
h
h
i
i
n
n
g
g
t
t
h
h
e
e
S
S
l
l
o
o
w
w
M
M
o
o
t
t
i
i
o
o
n
n
K
K
n
n
o
o
b
b
s
s
(
(
F
F
o
o
r
r
N
N
o
o
n
n
-
-
G
G
T
T
M
M
o
o
d
d
e
e
l
l
s
s
O
O
n
n
l
l
y
y
)
)
The Advanced Series (non-GT models) comes with two slow motion control knobs that allows you to
make fine pointing adjustments to the telescope in
both R.A. and Declination. To install the knobs:
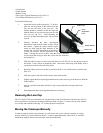
1. Locate the hard plastic shell under the R.A. shafts.
2. Remove either of the two oval tabs by pulling
tightly.
3. Line up the flat area on the inner portion of the R.A.
slow motion knob with the flat area on the R.A.
shaft (see Fig 2-7).
4. Slide the R.A. slow motion knob onto the R.A.
shaft.
The knob is a tension fit, so sliding it on holds it in
place. As mentioned above, there are two R.A.
Hand Control
Holder
Leg Clamp
Figure 2-6
Figure 2-7
Counterweigh
t
Safety Screw
Counterweigh
t
Bar
Locking Screw
Figure 2-5


