


- 3 -
AUTO DISPLAY FUNCTION
The Auto Display function of this watch continually chang-
es the contents of the digital display. Note that you can-
not use any of the watch's other functions (except for back-
light) while the Auto Display function is operating.
To turn the Auto Display off
Hold down for about three seconds until the watch
beeps.
To turn Auto Display on
Hold down for about three seconds until the watch
beeps.
Note
The Auto Display function cannot be performed while you are making settings (i.e.
while digits or other settings are flashing on the display).
About On-screen Button Labels
This watch features on-screen button labels that indicate the function of each button.
You can use the following procedure to turn these labels on and off.
To turn on-screen button labels on and off
While the Auto Display function is turned on, press to toggle the on-screen button
labels on and off.
The on-screen button label setting you select remains in effect even when you turn
off the Auto Display function.
On-screen button labels
(a) Elapsed time measurement
Start
Stop Re-start Stop Clear
Start
Split Split release Stop Clear
Start
Split Stop Split release Clear
(b) Split time measurement
(c) Split time and 1st-2nd place times
First runner
finishes.
Second runner
finishes.
Record time of
first runner.
Record time of
second runner.
Mode indicator
Minutes
Seconds
1/100 second
Hourly Time
Signal Only
Daily Alarm
Only
Both OFFBoth ON
Hour Minutes
3.Use and to change the character at the cursor position in the text field. The
character changes in the following sequence.
Holding down either button changes the character at high speed.
4.When the character you want is at the cursor position, press to move the cursor
to the right.
5.Repeat steps 3 and 4 until your text is complete.
You can input up to eight characters in the text field.
6.After you input a name, use to move the cursor to the number field.
The NAME indicator is cleared and the TEL indicator appears when the cursor is in
the number input field.
You can input up to eight characters for the name. After you input the eighth char-
acter, pressing causes the cursor to jump to the first digit of the number.
You can input up to 12 digits for the number. After input the twelfth digit, pressing
causes the cursor to jump back to the first character of the name.
7.Use and to change the character (space, number, or hyphen) at the cursor
position in the number field. The character changes in the following sequence.
Holding down either button changes the character at high speed.
8.When the character you want is at the cursor position, press to move the cursor
to the right.
9.Repeat steps 7 and 8 until you complete number input.
You can input up to 12 digits in the number field.
10.After inputting your data, press to store it.
When you press to store data, the watch takes a few seconds to sort memory
data. After the sort operation is complete, the watch returns to the normal Data
Bank Mode (without the cursor).
Unused spaces at the end of the name and number fields are automatically filled in
with “t ” whenever the number of characters you input in these fields is less than
the allowable maximum (8 characters for the name, 12 digits for the number). These
filler characters also appear on the display whenever you recall data.
If you do not perform any button operation for a few minutes while the cursor is on
the display, the watch automatically returns to the normal Data Bank Mode (without
the cursor).
To recall Data Bank data
1.In the Data Bank Mode, press to scroll through stored data items.
Holding down scrolls through the data at high speed.
Only name data appears when you are scrolling through stored data items.
2.Press to toggle the screen between the name and number data.
The name and number scroll from right to left on the screen. A separator (
<
) is
inserted between the last character and first character of the data.
To edit Data Bank data items
1.In the Data Bank Mode, scroll through the data items and display the one you want
to edit.
2.Hold down until the first character of the name starts to flash on the display.
3.Use to move the flashing to the character you want to change.
4.Use and to change character.
For details on inputting characters, see “To input new Data Bank data” (steps 3 for
name input and 7 for number).
5.After making the changes that you want, press to store them and return to the
Data Bank Mode.
To delete Data Bank data
1.In the Data Bank Mode, scroll through the data items and display the one you want
to delete.
2.Hold down until the first character of the name starts to flash on the display.
3.Press and at the same time to delete the data item.
At this time the cursor appears on the display, ready for input.
4.Input data or press to return to the Data Bank Mode.
ALARM MODE
When the Daily Alarm is turned on, the alarm sounds for
20 seconds at the preset time each day. Press any button
to stop the alarm after it starts to sound.
When the Hourly Time Signal is turned on, the watch beeps
every hour on the hour.
The alarm sounds whenever the time displayed in the
Timekeeping Mode reaches the alarm time and the Hour-
ly Time Signal sounds at the top of each hour, regard-
less of whether you are using the Home Time screen or
Dual Time screen.
Note that switching between the Home Time and Dual
Time screen in the Timekeeping Mode has no effect on
the Daily Alarm time setting. If you set an alarm time of
4:00 pm for your Home Time and then change to the
Dual Time screen, the Daily Alarm will start to sound
when the Dual Time reaches 4:00 pm.
to
(space)
Press
Press
to to
(space)
Press
Press
Hour : Minutes
Mode indicator
Alarm on indicator
Hourly time signal
on indicator
[Name Screen]
[Number Screen]
Press
NAME indicator TEL indicator
To set the alarm time
1.Hold down while in the Alarm Mode until the hour digits start to flash on the
display. The hour digits flash because they are
selected
.
This operation will turn the Daily Alarm on automatically.
2.Press to change the selection in the following sequence.
3.Press to increase the selected digits or to decrease them. Holding down
either button changes the selection at high speed.
The format (12-hour and 24-hour) of the alarm time matches the format you select
for normal timekeeping.
When setting the alarm time using the 12-hour format, take care to set the time
correctly as morning (no indicator) or afternoon (PM).
4.After you set the alarm time, press to return to the Alarm Mode.
If you do not operate any button for a few minutes while a selection is flashing, the
flashing stops and the watch goes back to the Alarm Mode automatically.
To turn the Daily Alarm and Hourly Time Signal on and off
Press while in the Alarm Mode to change the status of the Daily Alarm and Hourly
Time Signal in the following sequence.
[Alarm ON Indicator/Hourly Time Signal ON Indicator]
To test the alarm
Hold down while in the Alarm Mode to sound the alarm.
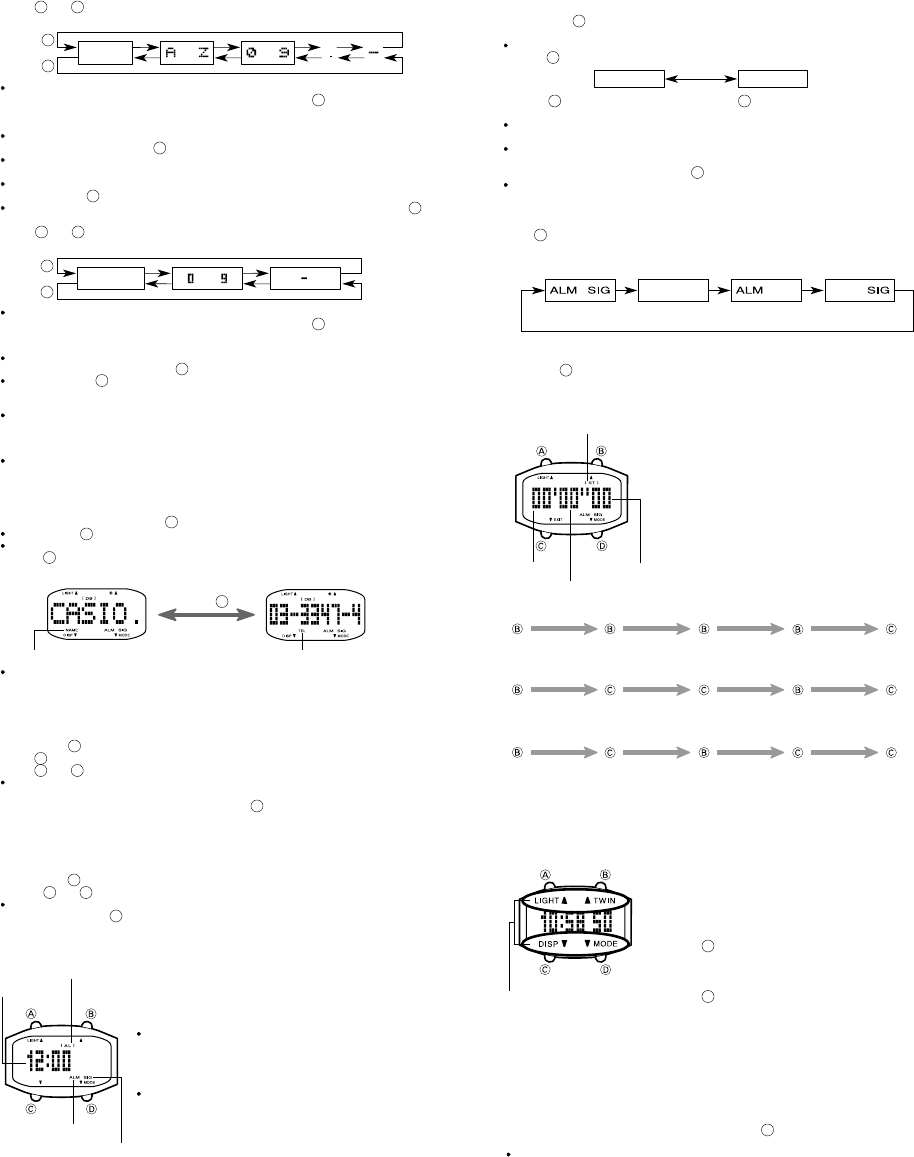
STOPWATCH MODE
The Stopwatch Mode lets you measure elapsed time, split
times, and two finishes. The range of the stopwatch is 59
minutes, 59.99 seconds.
C
C
C
C
C
C
C
C
C
C
C
D
D
D
D
D
D
D
D
D
B
B
B
B
B
B
B
B
B
B
B
A
A
A
A
A
A
A