


Operation Guide 5240
E-49
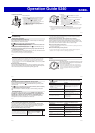
Important!
When
x TYO (TOKYO) is selected as the Home City, the temperature unit is set
automatically to Celsius (°C). These settings cannot be changed.
If you do not perform any operation with the crown for about two minutes after
x
pulling it out, crown operations will become disabled and the watch hands will no
longer move when you rotate the crown. If this happens, push the crown back in
and then pull it out again.
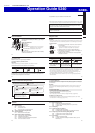
Correcting the Temperature Reading
The temperature sensor of this watch is adjusted at the factory and so further
adjustment is not required by you. However, if you notice that the readings produced
by the watch are different from readings produced by another instrument, you can use
the procedure in this section to make corrections. You also can use this procedure to
clear a correction.
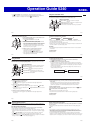
E-48
Measurement unit: 1°C (or 2°F)
Measurement range*: –10 to 60°C (or 14 to 140°F)
If a reading produces a value that is outside the measurement range, the *
z
Hour
Hand,
c
Minute Hand and
x
Second Hand all point to 11.
If you have performed correction of the temperature reading (page E-49), canceling
the correction may cause a reading to be outside the measurement range.
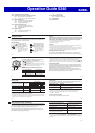
To switch a temperature reading unit between Celsius (°C) and Fahrenheit (°F)
While the hands are indicating a temperature reading, pull out the crown.1.
Hold down 2. A for about two seconds.
This will toggle the temperature reading unit between Celsius (°C) and
x
Fahrenheit (°F), causing the
x
Second Hand,
z
Hour Hand and
c
Minute Hand
to move accordingly.
Push the crown back in.3.
After about ten seconds, the watch will resume regular timekeeping.
x
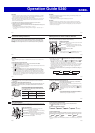
E-47
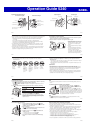
Fahrenheit (°F)
z
Hour Hand: Indicates the hundreds digit.
x
Second Hand: Indicates the ones digit.
c
Minute Hand: Indicates the tens digit.
b
Lower Dial Hand: Points to the day of the week.
To take a temperature reading
Enter the Timekeeping Mode (page E-32).1.
Press 2. A.
First the
x
x
Second Hand and then the
z
Hour Hand and
c
Minute Hand move
to indicate the temperature reading
Pressing
x A again while the hands are indicating a temperature reading will take
another reading.
To cancel an ongoing temperature measurement operation, press
x B or C.
About 10 seconds after the hands move to indicate a temperature reading, they x
will go back to regular timekeeping automatically.
E-46
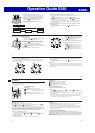
Thermometer
This watch uses a temperature sensor to take temperature readings.
You can select either Celsius (°C) or Fahrenheit (°F) as the temperature x
measurement unit (page E-48).
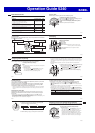
Hands and Indicators
Celsius (°C)
z
Hour Hand: Indicates the tens digit.
x
Second Hand: Indicates temperature is above
zero (+°C) or below zero (–°C).
c
Minute Hand: Indicates the ones digit.
b
Lower Dial Hand: Points to the day of the week.
* +
@
B
2 (tens digit)
5 (ones digit)
Example: 25°C
°C
(Above zero)
E-45
After the settings are the way you want, push the crown back in to return to the 9.
Timekeeping Mode.
This causes timekeeping to resume with the
x
x
Second Hand starting from
12 o’clock.
Note
The watch’s built-in full automatic calendar makes allowances for different month
x
lengths and leap years. Once you set the day, there should be no reason to change
it except after you have the watch’s rechargeable battery replaced or after power
drops to Level 3.
E-44
Rotate the crown to adjust the year setting.8.
If you want to change the time setting at this time, press
x C and then perform
the procedure starting from step 4 under “To change the current time setting
manually” (page E-39).
+
Year setting (ones digit)
0
1
2
3
4
9
8
6
57
B
Year setting (tens digit)
00
10
20
30
40
90
80
60
5070
E-43
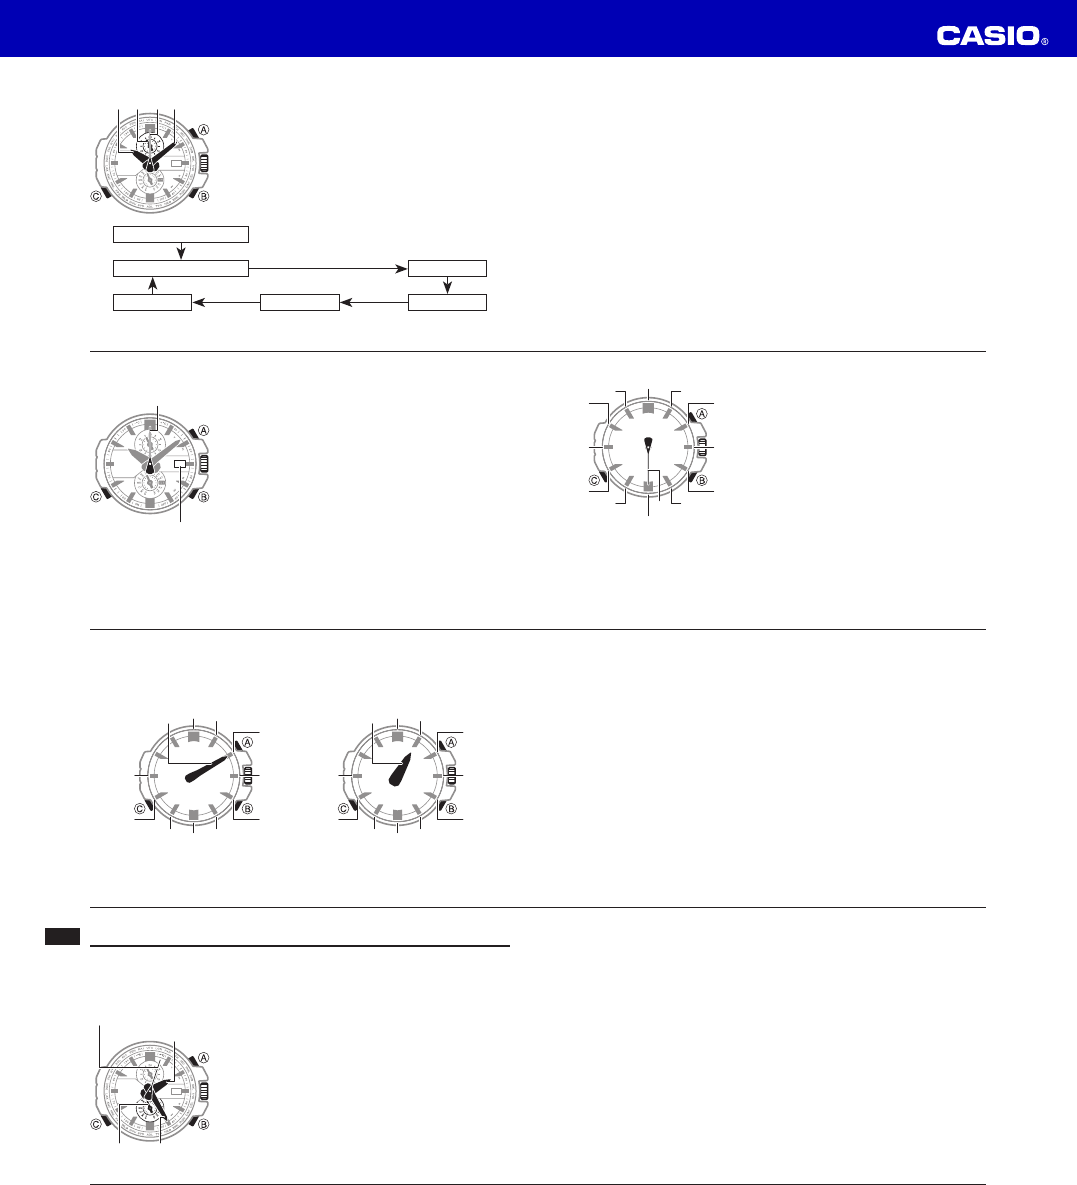
After the 5.
n
Day Indicator stops moving, press
C. This will enter the month setting mode.
The
x
x
Second Hand will move to the
currently selected month.
Rotate the crown to adjust the month setting.6.
Press 7. C. This will enter the year setting
mode.
The
x
z
Hour Hand will move to the number
that represents the tens digit of the year
and the
c
Minute Hand will move to the
number that represents the ones digit. The
x
Second Hand will move to 12 o’clock and
stop there.
@
Dec
Nov
Feb
Mar
Apr
Oct
Sep
Aug
Jan
Jul May
Jun
Setting the month
E-42
To change the current day setting manually
Pull out the crown.1.
This will cause the
x
x
Second Hand to move to the city
code of the currently selected Home City.
Hold down 2. C for about one second until the watch
beeps and the
x
Second Hand moves to 12 o’clock.
This indicates the manual time setting mode.
x
Press 3. C twice. This will enter the day setting mode.
The x
n
Day Indicator will move slightly to indicate the
setting mode.
Rotate the crown to adjust the day setting.4.
6
@
E-41
Rotate the crown to adjust the time (hour and minute) setting.4.
See “Using the Crown” (page E-3) for information about high-speed hand
x
movement.
The x
v
Upper Dial Hand is synchronized with the
z
Hour Hand.
When adjusting the setting, check to make sure that the x
v
Upper Dial Hand
correctly indicates an a.m. time or p.m. time.
If you want to change the day setting at this time, press
x C and perform the
procedure starting from step 3 under “To change the current day setting
manually” (page E-42).
After the settings are the way you want, push the crown back in to return to the 5.
Timekeeping Mode.
This causes timekeeping to resume with the
x
x
Second Hand starting from
12 o’clock.
E-40
Change the Home City settings, if you want.2.
For details about these settings, see steps 2 and 3 x
under “To confi gure Home City settings” (page E-34).
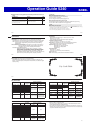
Hold down 3. C for about one second until the watch
beeps and the
x
Second Hand moves to 12 o’clock.
This indicates the manual time setting mode.
x
In the following steps, each press of x C cycles
between settings as shown below.
Home city/DST
Hour/Minute Hour
Year DayMonth
C
CC
C
CC
+@>B