


Operation Guide 3390
2
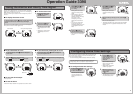
Location
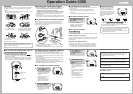
Reception is difficult and may even be impossible in the locations
described below. Avoid such locations when performing signal
reception.
• You should think of your watch operating like a radio or TV when it
is receiving the calibration signal.
If you are experiencing problems with reception, move away
from the types of locations described above to a location with
better reception, and try again.
Near high-voltage lines
Among or near buildings
Receiving the Calibration Signal
There are two methods you can use to receive the time calibration signal.
• Auto receive (Reception is performed automatically at
midnight, 2:00, 3:00 and 4:00 each morning.)
•
Manual receive (You initiate reception using a button operation.)
• If reception is not successful for any of the normal auto receive
operations shown above, auto receive is performed one more
time at 5:00 a.m.
• The watch is set up for auto receive at the factory, so all you need to
do is to place it in a location that allows good reception each night.
❚
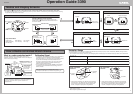
To position the watch for optimum reception
Remove the watch from your wrist and place it somewhere so its
top (12 o’clock side, where the antenna is located) is facing
approximately in the direction of the signal transmitter. Keep the
watch away from metal objects.
Resin band
Metal band
• Orienting the watch so it is sideways to the transmitter makes it
more difficult to receive the signal.
• Do not move the watch while it is receiving the calibration signal.
Near mountains
Inside a vehicle
(automobile, train, plane, etc.)
In a location where there is
radio interference
(construction site, airport, etc.)
Next to a household appliance
or office equipment (TV, speaker,
fax, computer, cell phone, etc.)
❚
Time Required for Reception
A calibration signal receive operation takes anywhere from about
two to six minutes.
• Note that when “AUTO” (Auto Select) is specified as the
transmitter selection mode, signal reception can take up to
12 minutes.
• See “Configuring Auto Receive Settings” for more information.
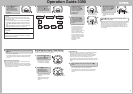
❚
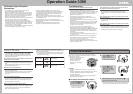
To perform manual receive
In the Timekeeping Mode, hold
down the
DD
DD
D button for about
two seconds.
• The watch will beep and
reception will start. An indicator
will appear on the display to
indicate reception conditions.
❚
To interrupt reception
Press the
DD
DD
D button.
• All other buttons besides D are disabled during signal reception.
When reception is successful
The watch terminates reception and adjusts the current time. Next
it beeps and then displays the date and time that the adjustment
was performed.
Reception Error (ERR Indicator)
The watch does not adjust its current time setting, and displays
“ERR” when signal reception is unsuccessful for some reason.
• The watch will return to the Timekeeping Mode automatically if
you do not perform any operation for about one or two minutes.
❚
Receive Indicator
The receive indicator cycles from
“Unstable” through “Stable” as
shown below while reception is in
progress. How far it cycles depends
on the signal strength. Keep the
watch in a location where reception
is stable while reception is in
progress.
Unstable
Stable
• Even under optimum reception conditions, it can take about 10
seconds for reception to stabilize.
• Use the receive indicator to check reception status and to
determine the best location for signal reception.
• Note that weather, the time of day, surroundings, and other
factors can all affect reception.
Receive Indicator
Configuring Auto Receive Settings
Use the procedure below to turn auto receive of the time
calibration signal on or off. When TYO (Tokyo) is selected as your
Home City, you can also specify the transmitter selection mode,
which controls which Japanese transmitter signal should be used
for time calibration.
• For information about selecting you Home City, see “Configuring
Home Time Settings”.
• The initial factory default settings for auto receive are Home City =
TYO (Tokyo); Auto Receive = On; Transmitter = AUTO
• The following procedure can be performed only when TYO, LAX,
DEN, CHI, or NYC is selected as the Home City.
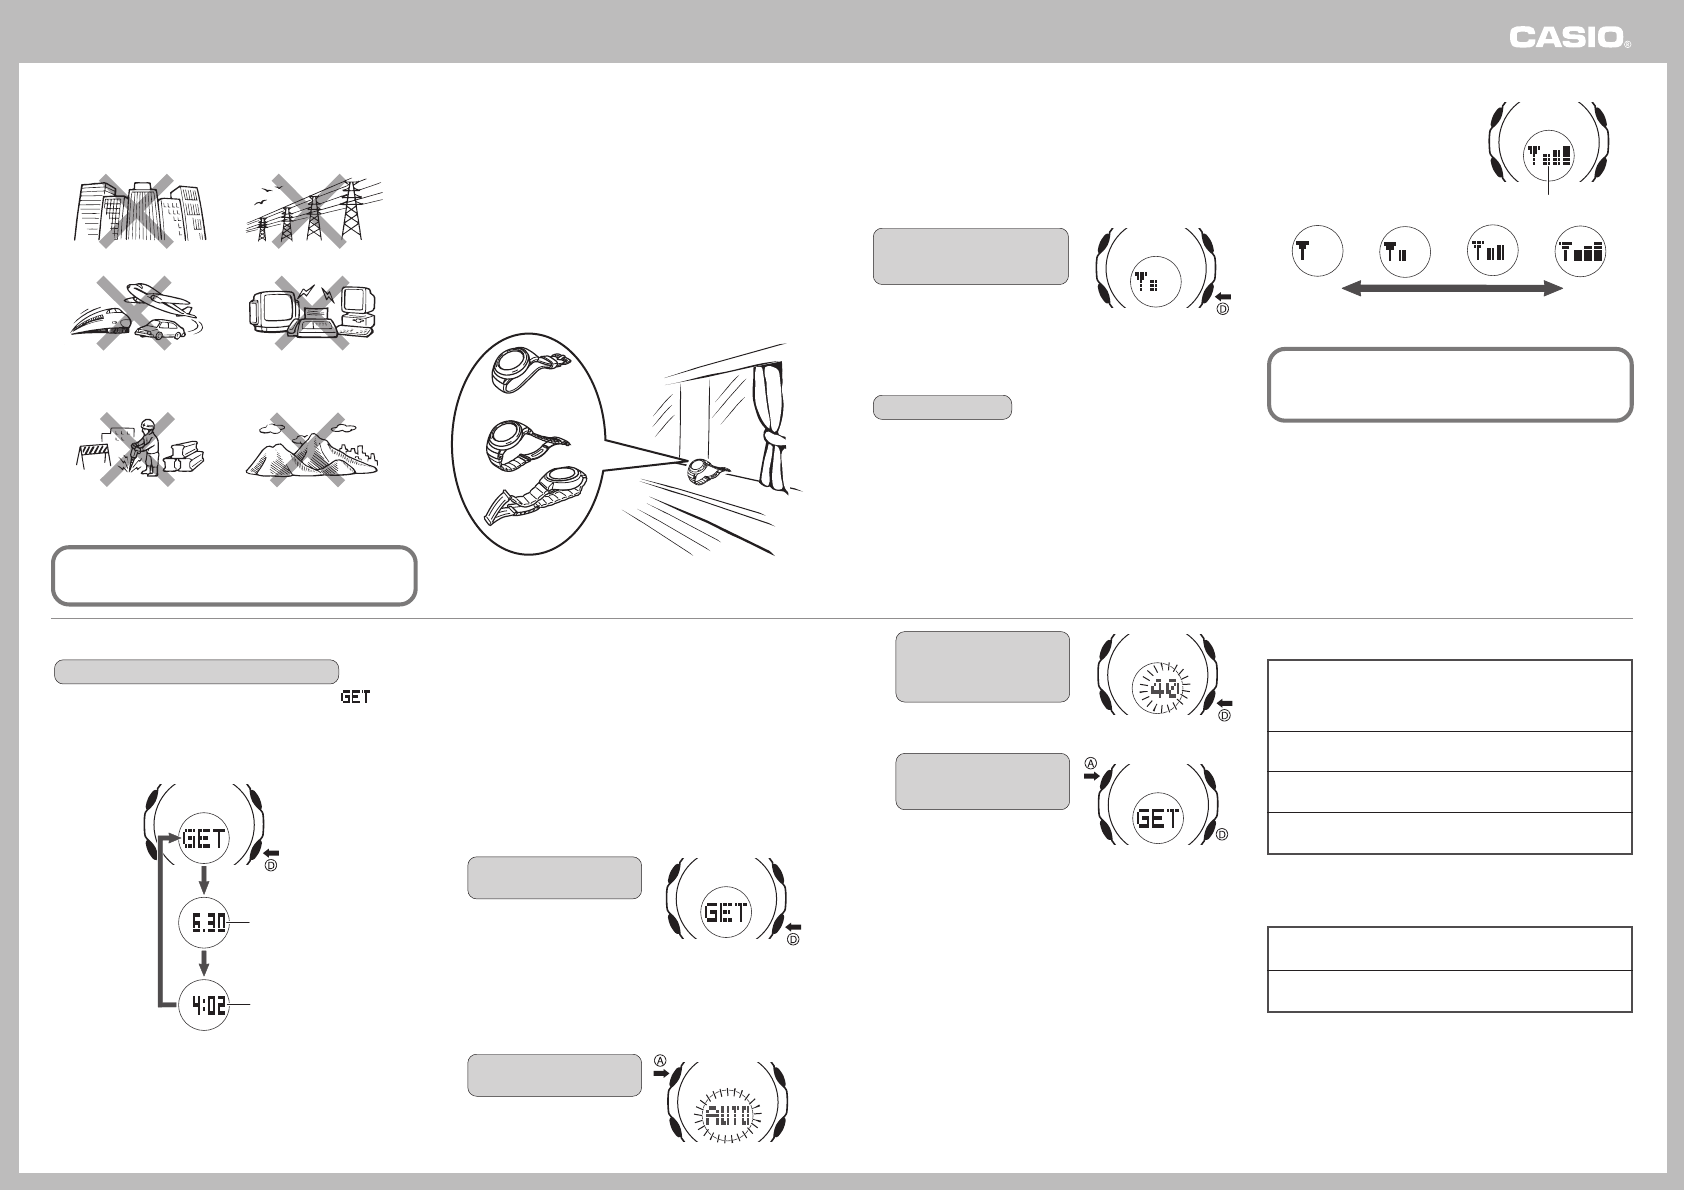
❚
To configure auto receive settings
1. In the Timekeeping Mode,
press the
DD
DD
D button.
• This will cause the display to
start cycling through the last
reception date and time
screens.
• The watch will return to the
Timekeeping Mode
automatically if you do not
perform any operation for
about one or two minutes.
2. Hold down the
AA
AA
A button
for about two seconds.
• This will cause the currently
auto receive setting to flash
on the display.
❚
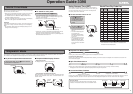
To view the last reception date and time
In the Timekeeping Mode, press the
DD
DD
D button.
• This causes the display to start cycling through the “ ”
screen, last reception date screen, and last reception time screen
at two-second intervals.
• To return to the Timekeeping Mode, press the D button again.
• The watch will return to the Timekeeping Mode automatically if
you do not perform any operation for about one or two minutes.
Last Reception
Date
Last Reception
Time
Auto Receive Settings when the Home City is TYO
• AUTO
Auto receive turned on with automatic selection of either the
Mt. Otakadoya signal (40kHz) or the Mt. Hagane signal
(60kHz), whichever is strongest.
• 40
Auto receive turned on for the Mt. Otakadoya signal (40kHz).
• 60
Auto receive turned on for the Mt. Hagane signal (60kHz).
• OFF
Auto receive turned off.
Auto Receive Settings when the Home City is NYC,
CHI, DEN, or LAX
• ON
Auto receive turned on for the Ft. Collins, Colorado signal.
• OFF
Auto receive turned off.
3. Press the
DD
DD
D button to
cycle through the
available auto receive
settings.
4. When the setting is the
way you want, press the
AA
AA
A button.
• This will exit the setting
screen and return to the last
reception date and time
screens.
• To return to the Timekeeping
Mode, press the D button
again.
• The watch will return to the
Timekeeping Mode
automatically if you do not
perform any operation for
about one or two minutes.