


12
www.cannondownriggers.com
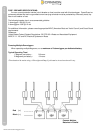
Installation
ATTACHING THE ROD HOLDER(S)
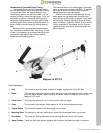
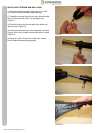
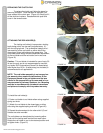
The locking rod holder(s) incorporate a locking
tooth design which can be easily adjusted every 15°
with the soft grip knob. The symmetrical design will al-
low mounting of the rod holder on either side of the
downrigger or two rod holders at the same time. The
unique two piece design allows independent adjustment
of the rod holder and the rod holder arm in two axes.
(Figure 19)
Caution: This rod holder is intended for use of up to 30
lb. test line only and is not recommended for use with
any tackle IGFA (International Game Fish Association)
rated higher than 30 lb. A safety strap (not included) is
recommended for all applications.
NOTE: The rod holder assembly is not covered un-
der warranty when used with tackle above 30 lbs.
Equipment placed in the rod holders and the loss
thereof is the responsibility of the user and is in no
way warranted by Johnson Outdoors, Inc. Mounting
must be in accordance with the above instructions
and pictures to comply with the product warranty.
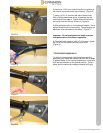
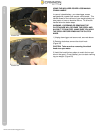
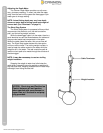
To install the rod holder(s):
1) Fasten rod holder to rod holder elbow using supplied
spring and knob.
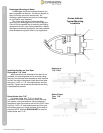
2 ) Attach the rod holder to the downrigger on either
side using the supplied spring and knob. (Figure 20)
3) Repeat the above steps for the other side if (2) rod
holders are to be mounted.
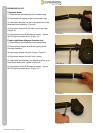
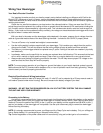
The rod holders can be adjusted by loosening either
knob until the locking teeth are free from each other.
Rotate the rod holder or arm to the desired position and
re-tighten knob. (Figure 21)
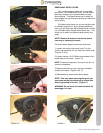
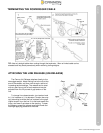
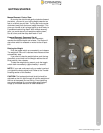
REPLACING THE CLUTCH PAD
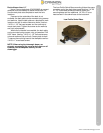
To replace the clutch pad, follow the steps for
removing the spool. Once the spool is removed, you
have access to the clutch pad. (Figure 18) Simply pull it
off the shaft and replace. Reassemble the spool and
cover in the reverse order.
FIGURE 18
FIGURE 19
FIGURE 20
FIGURE 21