


DIGITAL RADIO
CONTROLLED WATCH
INTRODUCTION
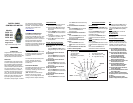
Congratulations on your purchase of the
Sima RCW. Before you begin using the
RCW, please read this manual carefully and
keep this manual for further information.
ABOUT NIST
The RCW utilizes a highly sensitive radio
receiver to automatically set the time and
date. The National Institute of Standards
and Technology (NIST) measures each
second of time as 9,192,631,770 vibrations
of a Cesium 133 atom in a vacuum. The
measurement of the Cesium 133 atom is
accurate to one second every one million
years. The time is then transmitted from
Fort Collins, CO to the rest of the United
States (US). NIST is the official time used
by the US; it governs ship movements,
radio stations, and space flights. The RCW
also automatically adjusts for daylight
saving time, leap years, and leap
seconds. For more details about
the NIST Clock, please visit
www.NIST.gov
AUTOMATIC TIME SETTING
The RCW receives the NIST signal
automatically at 3:00AM every night. Once
the NIST signal is received the watch will
display the official U.S. time. The time and
date are set automatically for Eastern
Standard Time, which will need to be
adjusted if you are located in a different time
zone. If the signal cannot be received, the
RCW also can be set manually.
BEFORE USING THE RCW
The time zone that you are located in must
be selected. Setting the correct time zone
will allow the watch to set itself to the
correct time.
This watch should be set manually for the
first time. After that, the watch will
automatically adjust itself to maintain
accurate time.
SETTING THE TIME ZONE
The RCW will automatically set the time and
date when a NIST signal is received
successfully. However, you will still have to
set the correct time zone.
(Note: The RCW will not automatically
adjust to a new time zone if you are
traveling. You must change the time zone
setting to continue to keep the exact time.)
TIME ZONE SETTING
1. Press the MODE button three times and
the time zone will be displayed.
2. Press and hold the SET button for three
seconds or until the offset hours digits
begin to flash.
3. Press the RECEIVE button to increase or
press the LIGHT button to decrease the
hour-offset.
4. For standard time: (Eastern = -5) (Central
= -6) (Mountain = -7) (Pacific = -8)
5. Press the SET button once to return to
normal operation.
MANUAL TIME AND DATE SETTING
1. Press and hold the SET button for
three seconds and “12” or” 24” will blink
on the LCD.
Press the RECEIVE or LIGHT button to
change the setting from 12 to 24 or 24 to
12.
2. Press the SET button to advance to
the year setting.
Press the RECEIVE button to increase
the year or LIGHT button decrease the
desired year.
3. Press the SET button to advance to
the month setting.
Press the RECEIVE button to increase
the month or LIGHT button decrease the
desired month.
4. Press the SET button to advance to
the day of the month.
Press the RECEIVE button to increase
the day or LIGHT button to decrease the
day of the month.
5. Press the SET button to advance to
the day of week.
Press the RECEIVE button to increase
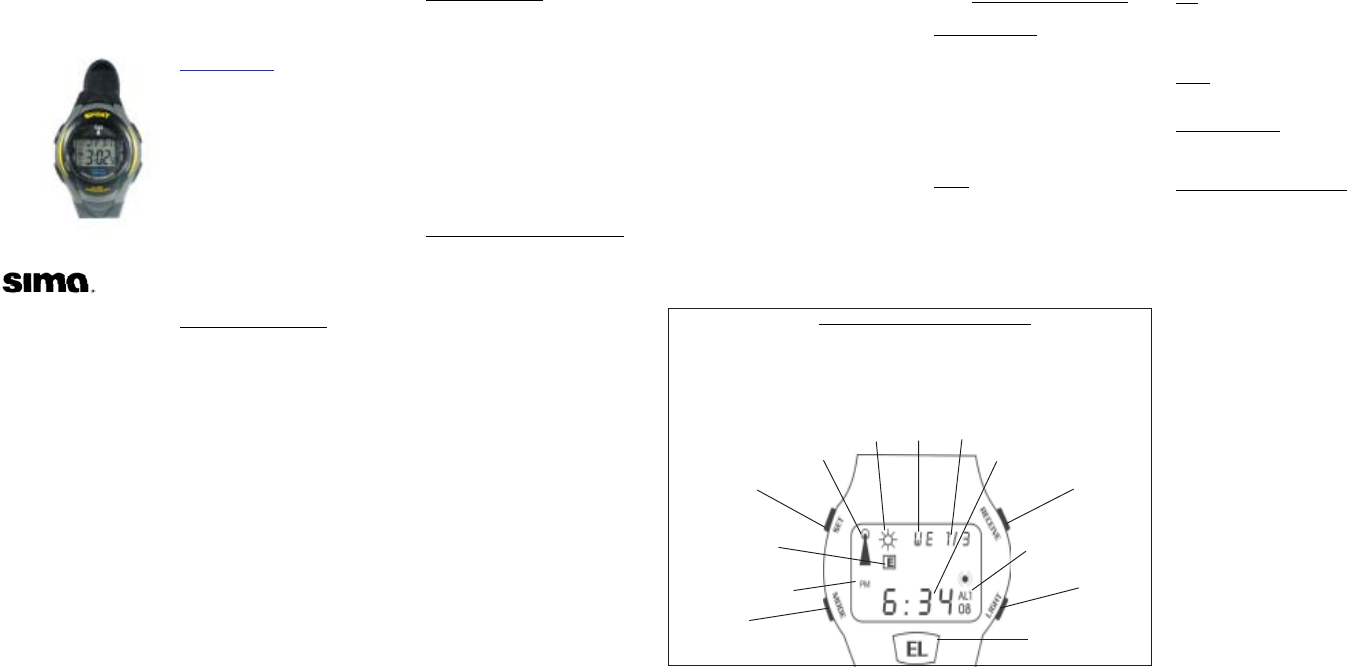
WATCH DISPLAY ICONS & BUTTONS
or the LIGHT button to decrease the day
of the week.
6. Press the SET button to advance to
hours.
Press the RECEIVE button to increase
the hour or the LIGHT button to
decrease the hour.
7. Press the SET button to advance to
minutes.
Press the RECEIVE button to increase
the minute or the LIGHT button to
decrease the minute.
8. Press the SET button to advance to
seconds.
Press the RECEIVE button or the
LIGHT button to reset the seconds to
“00”.
9. Press the SET button one more time
to return to normal operation.
BUTTONS AND FUNCTIONS
RECEIVE BUTTON
Pressing and holding the RECEIVE button
for five seconds activates the manual signal
receiver.
Pressing the RECEIVE button while in
manual setup will increase the digits
displayed on the LCD.
Press and hold the RECEIVE button to
increase the numbers at a faster rate.
LIGHT
Pressing the LIGHT button activates the
RCW backlight.
Pressing the LIGHT button while in manual
setup decreases the digits displayed on the
LCD.
Press and hold the LIGHT button to
decrease the numbers at a faster rate.
Online Product
Registration
http://www.simacorp.com
Models
RCW -101
RCW -103
RCW -303
RCW -305
1. AM/PM Indicator
2. Time Zone indicator
3. NIST Reception
4. Daylight Saving Time Indicator,
5. Day of Week
SETTING ALARM 1 & ALARM 2
The RCW has two alarms that can be
activated, AL1 and AL2. Pressing any
button will turn the alarm sound off once
activated. If no button is pushed, it will
automatically shut off after two minutes.
1) Press the MODE button once for
AL1, twice for AL2. The icon will
blink on the right side of the LCD.
2) Press and hold the SET button for
three seconds.The hour section of
the clock will begin blinking.
3) Press the RECEIVE button to
increase the hour or the LIGHT
button to decrease the hour.
4) Press the SET button to move to the
minute section of the clock.
5) Press the RECEIVE button to
increase the minute or the LIGHT
button to decrease the minute.
6) Press the SET button to advance to
the ON / OFF setting.
7) Press the RECEIVE button to set the
alarm to ON or OFF.
The icon for ON/OFF is located above
the second portion of the clock (on=ON,
oF=OFF).
8) The RCW will return to normal
operation in approximately 15 seconds.
SET
Pressing and holding the SET button for
three seconds enters the manual setup
mode. Different settings can be accessed
by pressing the SET button repeatedly .
MODE
Press the MODE button to enter the
alarm-setting menu.
EL (RCW-101 only)
Pressing the EL button will activate the
RCW backlight.
6. Month & Day
7. Hours: Minutes: Seconds
8. Alarm Indicators (AL1 + AL2)
9. EL - Light (RCW 101 only)
RECEIVE
SET
LIGHT
MODE
1
3
4
5
6
7
8
9
2