


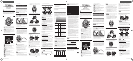
EN
INTRODUCTION
Thank you for selecting the Oregon Scientific
TM
Strapless
Heart Rate Monitor (SE138). The SE
138 is a very practical
sports and fitness aid as it monitors your heart rate without
requiring to wear a heart rate transmitter. It is equipped
with calorie measurement along with real-time clock,
stopwatch, backlight and keypad lock functions.
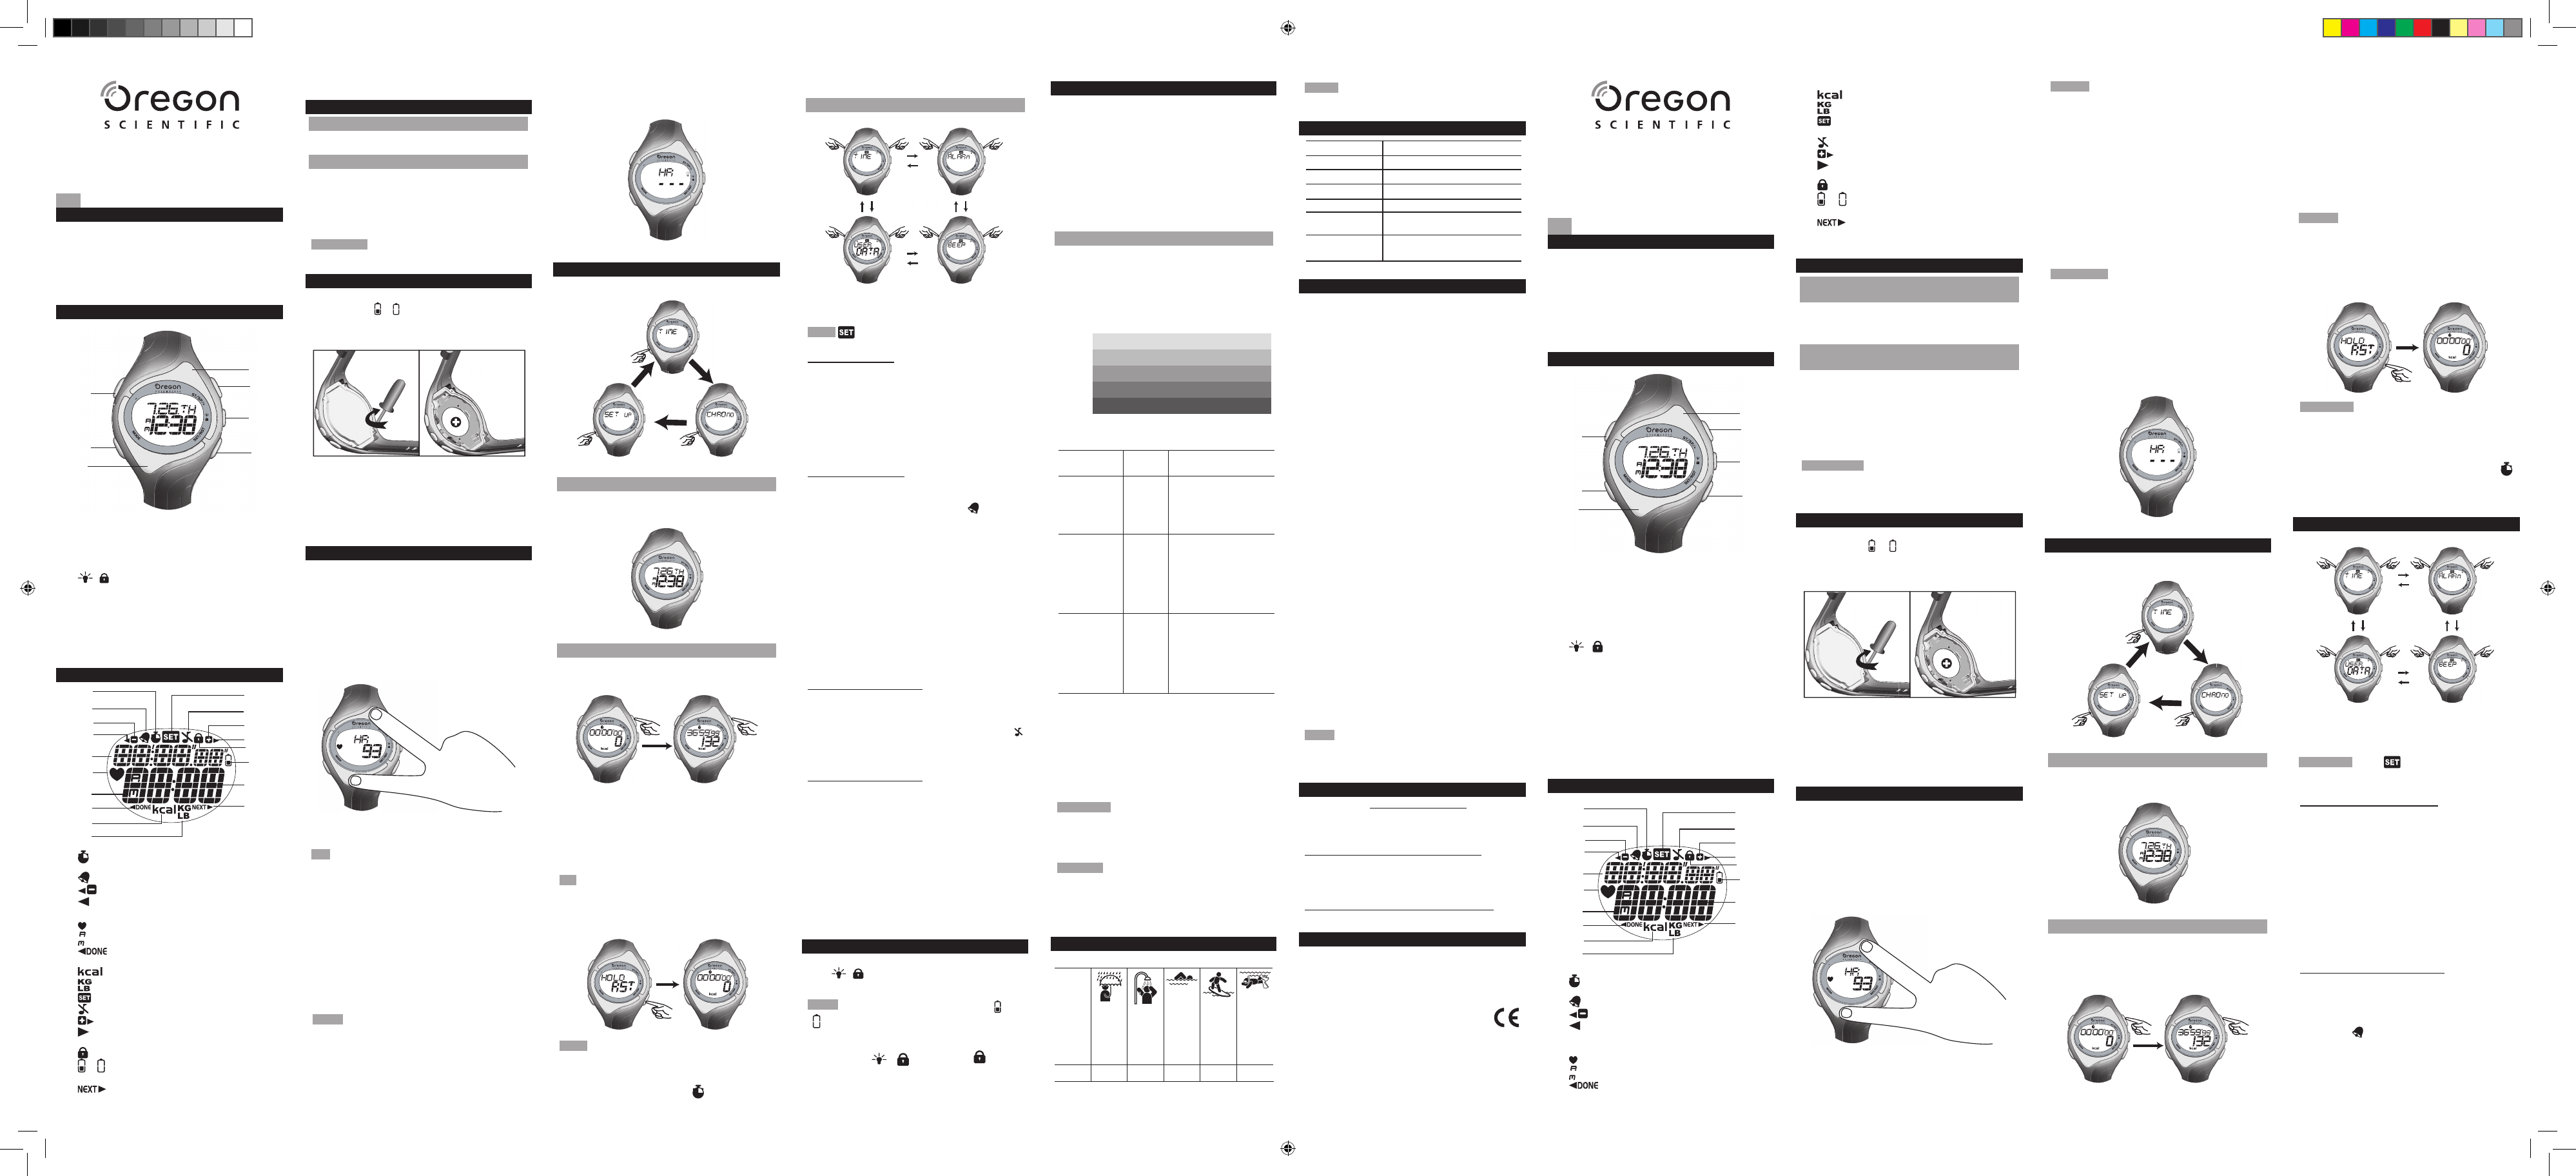
CONTROL BUTTONS
2
1
3
6
7
4
5
1. -: Toggle between setting sub-modes; decrease values
2. MODE: Toggle between modes, confirm and exit settings
3. ST/SP/+: Start / stop stopwatch; toggle between
setting sub-modes; increase values
4. / : Activate backlight; lock keypad
5. SET/RST: Enter setting sub-mode; confirm setting;
reset stopwatch and calorie values
6. Top metallic plate: Touch to enter Heart Rate Mode
and take heart rate measurement
7. Bottom metallic plate: Touch to enter Heart Rate Mode
and take heart rate measurement
LCD
11
12
1
14
15
13
16
18
2
4
5
3
6
7
8
9
10
17
1. : Indicates you are in Stopwatch Mode or the
stopwatch is running
2. : Indicates alarm is On
3. : Smart indicator to decrease values
4. : Smart indicator to toggle between setting sub-modes
5. Displays stopwatch, date or mode banners
6. : Indicates a heart rate reading is detected
7. : 12 hour clock
8. : Smart indicator to quick exit and return to
previous mode
9. : Calorie unit
10. : Weight unit
11. : Indicates you are in setting sub-modes
12. : Indicates beep tone is Off
13. : Smart indicator to increase values
14. : Smart indicator to toggle between setting sub-
modes
15. : Indicates keypad is locked
16. or : Indicates battery power is low
17. Displays time or calorie reading
18. : Smart indicator to confirm setting and move
STRAPLESS HEART RATE MONITOR
Model: SE138
USER MANUAL
to the next setting
GETTING STARTED
ACTIVATE WATCH (FIRST TIME USE ONLY)
Press and hold any key until the screen is activated.
SET TIME AND USER DATA
To effectively use the watch for calculating calorie burned
(based on the user’s age, weight, heart rate reading and
exercise time), you are advised to set the time and your
personal data in Set Up Mode. Refer to “Time Setting
Mode” and “User Data Setting Mode” in Set Up Mode.
IMPORTANT Remember to set the time and user data
after every battery replacement or power reset.
BATTERY REPLACEMENT
The watch uses a CR2032 3V battery, which has already
been installed.
If or flashes, it means battery power is
low and should be replaced. If battery power is low, alarm
beeping, backlight and heart rate measuring functions will
be disabled.
1. Use a small Phillips screwdriver to remove battery
compartment lid. Once opened, please keep the
screws in a safe place to avoid losing them.
2. Remove the old battery and insert the new one
matching the polarities.
3. Replace the lid by screwing it back into place.
HEART RATE MEASUREMENT
You can measure your heart rate anytime (except in
setting sub-modes).
1. Wear the watch on your wrist and place fingertips
(suggest to use index finger and middle finger) on both
metallic plates to enter Heart Rate Mode. A beep tone will
be heard and “HR” banner will flash to indicate the watch
is detecting heart rate reading. It will take between 6-10
seconds to detect a heart rate reading.
2. If a valid heart rate reading is detected, another
beep tone will be heard and the screen below will be
displayed. Remove your fingers.
3. To exit Heart Rate Mode, remove your fingers for 3
seconds or press MODE.
TIP
For accurate heart rate reading, make sure:
• you are not running or doing exercise
• to wear the watch on your wrist and your fingertips
touch the 2 metallic plates
If you cannot get your heart rate reading within 10 seconds or if
any unusual condition occur during heart rate reading:
• moisten your fingertips
• make sure your fingertips are warm and steady
• do not press too hard on the metallic plates
• make sure the metallic plates and the back of your
watch are clean
NOTE
• Heart rate measurement cannot be activated if keypad
is locked or battery power is low.
• Clean the watch with a soft dry cloth.
• The 2 metallic plates are very sensitive. Accidentally
touching them will trigger heart rate measurement.
Hence, to prevent from accidentally activating heart
rate measurement, you can select to lock the keypad.
• If the battery power is low, the screen below will be
displayed.
OPERATING MODES
The watch has 3 operating modes. Press MODE to toggle
between these modes.
TIME MODE
• This mode displays the real-time clock and date.
• To set the time and date, refer to “Time Setting Mode”
in Set Up Mode.
STOPWATCH MODE (CHRONO)
You can take your calorie reading in this mode.
To start or stop stopwatch:
Press ST/SP/+.
To take calorie reading:
Take a heart rate reading while the stopwatch is running
in order to view the calories burned. Refer to “Heart Rate
Measurement”.
The calorie reading shown in Stopwatch Mode represents
an average of the calories lost during the time elapsed.
TIP The more frequent you provide heart rate reading, the
more accurate the calorie calculation.
To reset stopwatch and calorie value:
Stop or pause the stopwatch, then press and hold
SET/
RST for 2 seconds.
NOTE
• Set Up Mode cannot be accessed while stopwatch is
running.
• If stopwatch is running, pressing MODE will go to Time Mode.
• Unless you stop the stopwatch,
will blink to remind
you that the stopwatch is still timing.
SET UP MODE
There are 4 setting sub-modes in Set Up Mode.
• Press - or ST/SP/+ to toggle between these sub-modes.
• Press MODE anytime to return to Time Mode.
NOTE icon will be displayed in setting sub-mode.
TIME SETTING MODE
To set time and date:
1. In Time Setting Mode, press SET/RST to enter settings.
2. Press - or ST/SP/+ to set the values. Press and hold
- or ST/SP/+ to rapidly change the values. The setting
sequence is as follows: 12 / 24-hour time; hour;
minute; year; day-month / month-day; month; day.
3. Press SET/RST to confirm and to move to the next setting.
4. Press MODE anytime to confirm and exit settings.
ALARM SETTING MODE
To set alarm:
1. In Alarm Setting Mode, press SET/RST to enter settings.
2. Press - or ST/SP/+ to turn alarm On or Off. indicates the
alarm is turned On. If alarm Off is selected, press MODE to
confirm and exit settings. If alarm On is selected, press SET/
RST to confirm and set the alarm time.
3. Press - or ST/SP/+ to set the values. Press and hold
- or ST/SP/+ to rapidly change the values. The setting
sequence is as follows: hour; minute.
4. Press SET/RST to confirm and to move to the next setting.
5. Press MODE anytime to confirm and exit settings.
To silence alarm:
• Press any button to stop the alarm and it will activate
24 hours later.
OR
• Turn the alarm Off in Alarm Setting Mode.
BEEP TONE SETTING MODE
To turn beep tone On or Off:
1. In Beep Tone Setting Mode, press SET/RST to enter
settings.
2. Press - or ST/SP/+ to turn beep tone On or Off.
indicates the beep tone is turned Off.
3. Press Mode anytime to confirm and exit settings.
USER DATA SETTING MODE
To enjoy the full benefits of this watch, set up your personal
data before you exercise. This will enable the watch to
calculate the level of calories burned while exercising. This
information helps you track your progress over time.
To set personal data:
1. In User Data Setting Mode, press SET/RST to enter settings.
2. Press
- or ST/SP/+ to set the values. Press and hold
- or ST/SP/+ to rapidly change the values. The setting
sequence is as follows: year of birth; month of birth;
day of birth; weight unit; weight.
3. Press SET/RST to confirm and to move to the next setting.
4. Press MODE anytime to confirm and exit settings.
BACKLIGHT AND KEYPAD LOCK
To activate backlight:
Press / to turn backlight On for 5 seconds.
NOTE The backlight function will not operate if “ ” or
“ ” is displayed.
To toggle keypad lock On or Off:
Press and hold
/ for 2 seconds. indicates
keypad is locked.
PHYSICAL CONDITION AND WORKOUT
To help achieve maximum health benefits from your
workout program, it is important to know your:
• Maximum heart rate (MHR)
• Upper heart rate limit
• Lower heart rate limit
MHR is expressed in beats per minute. You can get your
MHR from an MHR test, or you can estimate it by using
the following formula:
220 - age = MHR
TRAINING ZONES
There are several training zones that are relevant to a
fitness program. The most popular zone range is from
50% to 80% of your maximum heart rate. This is where
you achieve cardiovascular benefits, burn fat, and
become fitter. When programming your watch, the lower
percentage of the zone you choose becomes your lower
heart rate limit and the higher percentage becomes the
upper heart rate limit.
50%
60%
70%
80%
90%
100%
Moderate Activity
Weight Management
Aerobic Zone
Anaerobic Threshold Zone
Red Line Zone ( maximum capacity )
There are three training zones, as described below:
TRAINING
ZONE
MHR% DESCRIPTION
Health
Maintenance
65-78%
This is the lowest training
intensity level. It is good for
beginners and those who
want to strengthen their
cardiovascular systems.
Aerobic
Exercise
65-85%
Increases strength and
endurance. It works
within the body’s oxygen
intake capability, burns
more calories and can
be maintained for a long
period of time.
Anaerobic
Exercise
78-90%
Generates speed and
power. It works at or
above the body’s oxygen
intake capability, builds
muscle, and cannot be
maintained for a long
period of time.
The upper and lower heart rate limits are calculated by
multiplying your MHR by the percentages of the selected
training zone.
For example:
A 40-year-old training for basic health maintenance:
• His Upper Heart Rate Limit [220 - 40(age)] x 78%
• His Lower Heart Rate Limit [220 - 40(age)] x 65%
IMPORTANT Always warm up before exercise and select
the training zone that best suits your physique. Exercise
regularly, 20 to 30 minutes per session, three to four times
a week for a healthier cardiovascular system.
WARNING Determining your individual training zone is a
critical step in the process towards an efficient and safe training
program. Please consult your doctor or health professional
to help you determine exercise frequency and duration
appropriate for your age, condition and specific goals.
USE IN THE WATER
The SE138 watch is water-resistant up to 50 meters (164 feet).
RAIN
SPLASHES
ETC
OK
SHOWERING
(WARM/
COOL
WATER
ONLY)
OK
LIGHT
SWIMMING/
SHALLOW
WATER
OK
SHALLOW
DIVING/
SURFING/
WATER
SPORTS
OK
SNORKELING/
DEEP
WATER
DIVING
NO
50M /
164 FEET
NOTE Set the watch before exposing it to excessive
water. Pressing the keys while in the water or during heavy
rainstorms may cause water to enter the watch.
SPECIFICATIONS
Real time clock 12/24 hour format with hour / minute
Stopwatch 00:00:00 to 99:59:59 (hrs: min: sec)
Heart rate 40 - 240 bpm
Calorie range 0 - 9999 kcal
Power 1 x CR2032 3V battery
Operating
temperature
0°C to 40°C (32°F to 104°F)
Storage
temperature
-20°C to 60°C (-4°F to 140°F)
PRECAUTIONS
To ensure you use your product correctly and safely, read
these warnings and the entire user manual before using
the product:
• Use a soft, slightly moistened cloth. Do not use abrasive
or corrosive cleaning agents, as these may cause
damage. Use lukewarm water and mild soap to clean
the watch thoroughly after each training session. Never
use the product in hot water or store it when wet.
• Do not subject the product to excessive force, shock,
dust, temperature changes, or humidity. Never expose
the product to direct sunlight for extended periods.
Such treatment may result in malfunction.
• Do not tamper with the internal components. Doing so will
terminate the product warranty and may cause damage.
The main unit contains no user-serviceable parts.
• Do not scratch hard objects against the LCD display
as this may cause damage.
• Take precautions when handling all battery types.
• Remove the batteries whenever you are planning to
store the product for a long period of time.
• When replacing batteries, use new batteries as
specified in this user manual.
• The product is a precision instrument. Never attempt
to take this device apart. Contact the retailer or our
customer service department if the product requires
servicing.
• Do not touch the exposed electronic circuitry, as there
is a danger of electric shock.
• Check all major functions if the device has not been
used for a long time. Maintain regular internal testing
and cleaning of your device. Have your watch serviced
by an approved service center annually.
• When disposing of this product, ensure it is collected
separately for special treatment and not as normal
household waste.
• Due to printing limitations, the displays shown in this
manual may differ from the actual display.
• The contents of this manual may not be reproduced
without the permission of the manufacturer.
NOTE The technical specifications for this product and
the contents of the user manual are subject to change
without notice.
ABOUT OREGON SCIENTIFIC
Visit our website (www.oregonscientific.com) to learn more
about Oregon Scientific products.
If you’re in the US and would like to contact our Customer
Care department directly, please visit:
www2.oregonscientific.com/service/support.asp
OR
Call 1-800-853-8883.
For international inquiries, please visit:
www2.oregonscientific.com/about/international.asp
.
EU-DECLARATION OF CONFORMITY
Hereby, Oregon Scientific, declares that this Strapless
Heart Rate Monitor (model SE138) is in compliance with
EMC directive 89/336/CE. A copy of the signed and dated
Declaration of Conformity is available on request via our
Oregon Scientific Customer Service.
CARDIO-FREQUENCEMETRE SANS
CEINTURE
MODELE : SE138
MANUEL DE L’UTILISATEUR
SOMMAIRE
Nous vous remercions d’avoir choisi le cardio-fréquencemètre
sans ceinture Oregon Scientific
TM
(SE138). Le modèle SE138
est un aide pr
écieuse pour toutes vos activités physiques et
de fitness puisqu’il contr
ôle vos pulsations cardiaques sans
recourir à un
émetteur de pulsations cardiaques. Il est
équipé d’un outil de mesure des calories, d’une horloge, d’un
chronomètre, des fonctions rétro-éclairage et verrouillage des
touches.
BOUTONS DE COMMANDE
2
1
3
6
7
4
5
1. -: Permet d’alterner entre les sous modes de réglages
et de diminuer les valeurs
2. MODE : Permet d’alterner entre les modes, de
confirmer un réglage et de sortir
3. ST/SP/ + : Permet de lancer/arrêter le chronomètre,
d’alterner entre les sous modes de réglages et
d’augmenter les valeurs
4. / : Active le rétro-éclairage et le verrouillage
des touches
5. SET/RST: Permet d’entrer dans les sous mode de
réglage, de confirmer un réglage, de réinitialiser le
chronomètre et les valeurs de calories
6. Plaque métallique supérieure : Appuyez pour entrer
dans le Mode de pulsations cardiaques et pour
mesurer vos pulsations
7. Plaque métallique inférieure : Appuyez pour entrer
dans le Mode de pulsations cardiaques et pour
mesurer vos pulsations
ECRAN LCD
11
12
1
14
15
13
16
18
2
4
5
3
6
7
8
9
10
17
1. : Indique que vous êtes en Mode Chronomètre ou
que le chronomètre est en fonctionnement
2. : Indique que l'alarme est activée
3.
: Indicateur vous permettant de diminuer les valeurs
4. : Indicateur vous permettant d’alterner entre les
sous modes de réglages
5. Affiche le chronomètre, la date et les bannières des modes
6. : Indique qu’un relevé de pulsation cardiaque est détecté
7. : Horloge format 12 H
8. : Indicateur vous permettant de sortir rapidement
FR
et de revenir au mode précédent
9. : Unité de mesure de calories
10. : Unité de poids
11. : Indique que vous êtes dans les sous modes d’un
réglage
12. : Indique le bip est désactivé
13. : Indicateur vous permettant d’augmenter les valeurs
14. : Indicateur vous permettant d’alterner entre les
sous modes de réglages
15. : Indique que les touches sont verrouillées
16. ou : Indique que la pile est faible
17. Affiche l’heure ou les relevés de calories
18. : Indicateur vous permettant de confirmer le
réglage et de passer au suivant
AU COMMENCEMENT
METTRE EN MARCHE LA MONTRE (UNIQUEMENT
LORS DE LA PREMI
ÈRE UTILISATION)
Appuyez et maintenez n’importe quelle touche appuyée
jusqu’à ce que l’écran s’active.
REGLER L’HEURE ET LES DONNEES DE
L’UTILISATEUR
Pour utiliser correctement la montre afin de calculer les
calories consommées (sur la base de l’âge de l’utilisateur,
de son poids, des relev
és de pulsations et du temps
d’exercice), il est recommandé de régler l’heure et les
données personnelles dans le Mode Réglage. Reportez-
vous à « Mode de R
églage de l’heure » et « Mode de
Réglage des données utilisateurs » dans le Mode Réglage.
IMPORTANT Rappelez-vous de régler l’heure et les
données utilisateurs après avoir remplacé la pile ou après
avoir réinitialisé l’appareil.
REMPLACER LA PILE
La montre fonctionne avec une pile 3V CR2032, d’ores et
déjà installée. Si ou clignote, la pile est faible et doit
être remplacée. Si la pile est faible, le bip de l’alarme, le
rétro-éclairage et les fonctions de mesure des pulsations
cardiaques seront désactivés.
1. Utilisez un petit tournevis pour retirer le couvercle du
compartiment des piles. Une fois ouvert, placez les vis
dans un endroit où vous êtes certain de les récupérer.
2. Remplacez la pile usagée et insérez la nouvelle en
respectant les signes de polarité.
3. Replacez le couvercle en le revissant.
MESURE DES PULSATIONS CARDIAQUES
Vous pouvez mesurer à tous moments vos pulsations
cardiaques (sauf dans les sous modes de réglages).
1. Mettez la montre au poignet et placez votre doigt
(index ou majeur) sur les deux plaques métalliques
pour entrer dans le Mode de Pulsations cardiaques.
Un bip sonne et “HR” s’affiche à l’écran lors de toute
détection de pulsations cardiaques. La détection des
pulsations cardiaques prend entre 6 et 10 secondes.
2. Si une pulsation cardiaque valide est détectée, un
autre bip sonne et l’écran suivant s’affiche.
3. Pour sortir du Mode de Pulsations Cardiaques,
retirez vos doigts ou appuyez sur MODE pendant 3
secondes.
ASTUCE
Pour obtenir un relev
é précis des pulsations cardiaques,
assurez-vous:
• que rester immobile et ne pas faire d’exercice.
• de porter la montre au poignet et de poser les doigts
sur les deux plaques métalliques.
Si vous n’obtenez aucun relevé de pulsations cardiaques
en l’espace de 10 secondes, ou si vous constatez des
conditions inhabituelles pendant la lecture des pulsations :
• humectez-vous les doigts
• faites en sorte que vos doigts soient chauds et stables
sur la plaque métallique
• n’appuyez pas trop fort sur les plaques métalliques
• assurez-vous que les plaques métalliques et l’arrière
de la montre soient propres
REMARQUE
• Les mesures de pulsations cardiaques ne peuvent
être activées si les touches sont verrouillées ou si la
pile est faible.
• Nettoyez la montre avec un tissu doux et sec.
• Les 2 plaques métalliques sont très sensibles.
Toucher accidentellement les plaques enclenchera
la mesure des pulsations. Ainsi, pour empêcher
l’activation accidentelle des mesures de pulsations,
verrouillez les touches.
• Si la pile est faible, l'écran ci-dessous s’affichera.
MODES DE FONCTIONNEMENT
La montre est équipée de 3 modes de fonctionnement.
Appuyez sur MODE pour alterner entre les modes.
MODE HEURE
• Ce mode affiche la date et l’heure en temps réel.
• Pour régler l’heure et la date, reportez-vous au « Mode
de Réglage de l’heure » dans Mode Réglage.
MODE CHRONOMETRE (CHRONO)
Vous pouvez visualiser les relevés de consommation de
calories dans ce mode.
Pour lancer ou arrêter le chronomètre :
Appuyez sur ST / SP / +.
Pour visualiser les relevés de la consommation de
calories :
Mesurez vos pulsations cardiaques, le chronom
ètre en
fonctionnement dans le but de visualiser les calories
consomm
ées. Reportez-vous à « Mesures des pulsations
cardiaques ».
Les relev
és des calories consommées dans le Mode
Chronomètre représentent une moyenne des calories
perdues pendant la période de temps écoulée.
ASTUCE Plus vous mesurez vos pulsations cardiaques,
plus les relev
és de la consommations de calories seront
exacts.
Réinitialiser le chronomètre et les valeurs de calories:
Arrêtez ou mettez le chronomètre en pause, puis appuyez
et maintenez SET/RST pendant 2 secondes.
REMARQUE
• Vous ne pouvez pas accéder au mode réglage si le
chronomètre est en fonctionnement.
• Si le chronomètre est en fonctionnement, appuyez sur
MODE et vous accéderez au Mode Heure.
• A moins que vous n’arrêtiez le chronomètre, l’icône
clignotera dans tous les modes, pour vous rappeler que
le chronomètre est encore en marche.
MODE RÉGLAGE
Il y a 4 sous modes réglages dans le Mode Réglage.
• Appuyez sur –
ou ST/SP/+ pour alterner entre les sous
modes.
• Appuyez sur MODE pour revenir au mode Heure.
REMARQUE L’icône s'affichera dans le sous mode
Réglage.
MODE DE REGLAGE DE L’HEURE
Pour régler l’heure et la date :
1. En mode de r
églage de l’heure, appuyez sur SET/RST
pour entrer dans les réglages.
2. Appuyez sur - ou ST/SP/+ pour r
égler les valeurs.
Appuyez et maintenez - ou ST/SP/+ pour modifier
rapidement les valeurs. Les r
églages se présentent dans
l’ordre suivant
: Heure : format 12 ou 24 h ; heure ; minute ;
ann
ée ; jour-mois / mois-jour ; mois ; jour.
3. Appuyez sur SET/RST pour confirmer le r
églage et
passer au suivant.
4. Appuyez sur
MODE pour confirmer et sortir.
MODE DE REGLAGE DE L’ALARME
Pour régler l’alarme :
1. En mode de r
églage de l’alarme, appuyez sur SET/RST
pour entrer dans les réglages.
2. Appuyez sur
– ou ST/SP/+ pour activer ou désactiver
l’alarme.
indique que l'alarme est activée. Si
l’alarme est d
ésactivée, appuyez sur MODE pour
confirmer et sortir des r
églages. Si l’alarme est activée,
appuyez sur
SET/RST pour confirmer et régler l’heure
de l’alarme.
SE138_OSI-USA_MU_R0.indd 1 1/9/08 12:00:20 PM